Clothing Hacker

Just another WordPress site

Category: dancing

My new rhythm dress!

This post has been a long time coming.  I mentioned a few times in the past that I wanted to put together a rhythm dress.  Well, I put one together and wore it to my last dance competition.

This project all started with a dress made from a gorgeous purple slinky knit that I found in a thrift shop in Laguna Beach for $5.

Then I cut the bottom of the dress off asymmetrically.

I purchased some 6″ lilac chainette fringe.  I sewed a row on upside down about 1/2″ from the cut edge along the bottom edge of the dress with a zigzag stitch, right sides together.

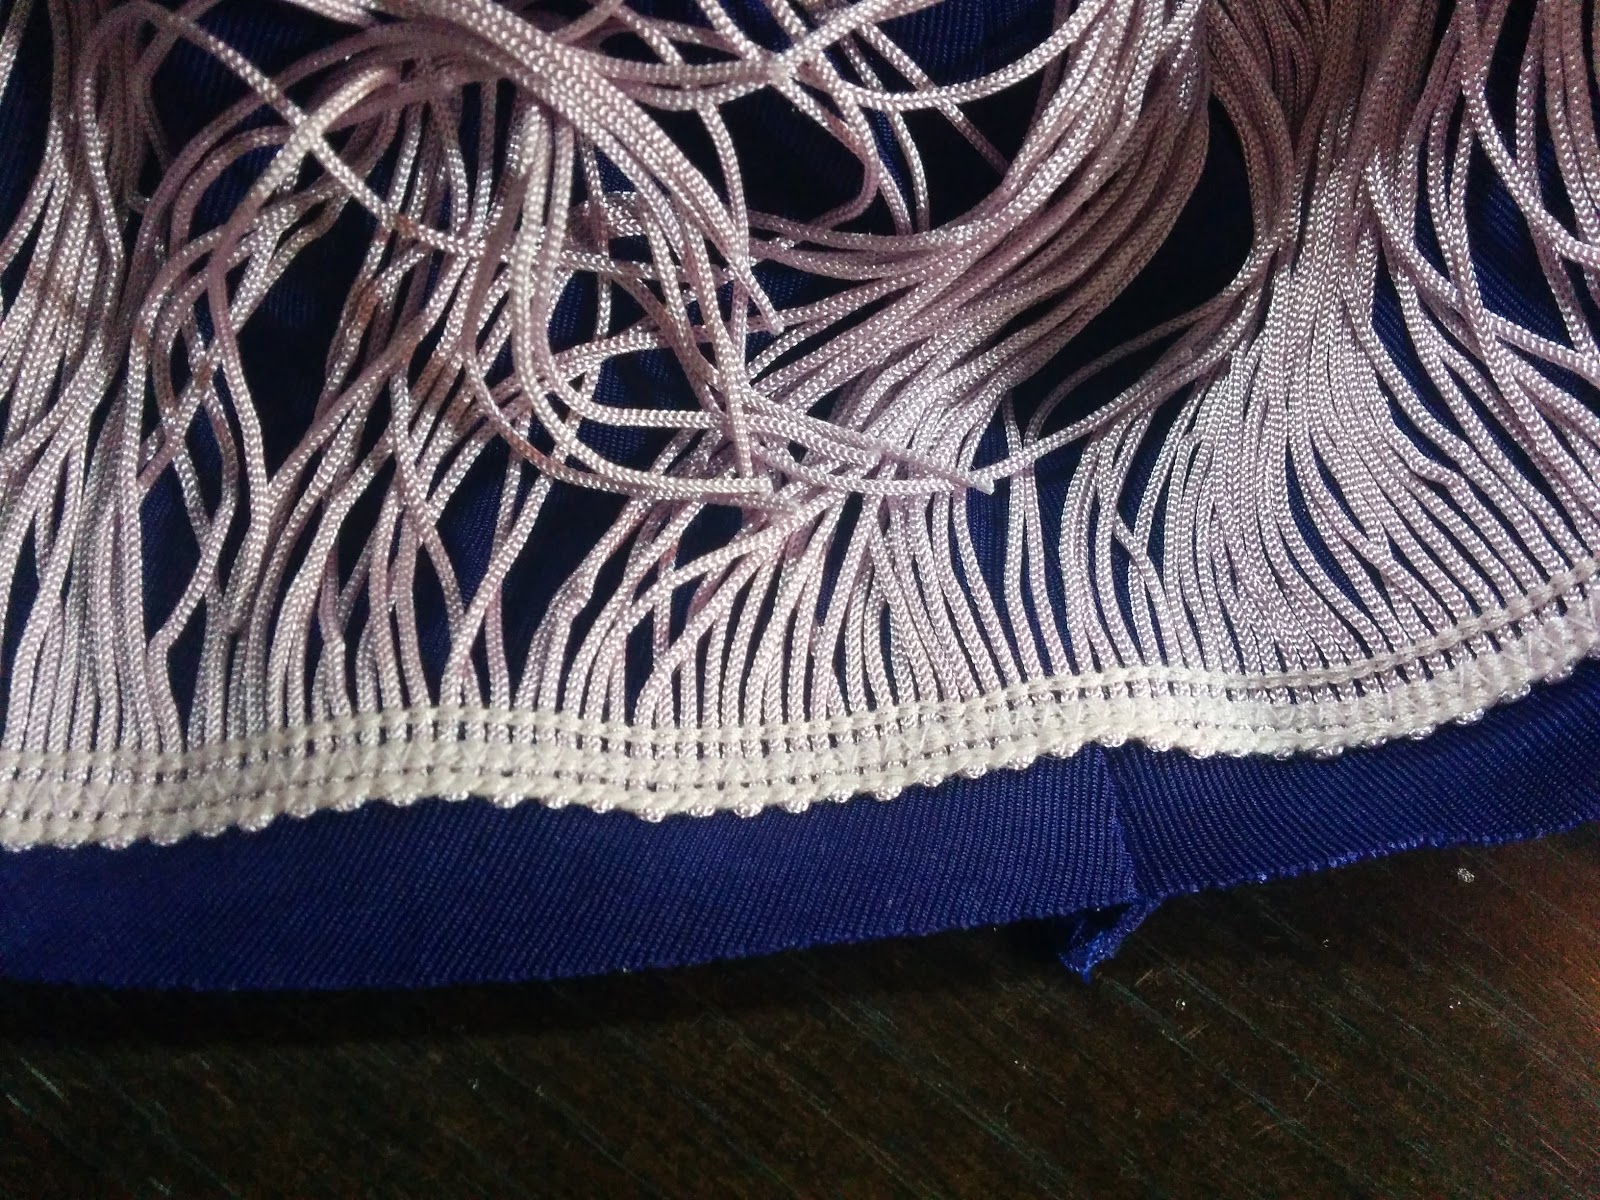
I turned the edge under under to create the hem and then sewed a second row of the fringe just above the hemline, but close enough that I caught the turned up edge of the dress hold it in place.

So I ended up with two rows of fringe along the bottom of the dress, so it looks nice and full.

The fringe doesn’t stretch, so I was a bit concerned that the stitching might end up popping, but that part of the dress doesn’t end up getting stretched out and since it’s applied on an angle, there hasn’t been a problem yet.

For this to be a “proper” dance dress, it needs to have a built-in leotard.  In comes Jalie Bella fit and flare dress pattern.  The dress in this pattern is basically the same as the one I purchased — an armhole princess seamed fit and flare dress, but it has an optional leotard underneath.

I made what was basically a muslin of the leotard in a blue nylon/lycra activewear knit that I had in my stash.  According to the pattern measurements, I needed to add 2″ to the length and that was the only alteration I did to the pattern.  It fit perfectly, so I made it again in this swimwear knit that I purchased from Pacific Fabrics because it matched both the purple of the dress body and the lilac of the fringe.  I used the blue muslin leotard as a lining to this leotard.

After trying them on together to see how it looked, I decided that I would like to open up the neckline  more and make the purple dress sit off my shoulders and show off a little skin and a little more of the leotard fabric.

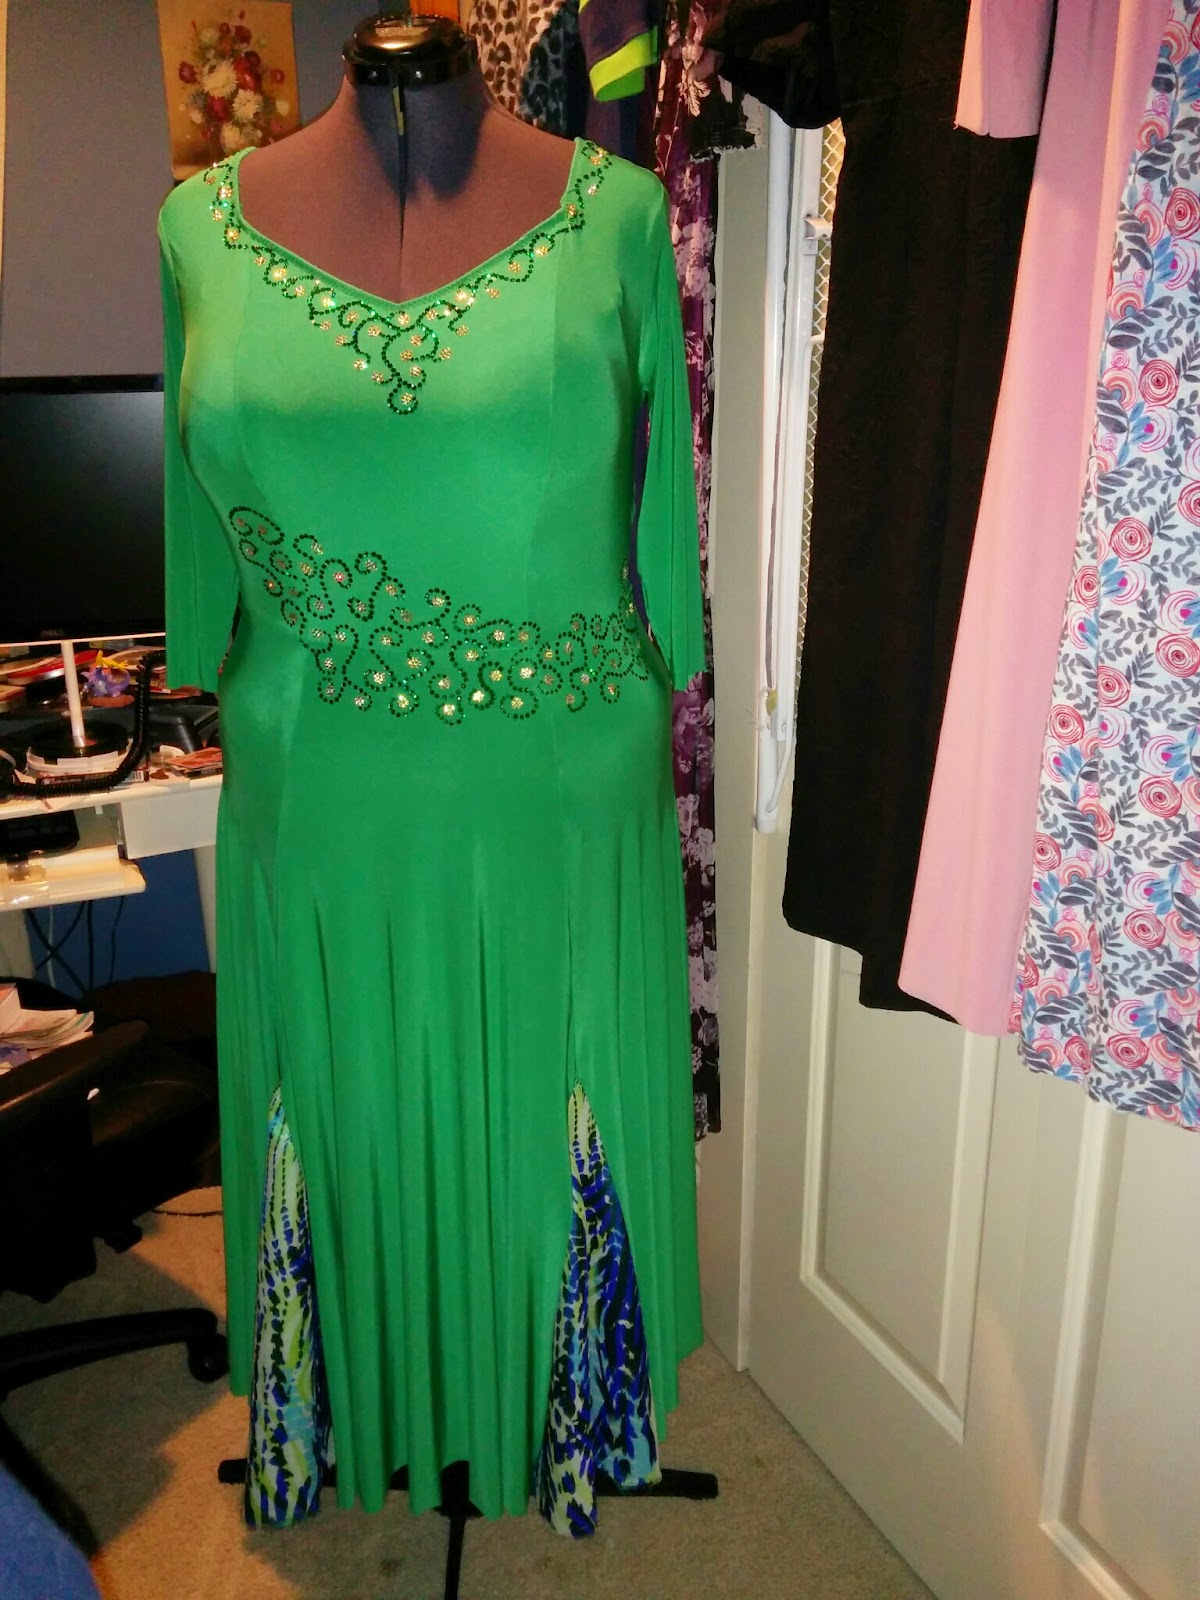
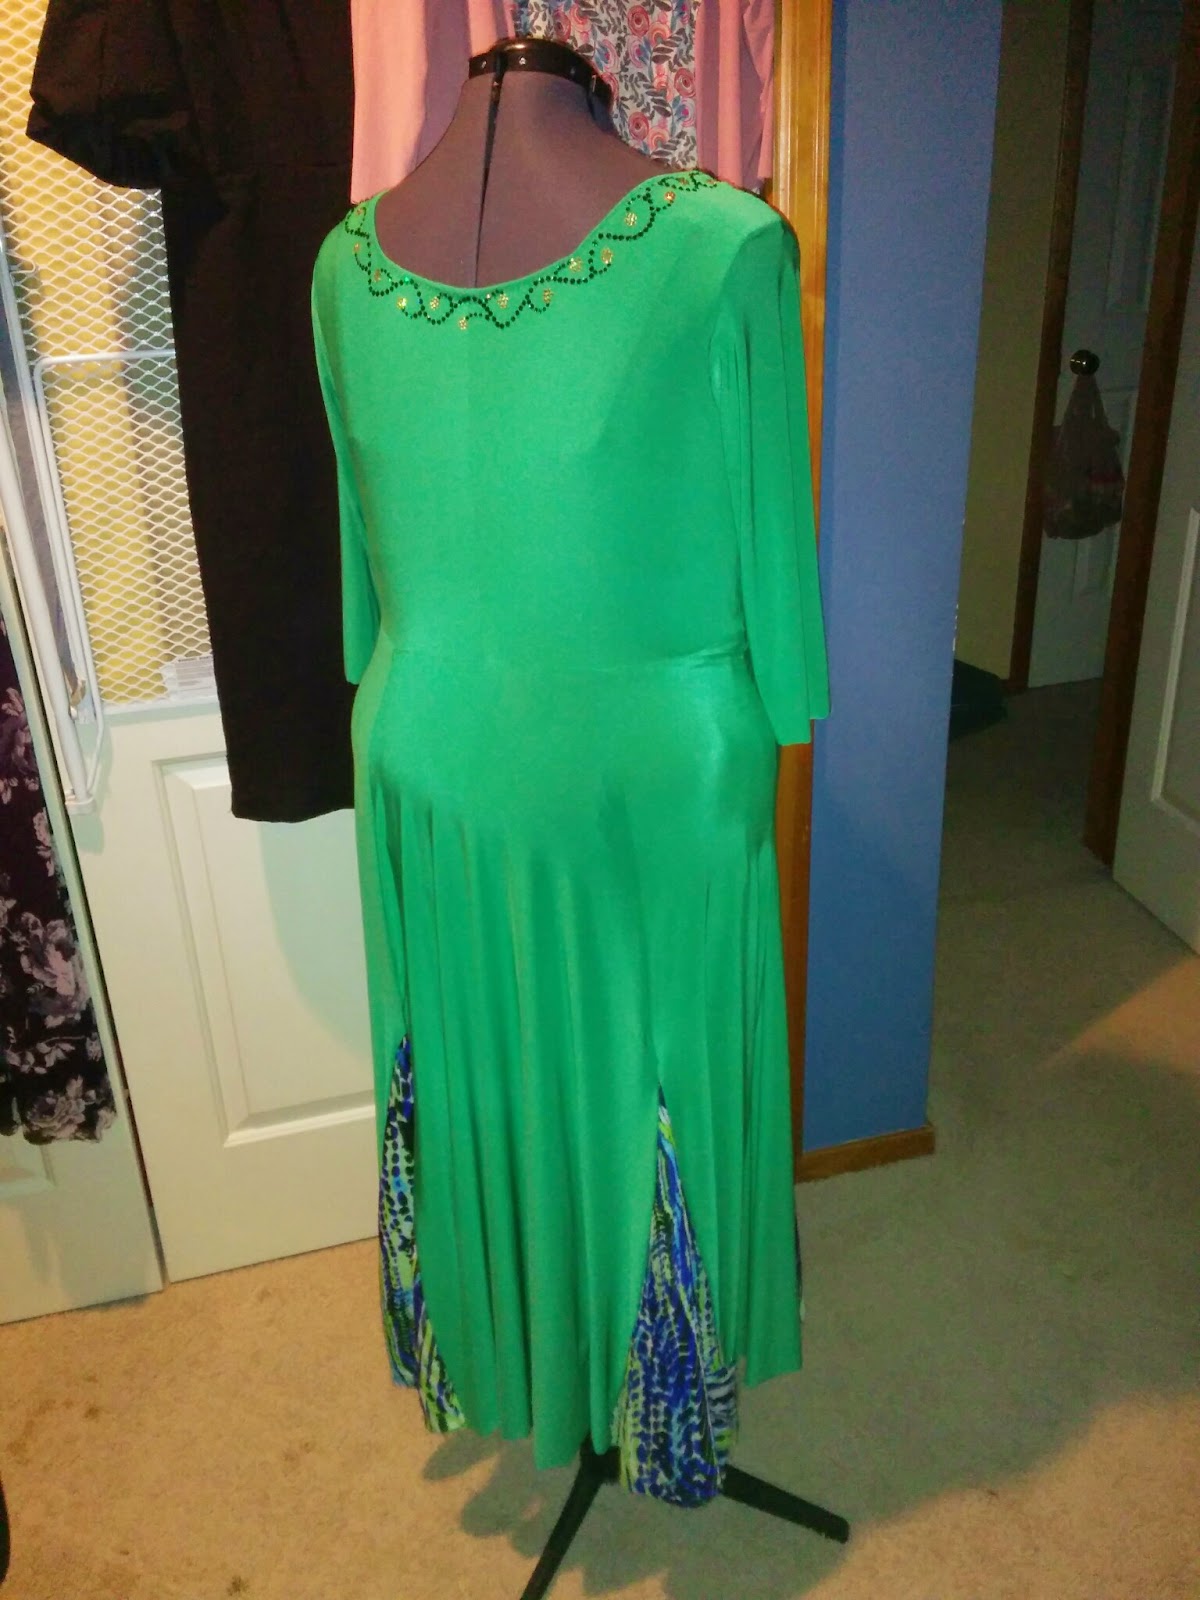
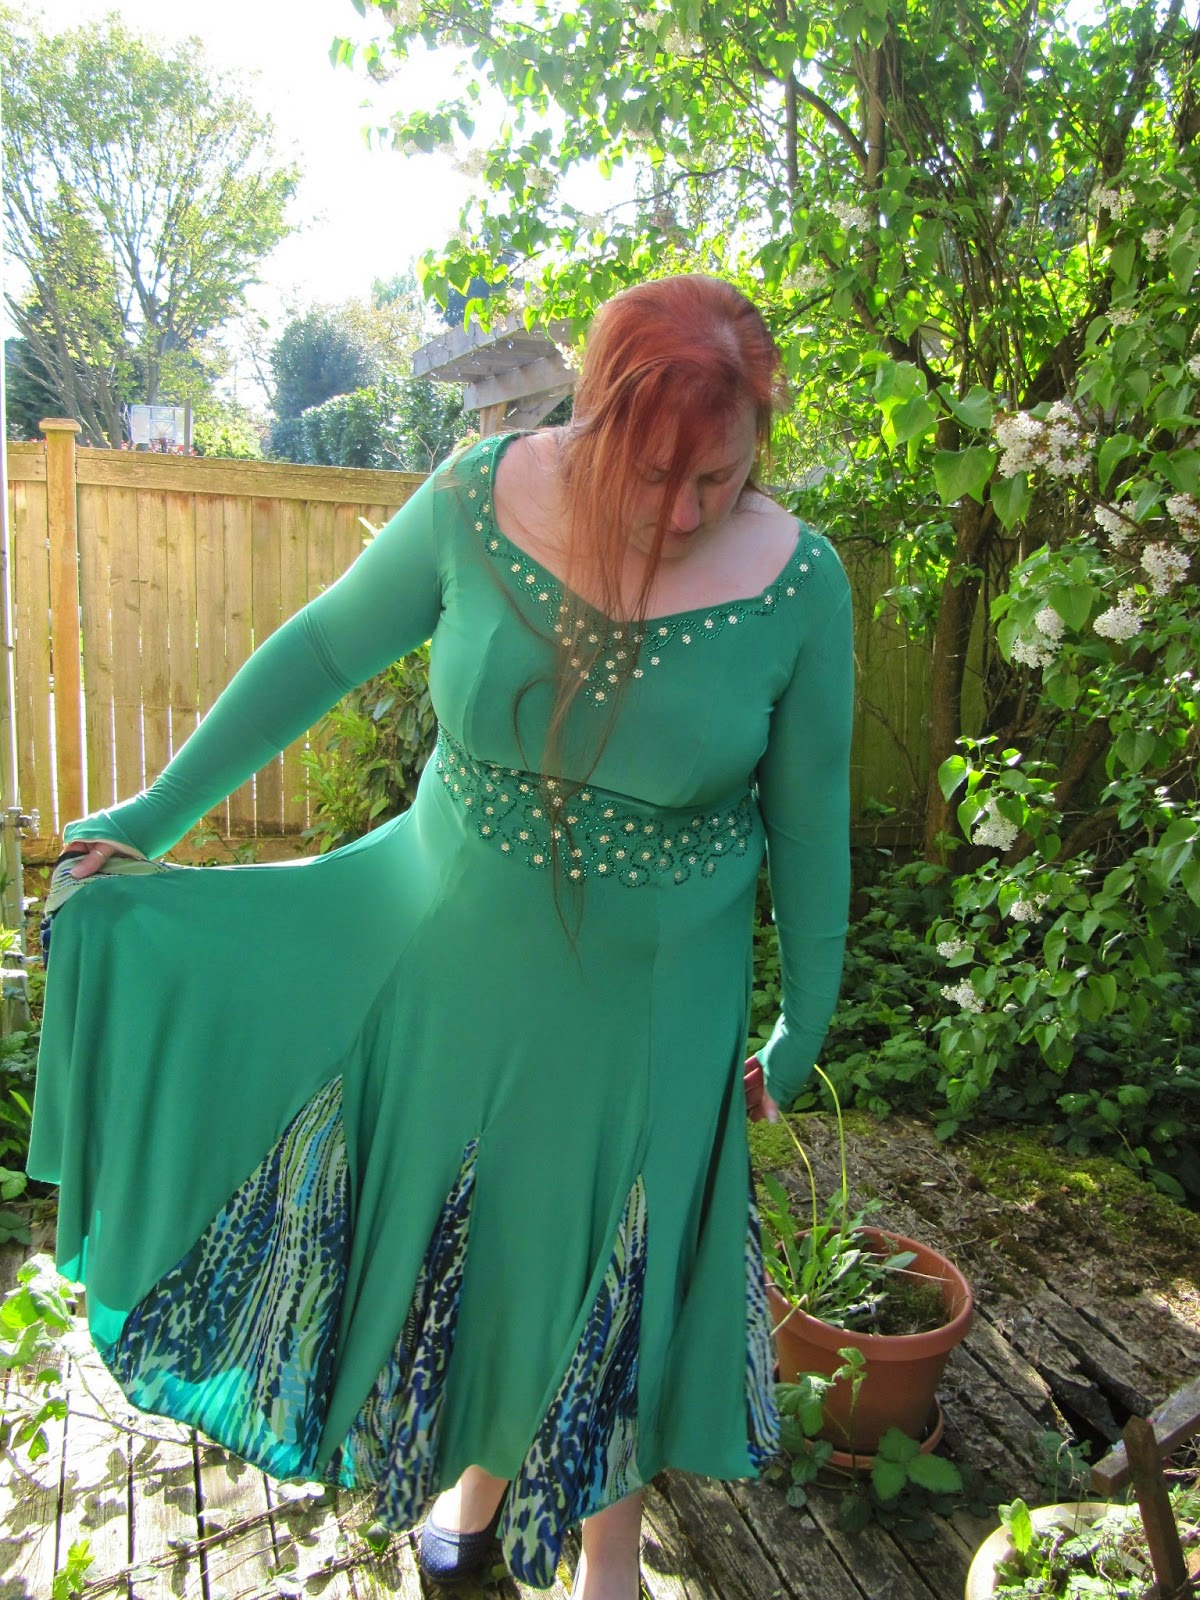
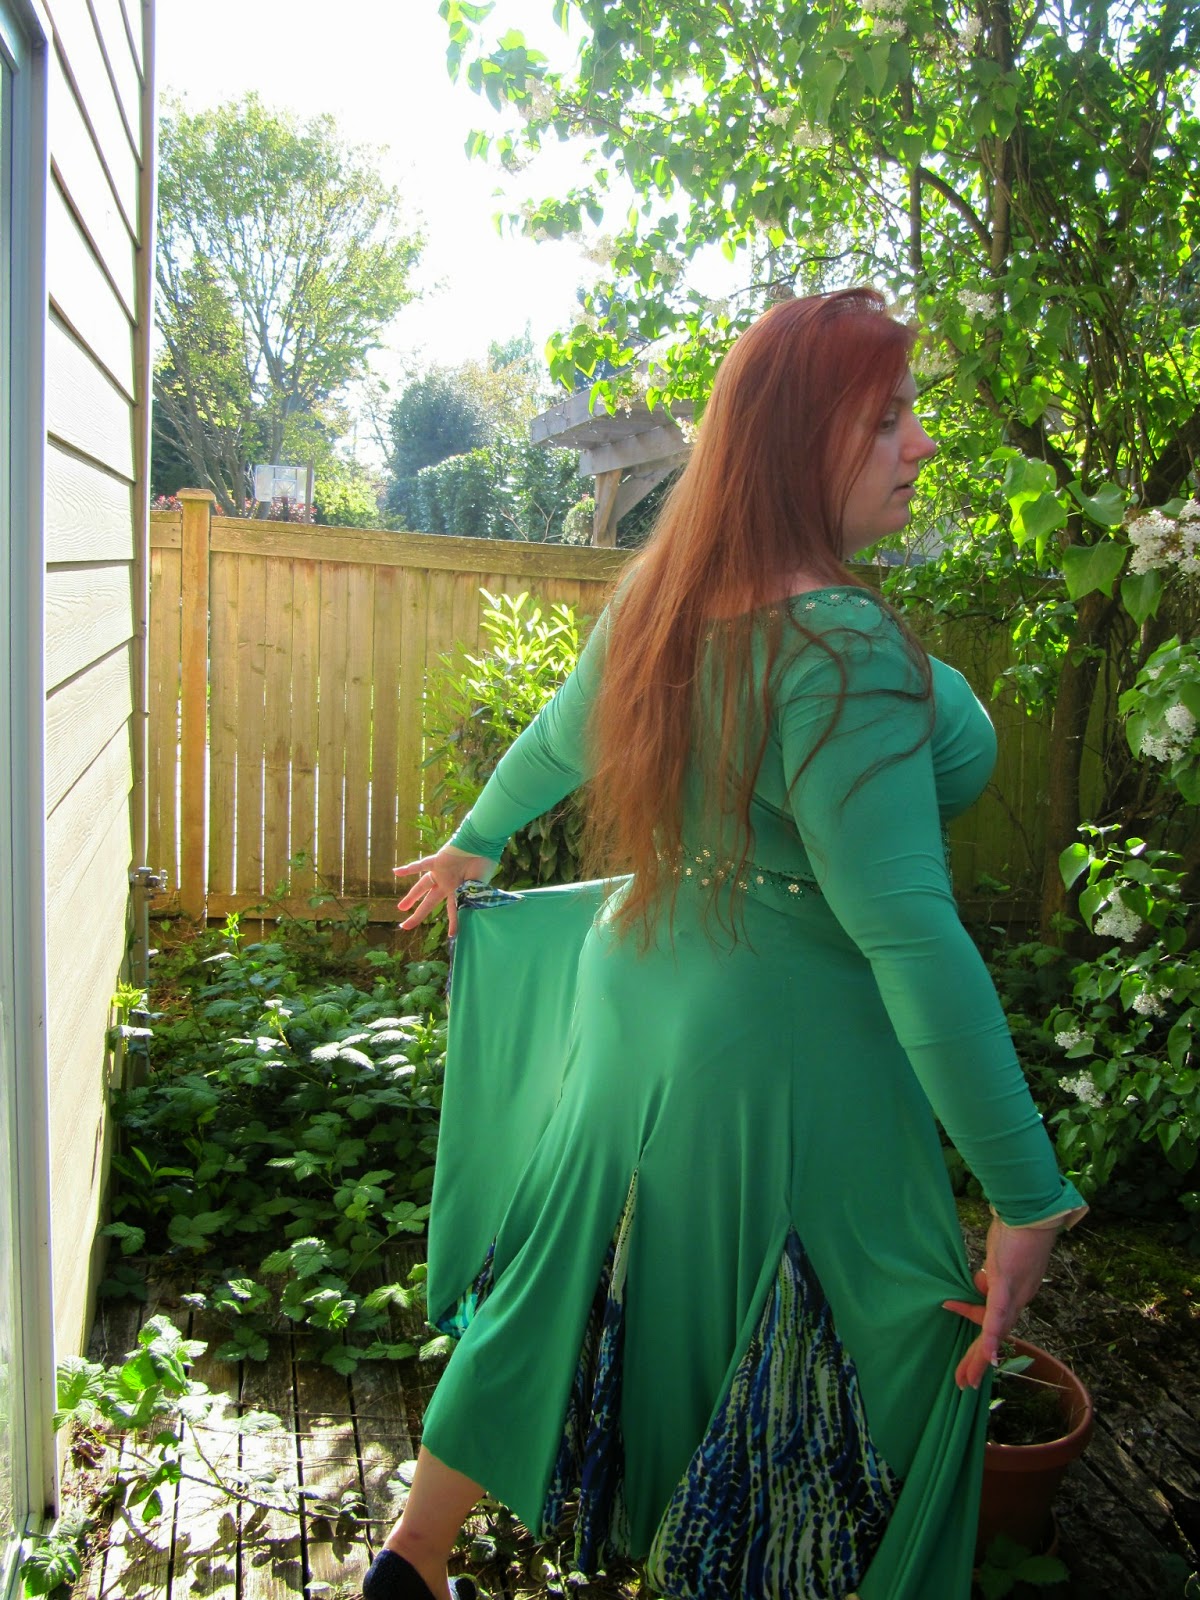
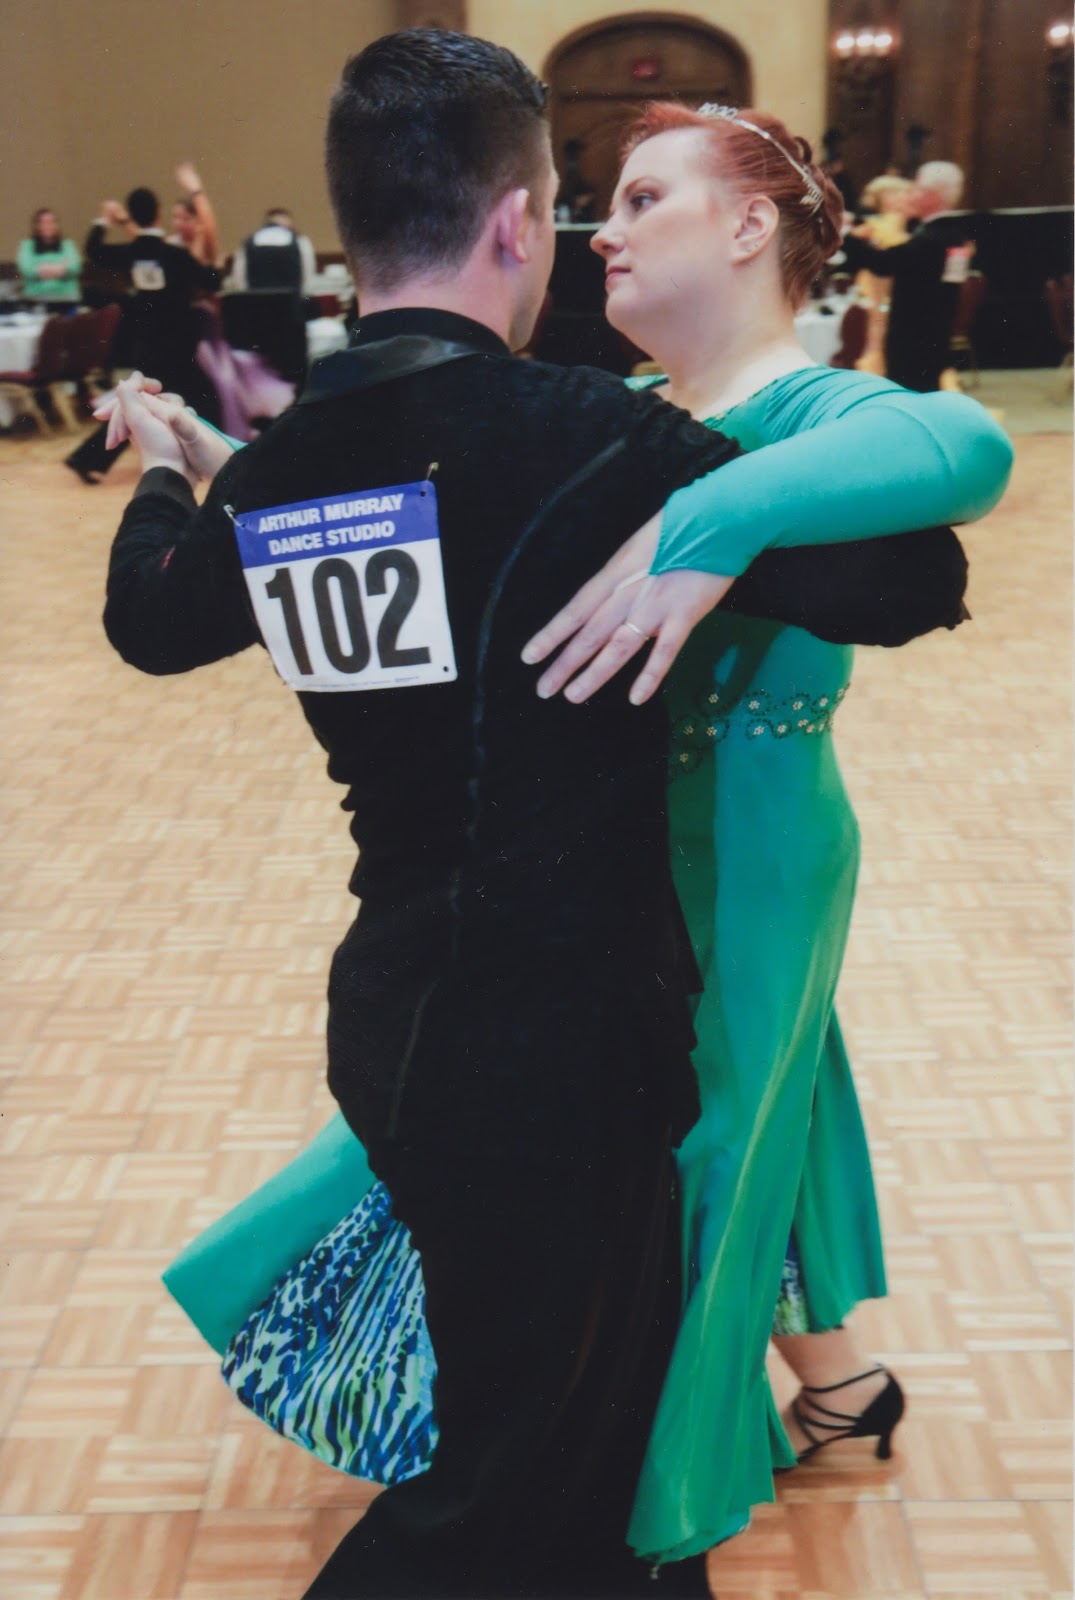
I also have discovered that, even though these dresses have a lot of stretch in them, I don’t want to pull them up over my head because I’ll end up messing up my hair and makeup that I sat and had done so beautifully by the wonderful professionals at these events.  I designed my green Modern Nature smooth dance dress to pull on like a swimsuit, but the neckline ended up getting pretty stretched out after I decorated it with the rhinestones and pull it on that way a dozen or so times.  So I’ve decided that I need to add zippers to my ballroom dresses from now on.  So, I ripped open the back seam of the dress and added an invisible zipper.  The dress and the leotard are joined at the zipper and I also sewed them together along the front where the purple dress comes straight across the front of the leotard.

Here’s a photo of me and my instructor Yaunique at the Portland DanceORama.

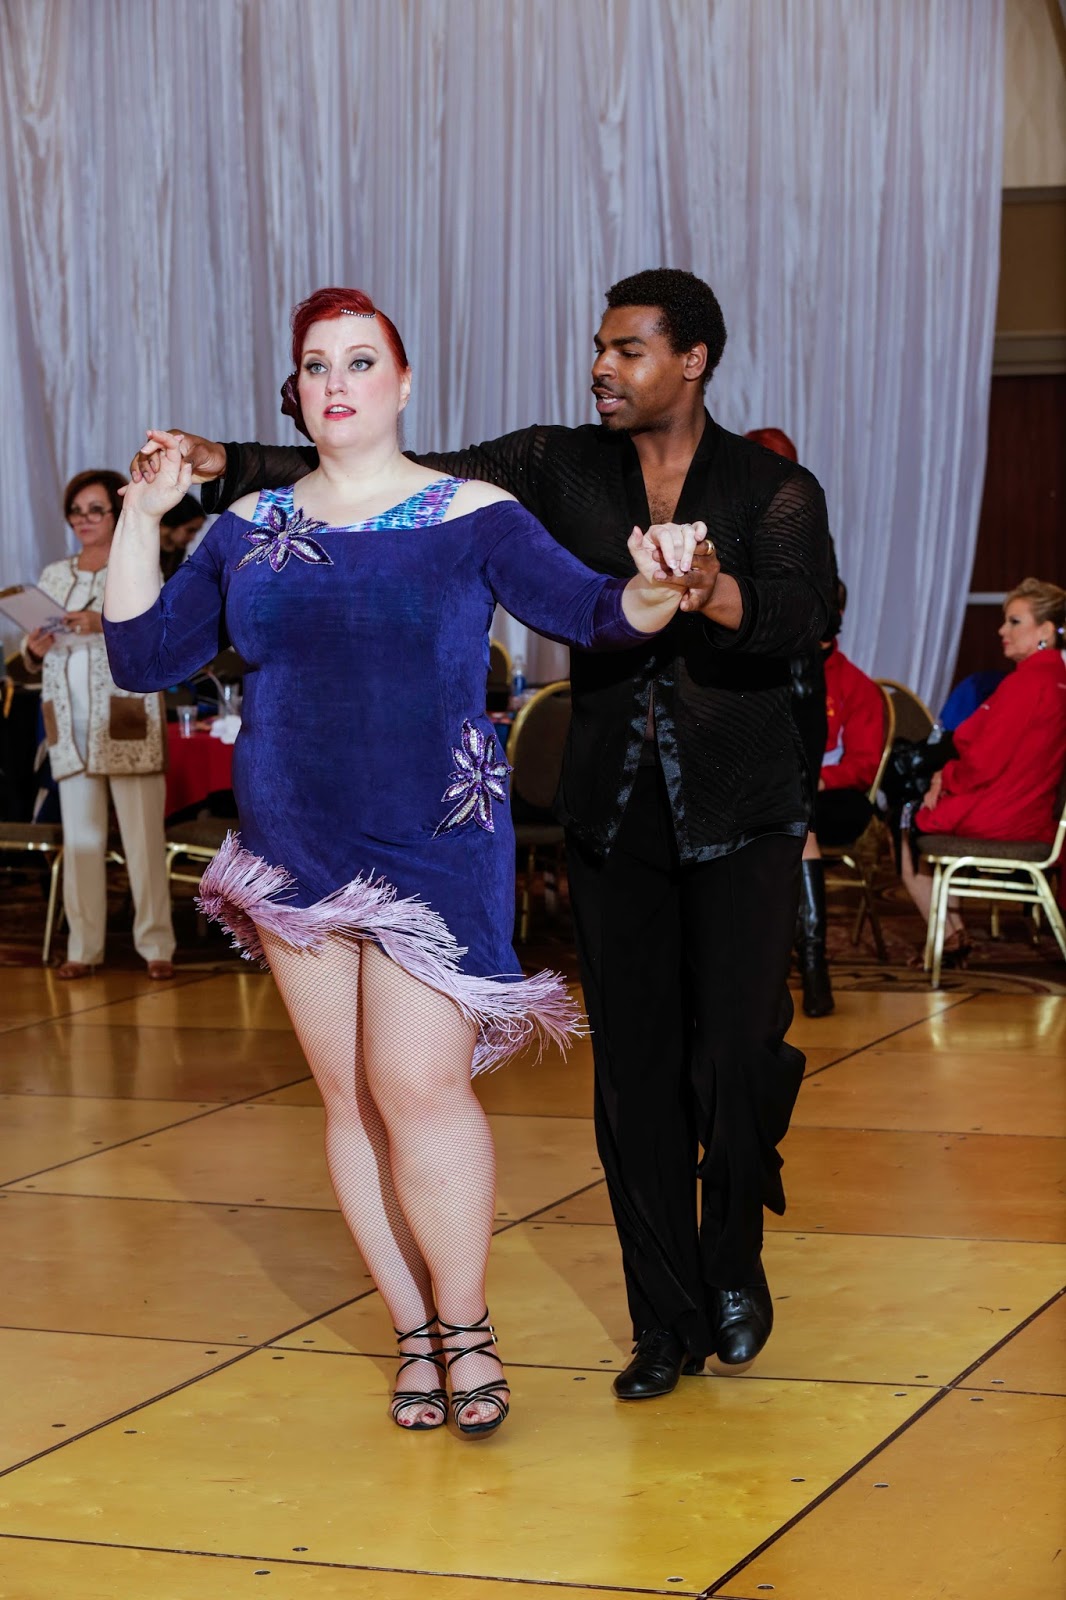
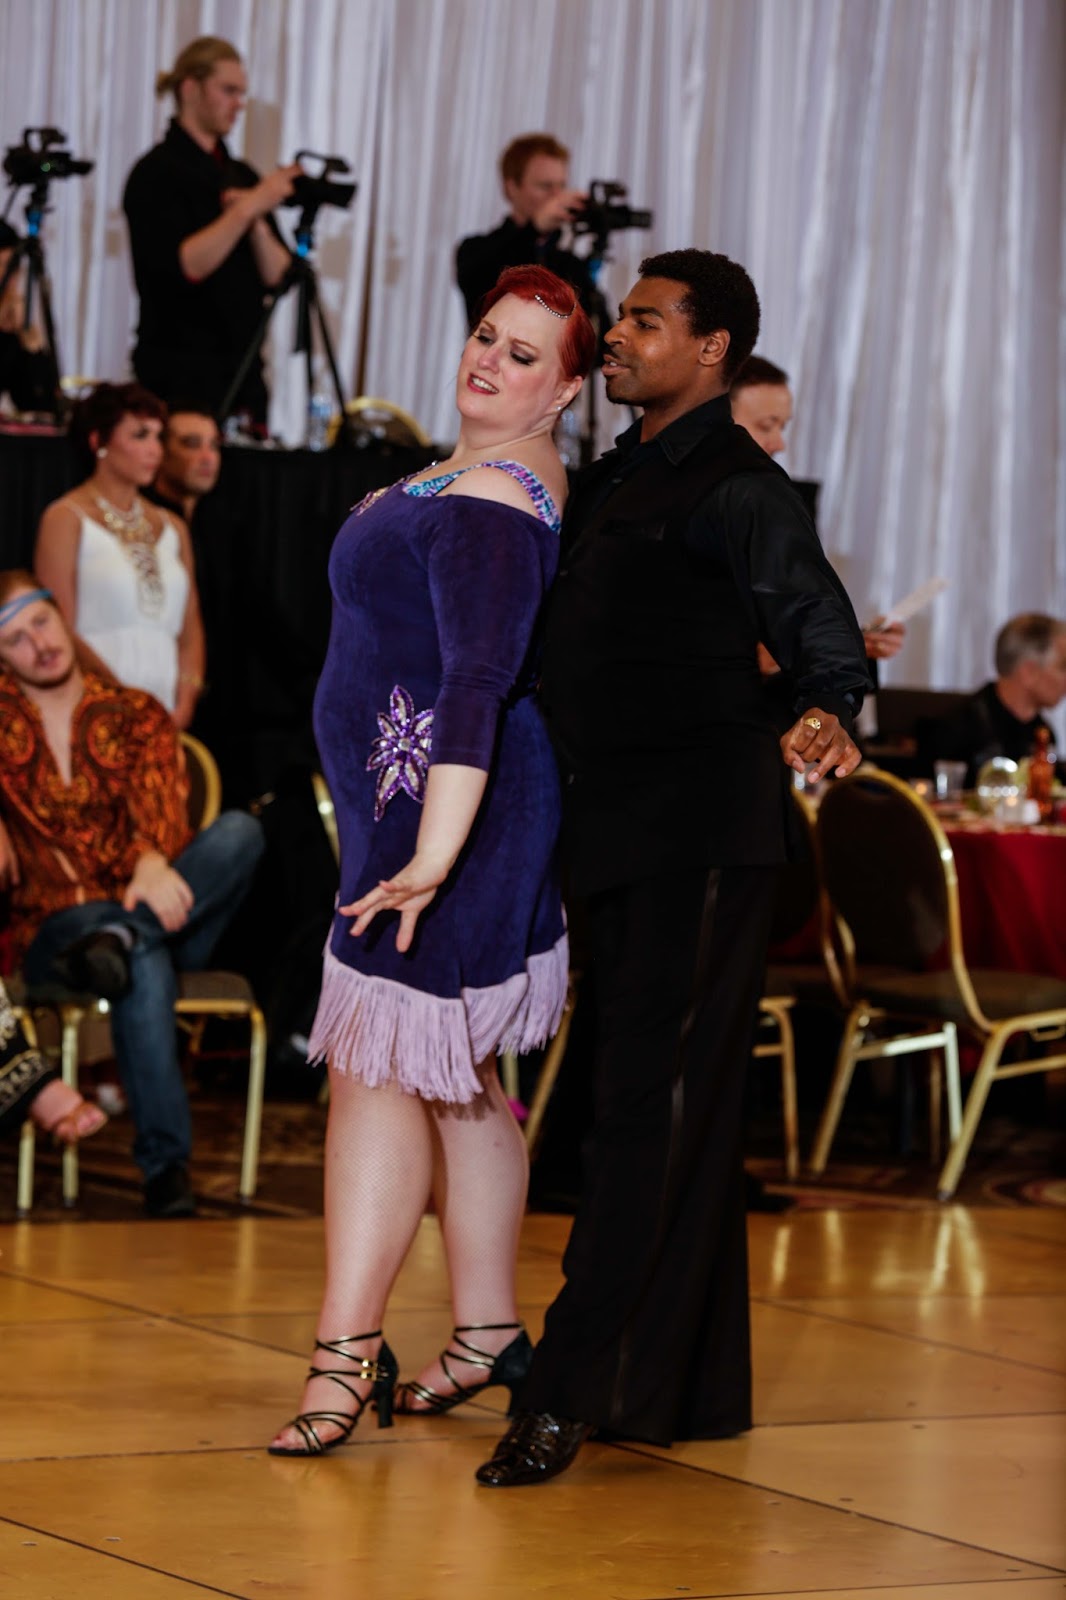
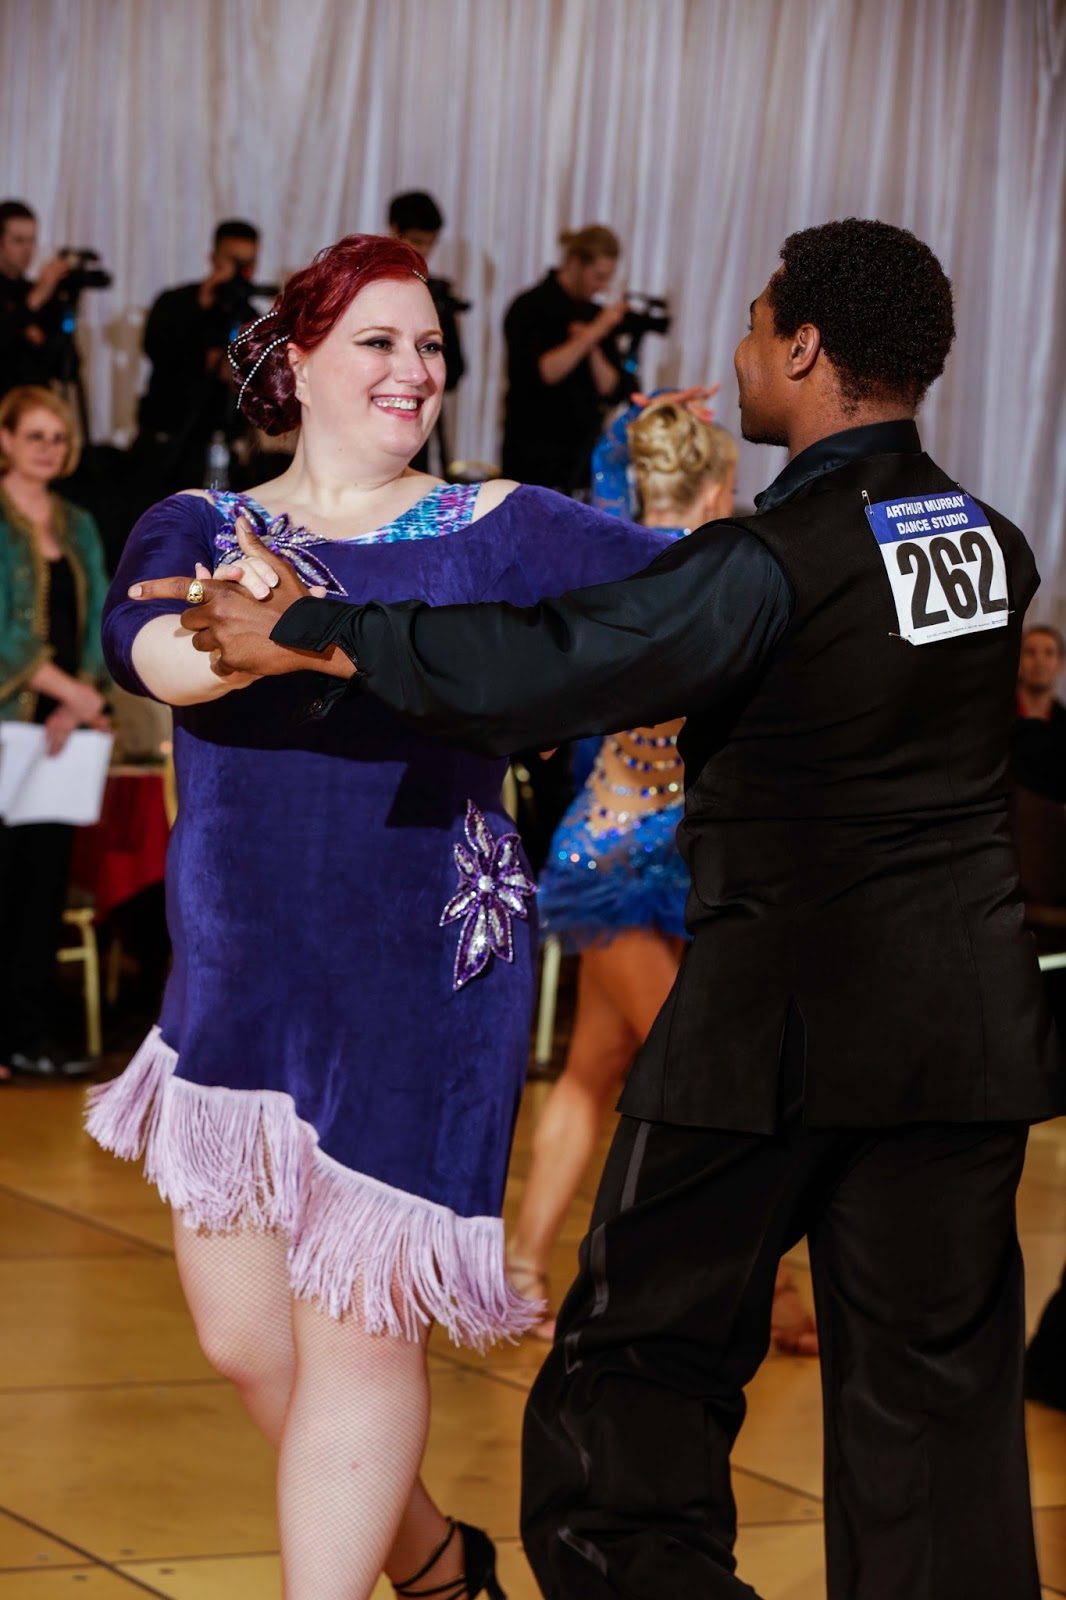
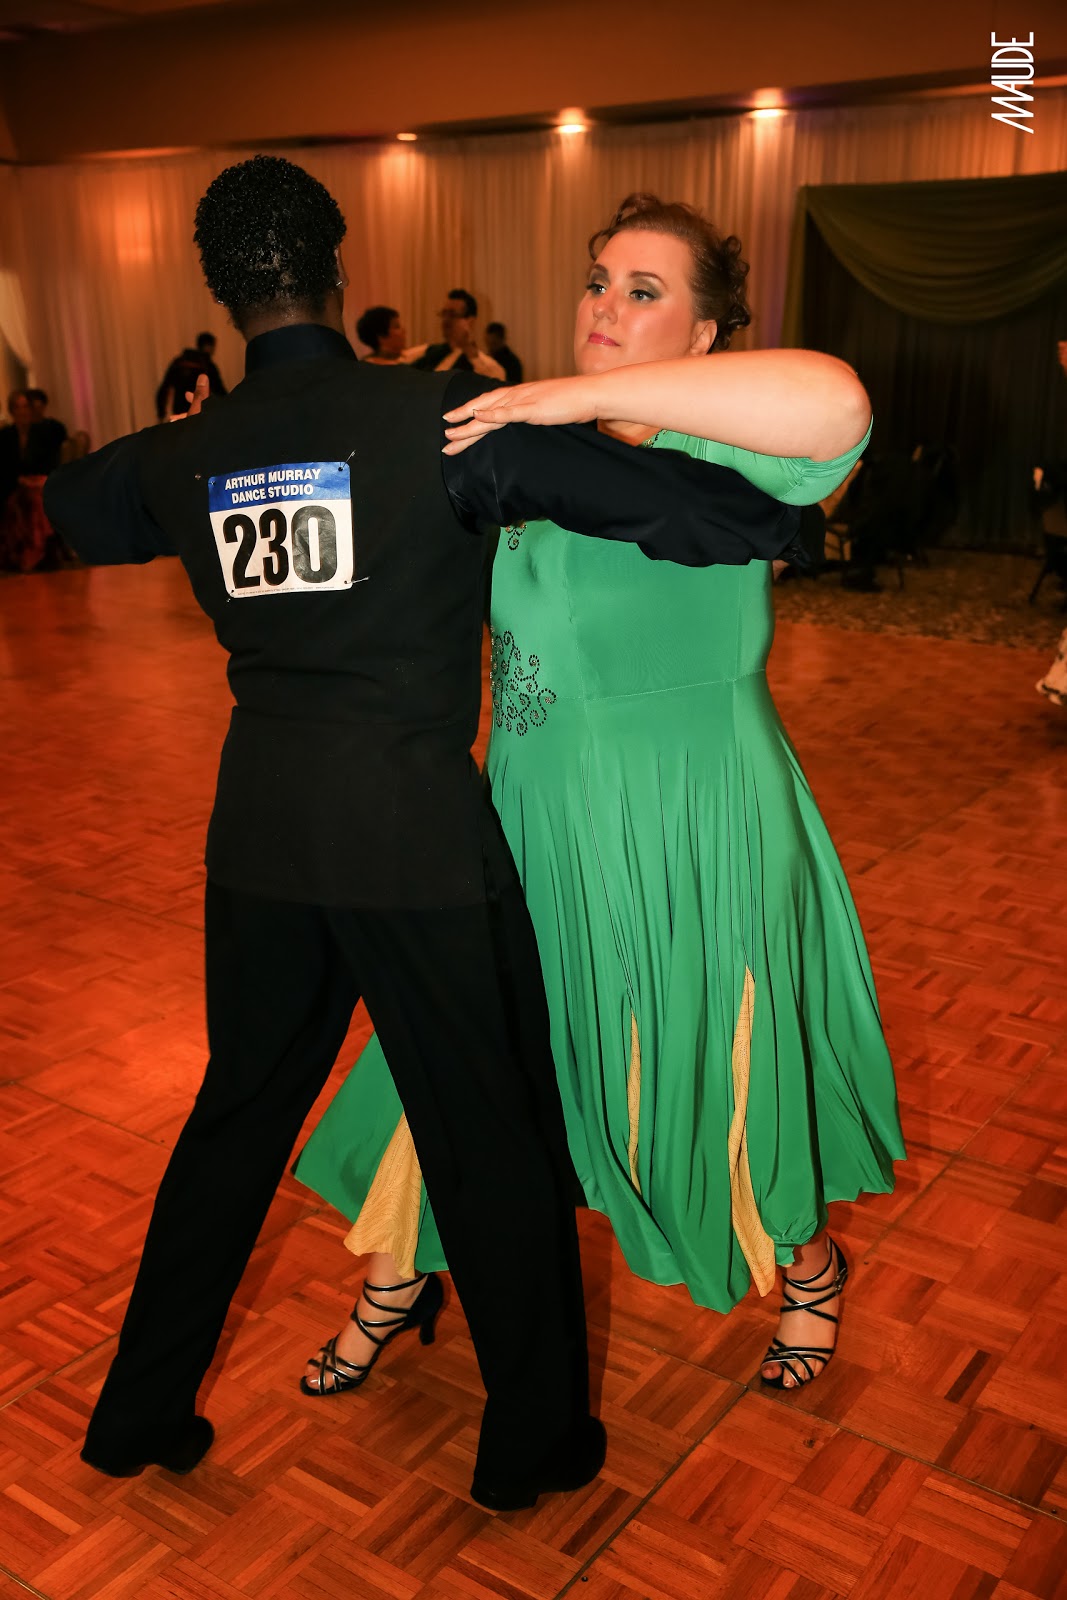
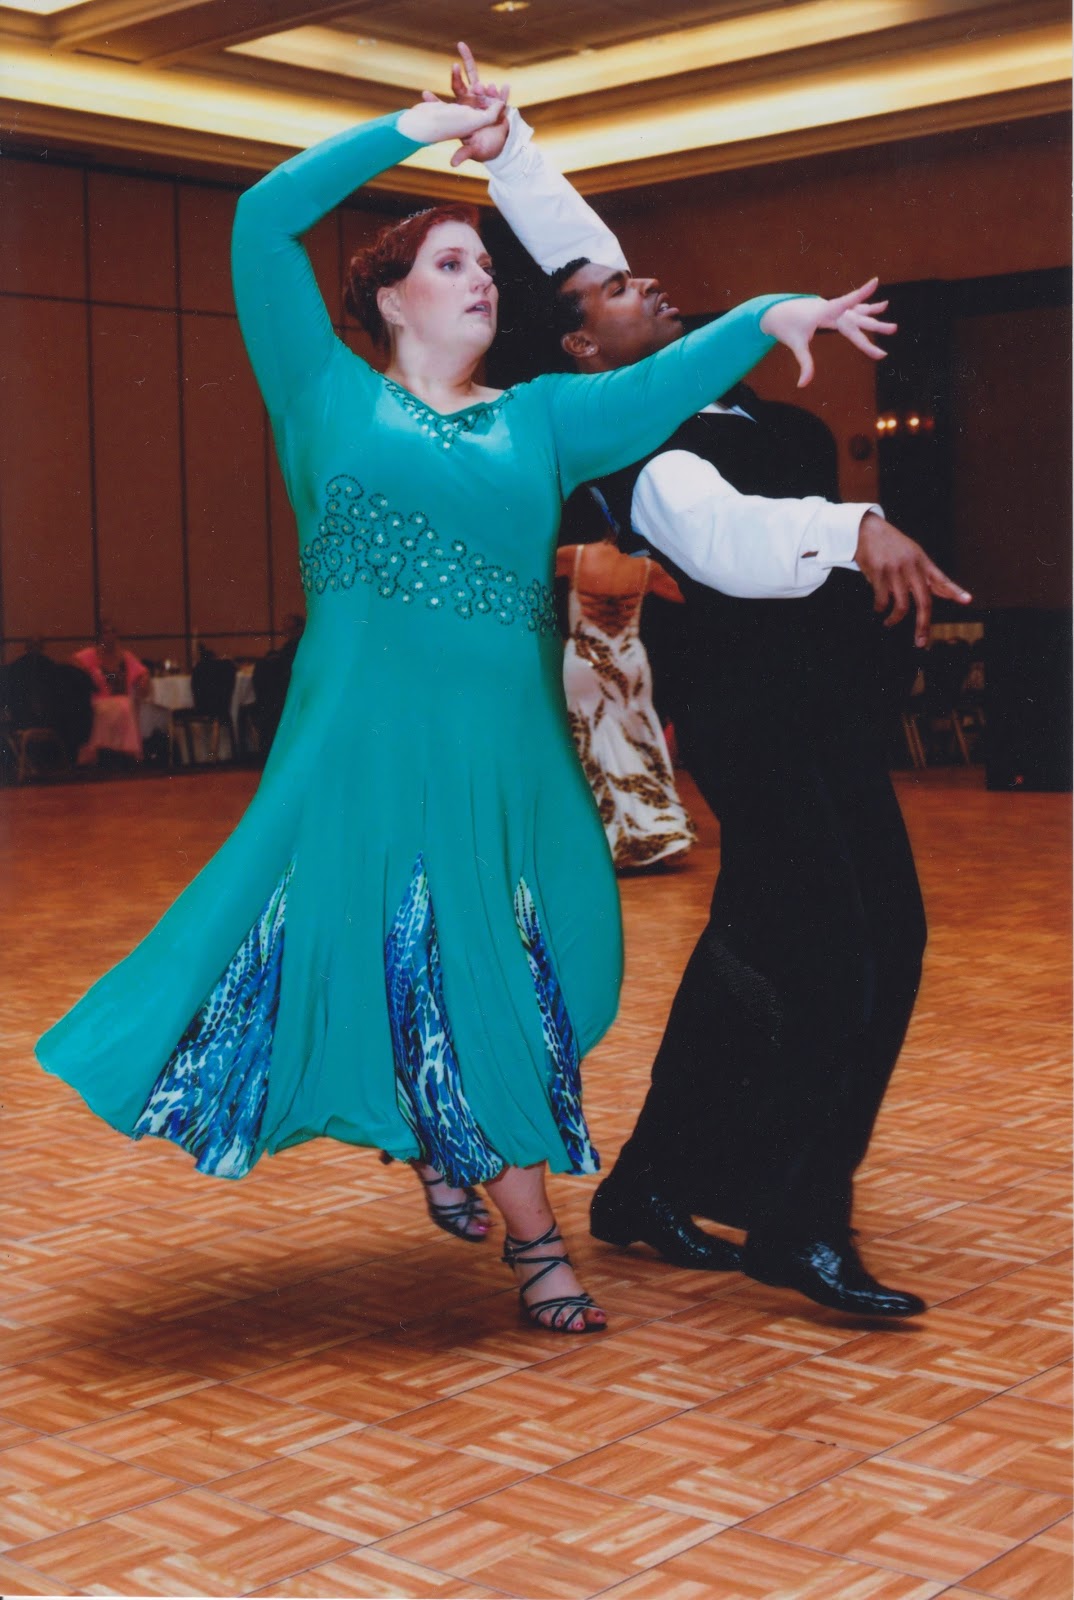
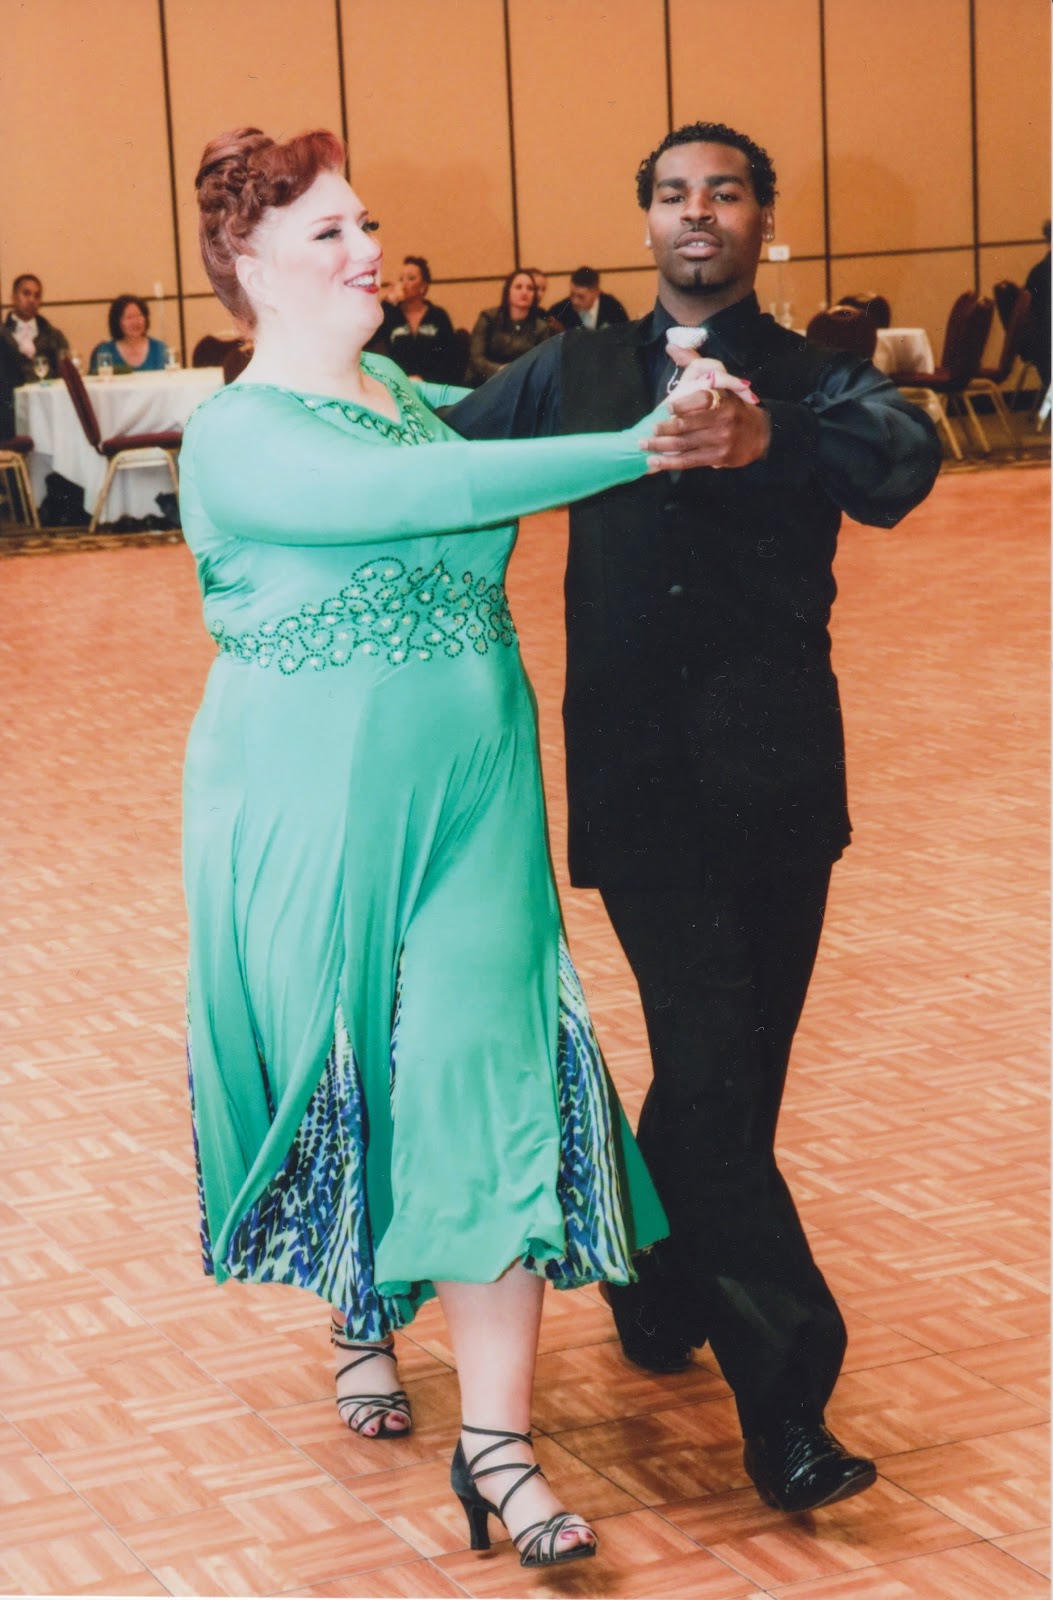
And here are a few action shots that the professional photographers at Maude Productions took at the Portland DanceORama

I have purchased some rhinestones and plan on decorating my new rhythm dress soon.  I really like the way it looks now and I’m a little afraid that adding the rhinestones will detract from the simple beauty of the dress.  But I also really want a super sparkly dress to wear too!

Edit 6/21:  I forgot to add a link to one of my dance videos so you could see the dress in action.  I have a few videos in this dress that you can see on my YouTube channel, but the Bolero is the only rhythm dance we actually have choreography for and the other Bolero video is to a cover of the M.I.A song Paper Planes, which just felt strange to dance to, even though Yaunique did actually remember to do the dip in that one.  ðŸ™‚

Gearing up for Portland DOR

I’ve been sewing up a storm for the last couple of weeks.  I’m headed down I-5 a bit to Portland, OR for the Arthur Murray Dance O Rama competition this weekend.

There are three evenings worth of outfits I had hoped to make, plus a rhythm dress for the actual competition.  I’m one dress short, partially because the fabric I thought was arriving on Saturday didn’t show up until Monday, but mostly because I’ve been pretty sick the last couple of days and I just didn’t have the energy to whip out the last dress.  But it’s alright, I have a few RTW options in my closet that will work.

I’ll go into more detail about each of these after I get some better photos.  In the mean time, here are some sneak peeks.

Wish me luck at my competition, because I sure need it!  And hopefully I’ll have some good action shots of my new rhythm dress to share.

Evolution of a ballroom dance gown – part 4

I’m not sure why I didn’t write this post sooner.  Well, better late than never, right?  Warning, it’s fairly wordy, so beware!

The dress (I nicknamed it “Modern Nature” after the song I used for the solo I made it for) as it is shown in part 3 of this series is the version I wore to the Seattle Dance-O-Rama (DOR) in 2014.

After DOR, my dress more or less sat for several months untouched.  Then, in early 2015, I had a Quickstep routine that I planned on performing, so I decided to do some improvements to my dress.

I never really liked the yellow fabric I used for the skirt godets.  It was thin and had glitter on it and it stuck to itself as well as the green ITY fabric of the body and was just generally very annoying.  But it had been a last minute choice from JoAnn’s where there weren’t a lot of options that I liked and I didn’t have the time to look around.  So, I literally cut them out.

Since then I had been ordering some various fabrics from Fabric Mart and Fashion Fabrics Club that I thought might be nice for a future ballroom gown.  So I had some “Cobalt/Lime Animal Stripe Chiffon” in my stash that I thought looked nice with the green fabric of the main dress.  The chiffon was too chiffony to work well by itself.  I happened to have some green crepe back satin from JoAnn’s in my stash as well.

When I layered that under the chiffon, it was so pretty; the shine of the satin really came through and gave the chiffon some dimension (and stability) that it didn’t have alone.  I used a regular glue stick to baste the chiffon to the satin to keep it from shifting around while I cut it.  I cut new godets a bit bigger this time around and attached them in the seams that previously had the yellow ones.

I then glued more rhinestones until I had a sort of blobby belt going around my waist.  I’m not super happy with how they show up from a distance, but live and learn, right?

I wore my dress in progress to a couple low key events (the basting, cutting and sewing was surprisingly time consuming and I always put things off to the last minute anyway.)  But I had the godets fully attached for an in studio event as shown in this video:

It’s funny watching a video of yourself dancing wearing a dress you made yourself.  There’s just SO MUCH to pick apart!  These are the things I noticed right away:

  • The skirt flares out from pretty much my waist and it should be closer to my body down through my hips.
  • The panels in the center front and center back look too wide without godets in them.
  • The sleeve length is odd.
  • It doesn’t sparkle enough!
So, I went home and took each seam in quite a bit for several inches below the waist and cut the front and back panels in the center to add godets.  That helped fix the first two problems.
Another problem that I already knew about from when I wore my dress at DOR was that after I danced several heats in a row, I would start to sweat and the sweat started to show through the dress, starting with under my arms, but only on the sleeve, not the bodice.  The bodice of the dress has two layers of the green ITY and a swimsuit lining, so it’s three layers, but the sleeves were only a single layer of the green ITY, so there wasn’t anything to soak up the perspiration other than the outer fabric.  This is something I definitely need to account for in my future dance dresses.
So, I removed the sleeves completely and cut the sleeve out of the swimsuit lining to the length I wanted them to be so that I would have lined sleeves.  Unfortunately, I didn’t have enough of the green fabric to recut the sleeves.  I experimented with the idea of trying to put a stripe of the chiffon + satin fabric across my forearm to make the seaming there look more intentional and to also tie that fabric in to the upper part of the dress, but I couldn’t figure out how to make a woven and knit work together the way I pictured it in my head.  Instead I just sewed on the amount of green to make them into long sleeves ending with a point.  I find that in my videos I don’t notice the seam across my forearm.
Some photos of me in the backyard.

Here are some in-action photos from the Banff DOR I participated in back in April 2015.

And here’s a video from the event.

Watching these videos, I still think I could take the side seams in a bit.  But I think I’ve lost some weight since last year too, so I’ve been thinking I might more or less scrap  this dress.  If I did, I figured I could cut out the fabric around the rhinestones into interesting shapes and use those as appliques on a future dress.  I do enjoy the style of dresses that have more dimension than this one does, so I’d like to incorporate that into the future.
I still have the pattern I drafted to make this dress, but at this point, I’ve made so many alterations here and there over the years that I didn’t notate, that I think it might be easier to just start the entire drafting process over again for my next dress.

Next on the agenda is to put together a rhythm dress, hopefully before I go to the Portland DOR at the end of April.

Evolution of a ballroom dance gown – part 3

With one somewhat successful-ish dance dress under my belt, I set out to try again.  This time I used a ITY Spring Green Jersey Knit that I purchased from Fashion Fabrics Club.

I liked the fit of the last dress I made pretty well, so I started with the pattern I had used with that and shortened it to be just the bodice again.  I also cut the center front panel to create more of a sweetheart neckline.

For the skirt, I don’t really remember what I did, but it’s a 6 panel skirt with the seams matching the princess seams of the front bodice.  I decided that I wanted even a bit more swish to the skirt, so I added some godets in the seams.  I went with this yellow glitter knit because it looked nice at JoAnn’s (it was a last minute purchase) and it pulled in the yellow color from the rhinestones I had purchased to decorate this dress.
Here’s a photo of me modeling once the initial construction was complete.

I had purchased 5 yards of the green fabric, not really knowing how much I was going to use.  I believe that was the same amount I had purchased for my previous dress.  I cut two bodices in the green and a third in a swimsuit lining to be next to my skin.  I assembled the outer bodice and used the swimsuit lining and the other green pieces together, with the swimsuit lining being the “right” side of the construction.  So when I joined the two bodices together, all the seams were hidden between the layers of fabric.  I sewed everything together at the neckline and sewed elastic to the inner most layer with a 3 step zigzag stitch (I learned my lesson from the last version!)  Then folded it all over to the inside and zigzagged it again to have a clean edge.
The bottom end of the inner bodice was left hanging.  I had thought I would end up adding a second layer of skirts to create an underdress, like Laura La Gassa shows in her step by step gown construction post, but I haven’t done that (yet?)  I also figured I could sew in some swimsuit bottoms to finish off an inner leotard, but I also haven’t done that yet either.  Although I planned this dress for a while and purchased most of the materials early, I had to rush it at the end so that I could do at least a little decorating before I wore it.
I added a flowering vine-like pattern around the entire neckline, with a little more detail in the center front.  

I also started on a waist design, as you can see in the photo above.  But attaching all those rhinestones is very time consuming, so after several evenings working on it, I ended up needing to stop to let everything dry and cure in time for my competition.  So I just have a strange blob of rhinestones on the front of my waist.
Here are a couple photos from the competition last year when I first wore it.
And here is a video of my foxtrot solo where you can see how it moves.

I wore this dress again a few times since then, including to another competition a couple weeks ago, but I’ve modified it quite a bit, so more to come on that soon!

Evolution of a ballroom dance gown – part 2

With my lesson learned about dancing in bedclothes, I decided to go for making an actual dance dress for the longer version of my Viennese Waltz routine.  I stopped in to Pacific Fabrics and found a lovely maroon slinky knit and a lovely black and white stretch floral netting.  I liked how the maroon under the netting gave it more of a purple appearance.

So I took the pattern pieces I had altered previously for the blanket version and removed some of the width to remove the excess ease since I wanted the knit version to be close to my body.  I also omitted the peplum and lengthened the bodice pieces to be floor length.  I didn’t put the netting over the center front piece to make it reminiscent of the Renaissance/Baroque style ball gown.

Also, dance dresses usually have built in leotards so that you don’t have to worry about what you are wearing under the dress.  So I turned to my handy dandy Kwik Sew’s Swim & Action Wear book and used that to create a leotard.  I ended up inserting it inside out, so I hacked at it a bit so that it doesn’t look horrible.

And here’s a video of me dancing it it.  The neckline really needs to have elastic inserted to keep it up better and the skirt doesn’t move as much as I had hoped.  I have extra material and someday I might end up going back to hack at this dress some more to make it work better.  As it is, I haven’t worn it again since this dance.

During the creation of this dress, my Singer machine started acting up so much that it was no longer productive to use at all.  So I borrowed a Pfaff sewing machine from a friend of a friend to finish the dress and I fell in love with her machine.  Thus, when I finally broke down and purchased a new machine, I splurged and managed to get the floor model of the Pfaff Expressions 150.

To be continued…

Evolution of a ballroom dance gown – part 1

I’ve been taking dance lessons from an Arthur Murray franchise for several years now.  I really enjoy it, but it’s pricey.  The lessons are pricey and the events are pricey, but the gowns are insanely expensive and I just can’t bring myself to buy one of those gowns.  But, I figured I could make one.

I started by reading what I could find on the internet.  Since I start trying to do this several years ago, there wasn’t really much I could find.  But I did find this great tutorial by Laura La Gassa and I read it and geared myself up to try it on my own.  And I read every post on BGBallroom for inspiration.  
I knew how to sew and I owned a decent Singer sewing machine that got use for maybe one Halloween costume a year, if even that.  But I really had never gotten into sewing actual clothes, so there was a lot that I didn’t know yet.
My first dress I did wasn’t intended to be a dance dress, per se, but I was going to dance in it.  I was supposed to do a short Viennese Waltz routine at a Masquerade themed spotlight ball.  So, I decided I wanted something that fit the part.  
I went to a thrift store and bought a lovely mint green flocked bedspread, some off-white brocade curtains and a couple of lace doilies and I made the bodice from McCall’s 6097 and just a floor length gathered skirt with an off-white panel in the front.  
I wore a large red wig and a mask for the dance I did.  It’s funny for me to watch this video because it was well before I started working on my lovely arms, so I cringe at all my “dead arms.” 
 But I also learned that wearing basically a blanket to a dance event was not the smartest thing ever.  I was drenched in sweat before I even started dancing.  ðŸ™‚
More to come later…

Oh-la-la Cabaret outfits

Back at the end of February, I mostly made two dresses in 4 days for a dance routine I did with one of the instructors, Emily. 

I planned, sketched and, starting with the Lady Skater pattern, made some alterations for Emily’s dress late Wed night.  I cut out and basted something together Thursday night after work and took it in to the dance studio on Friday so I could do a fitting with Emily. It fit very nicely and didn’t need any sizing adjustments. 

Then I went home and started patterning my own dress. Saturday morning I went to Jo-Ann’s to pick up some black ribbon and found a couple packages of really pretty black lace and sequins trim for cheap. Then I went home and worked more on Emily’s dress and made a dress for me. 

They aren’t as finished as I would like, but they look great and I’m really proud of them. The neckline on Emily’s dress looked horrible in the back because I didn’t stretch the elastic enough when attaching to the dress, so it gaped a ton.  But it more or less did the job anyway.

Both dresses are fully lined, with the skirt lining being red, so we could hike up the black skirt to show the red lining.  We both have the skirts safety pinned to show off the under layer and we are also both wearing black petticoats underneath.  Also, I angled the waistline seam so that the bodice joined the skirt in a V in both the front and the back.  It’s not as obvious on Emily’s dress since the point is black on both the bodice and the skirt, but it is a little more noticeable on my dress.

I didn’t want them to be super matchy-matchy.  But I love the color blocking I did on the bodice of Emily’s dress so much that I wish I’d done it on mine as well.  

Here’s the video of our performance.  Apparently, I couldn’t stop touching my own butt, so I really messed up the ending and kind of muddled through it.  But I had a blast working on this dance with Emily and learning a few more girly moves.

© 2026 Clothing Hacker

Theme by Anders NorenUp ↑