Clothing Hacker

Just another WordPress site

Category: knit dress (page 1 of 2)

Pride dress 2017 edition

This is my (hopefully) first entry for the Hack It! contest over at The Monthly Stitch.

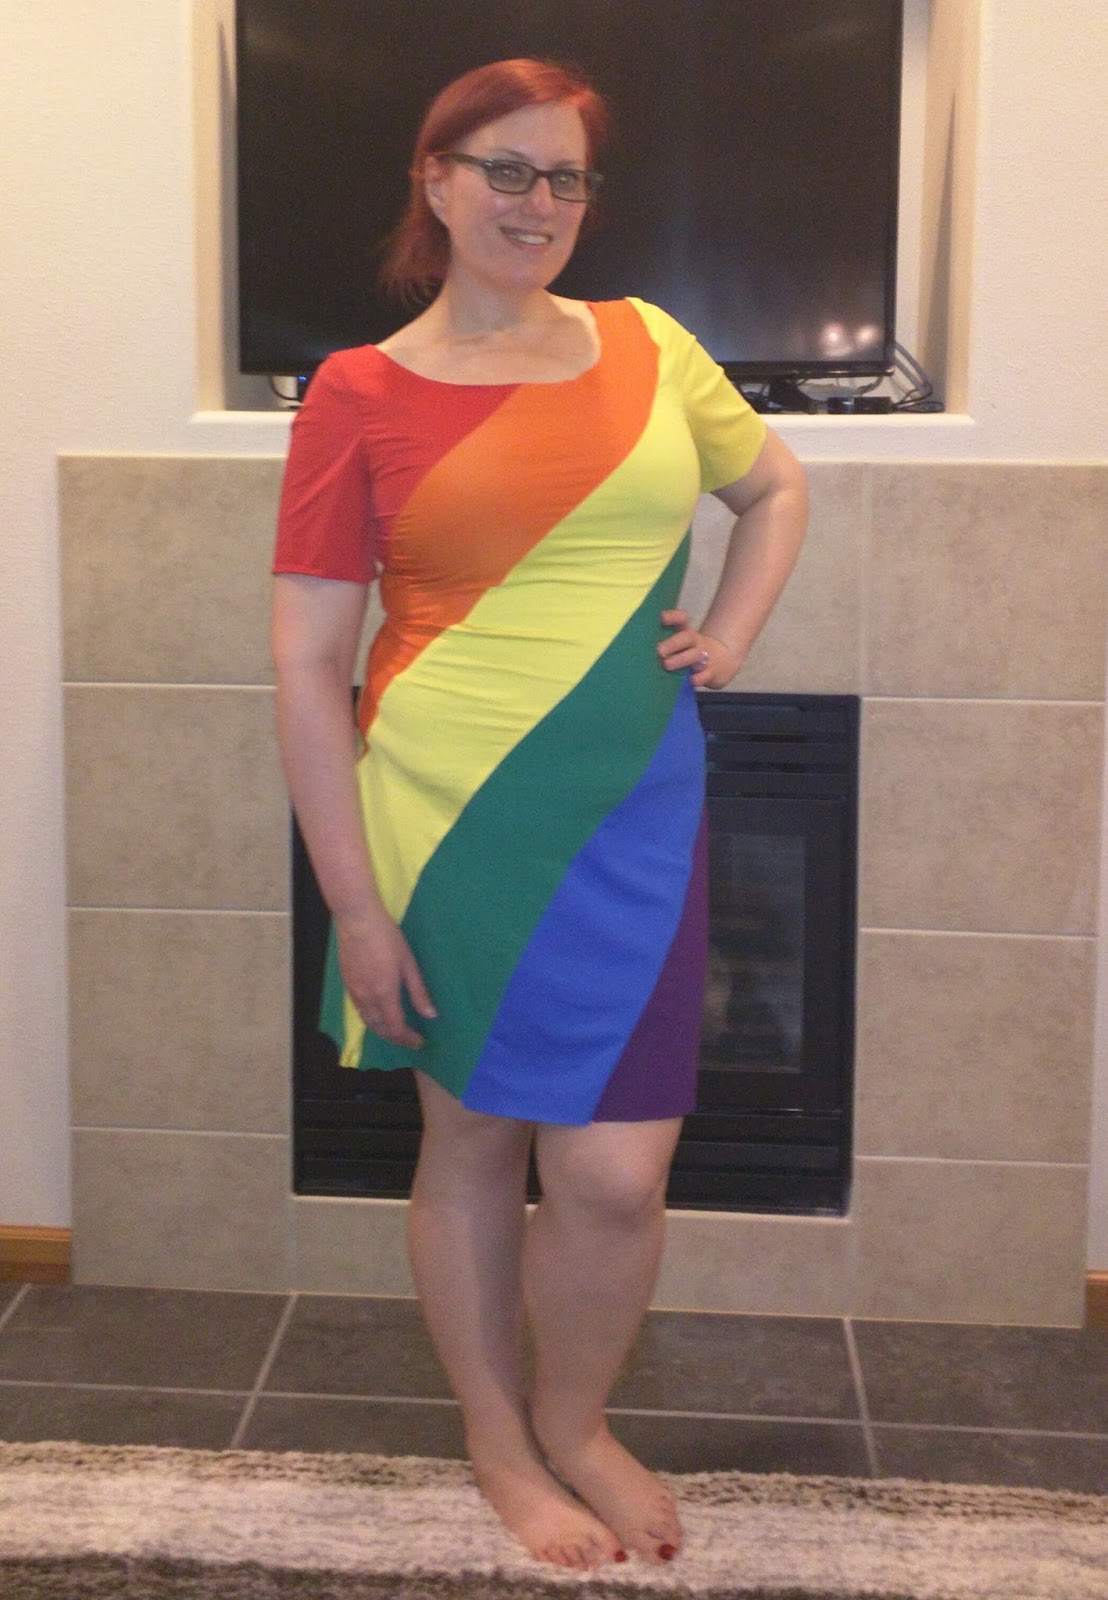
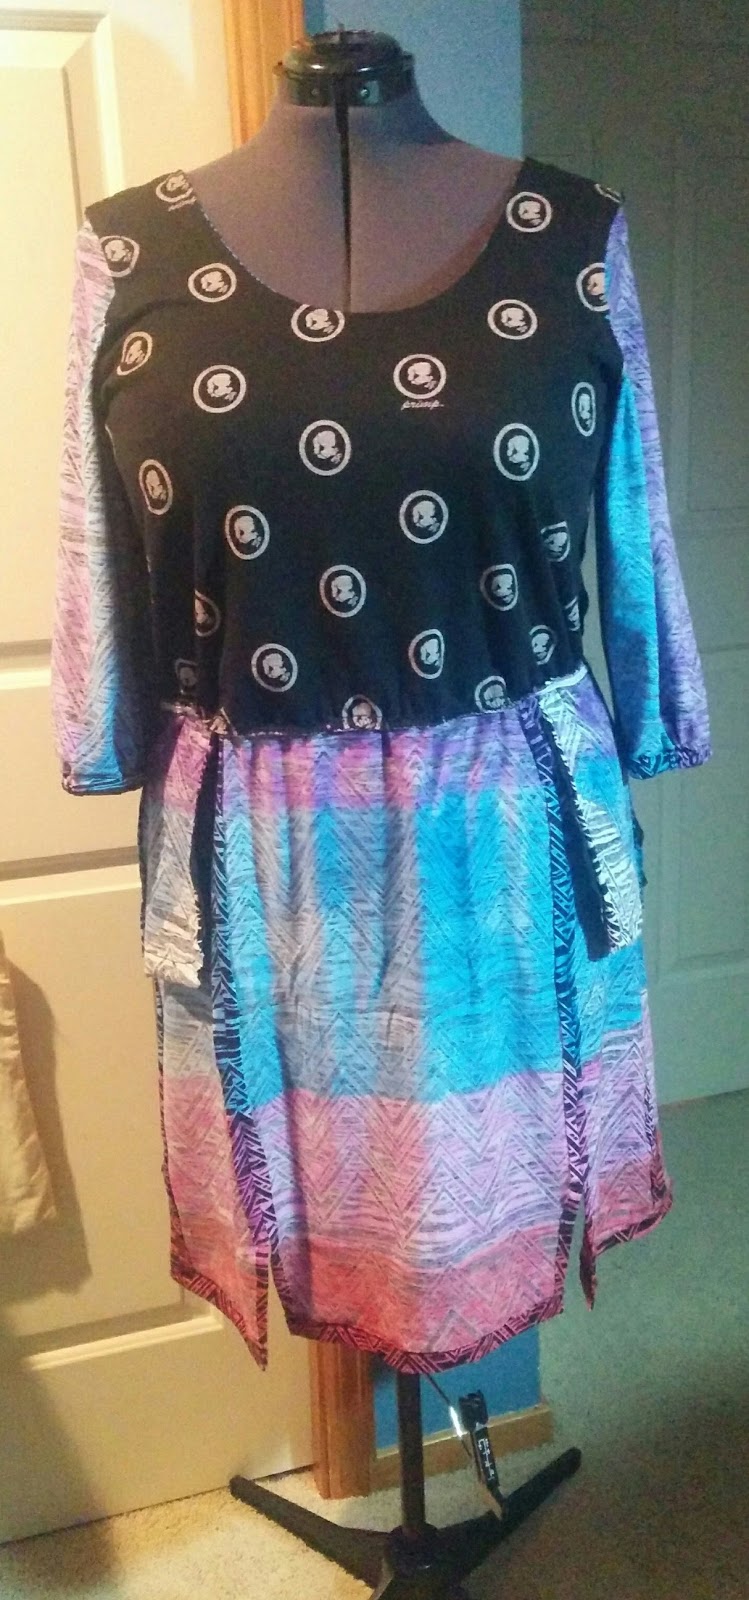
So, the rainbow dress I made for Pride in 2015 is a little too baggy on me now, so I decided that I needed a new one.  Instead of just repeating what I did before, I decided to try something different.

I sketched out what I was hoping to achieve.

I decided to use the Seamwork Mesa for my starting pattern.  I’ve made it twice before and I knew it fit pretty well.  I did go down a size from my previous ones and I think it’s even a better fit now.  I compared the front and the back of the dress pattern and decided that they were close enough in size/shape that I’d be ok just making two fronts and sewing them together, which made this hack much easier.  So first I printed out the dress front piece twice and taped them together to make a full piece.

You can see above that I sketched in the lines for the rainbow pieces.  I did a combination of eyeballing and measuring to get them to roughly appear even.  I then colored in the stripes to help keep which piece goes with which color fabric once I started cutting out the pieces.

I then cut each piece apart and added seam allowances.  I even added actual notches like a good seamstress!  As you may have noticed in the photo above, I messed up my rainbow coloring.  Luckily, I figured it out while I was still adding the seam allowances and fixed the colors with some permanent markers over my colored pencil.

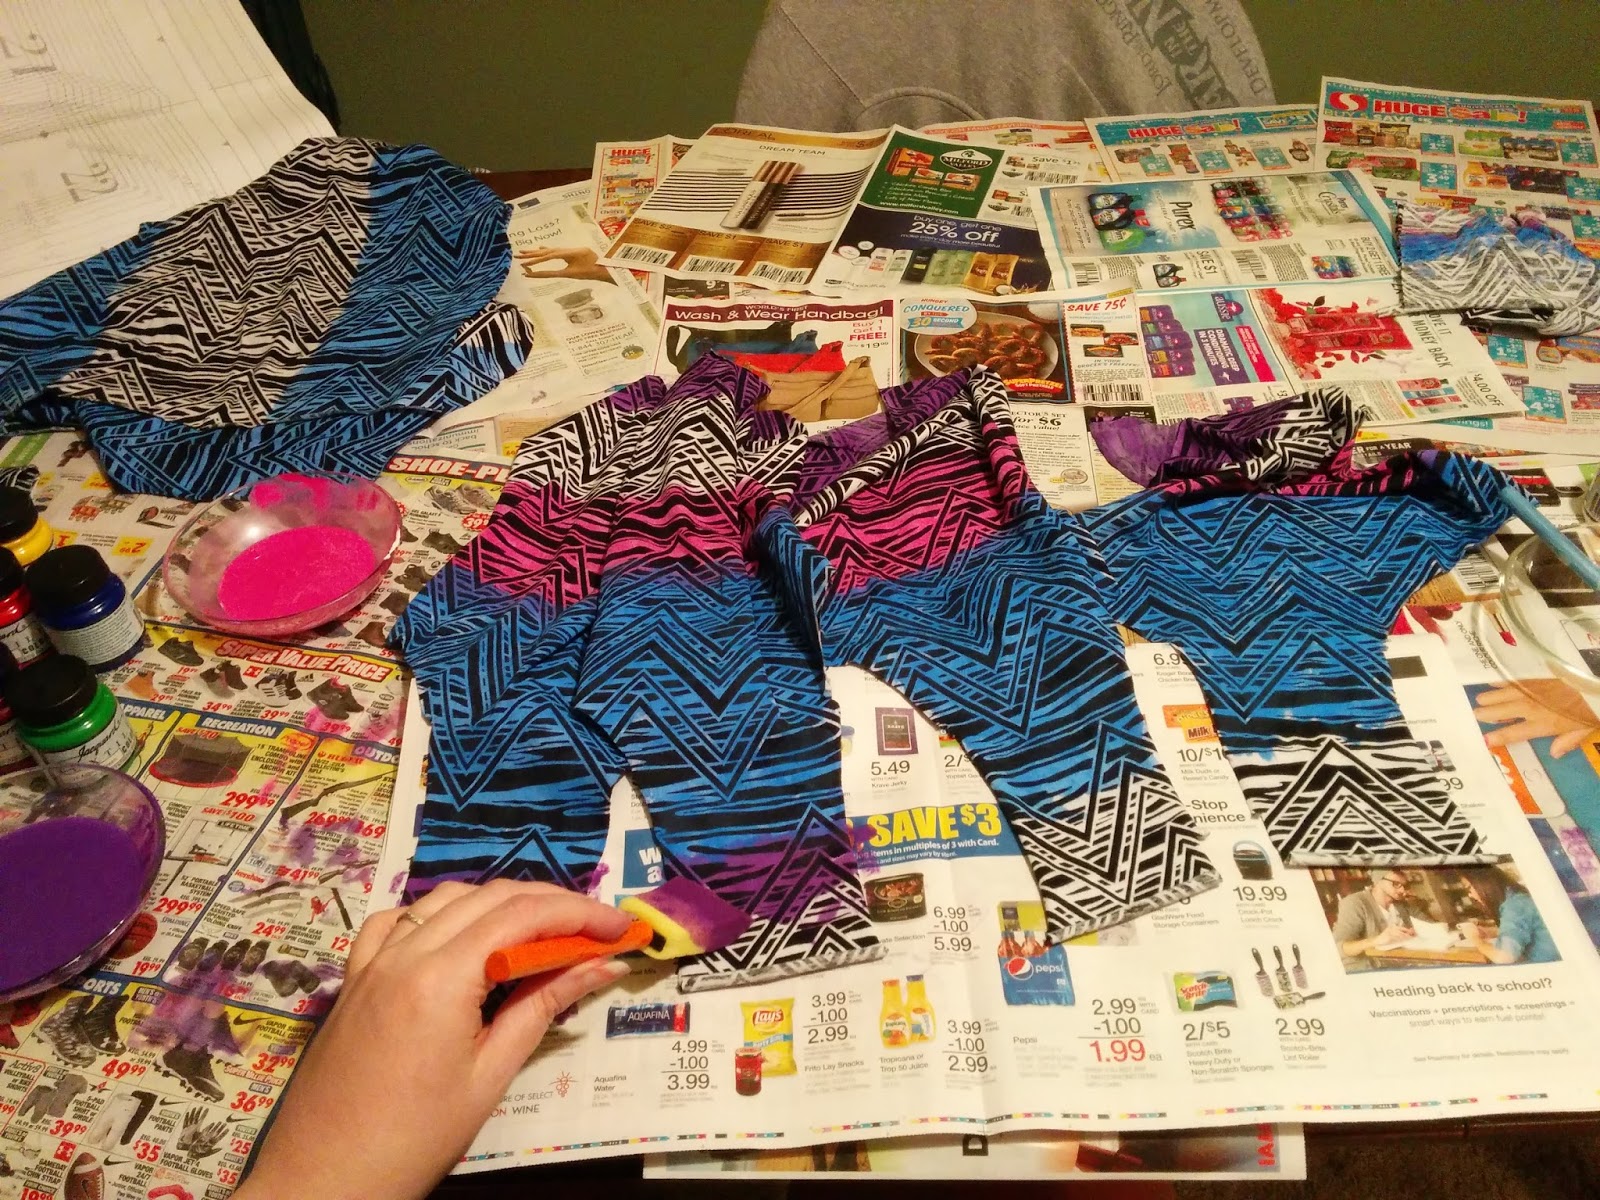
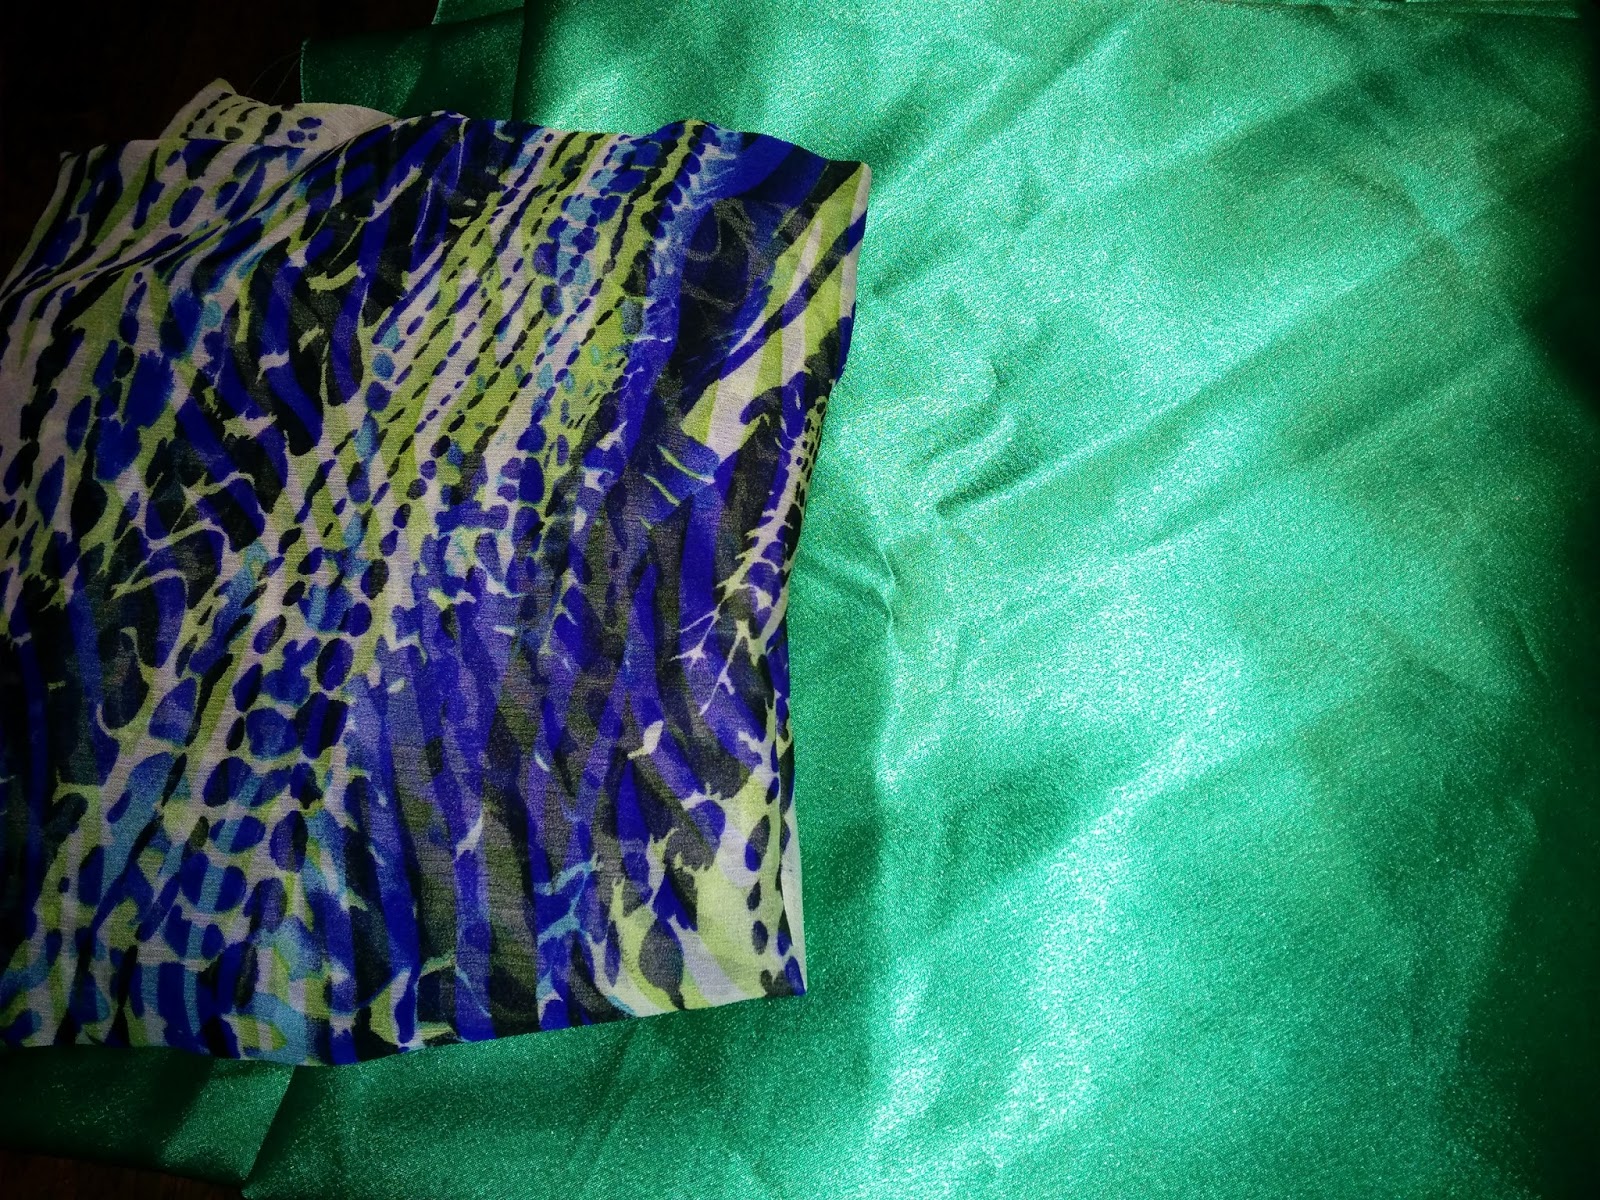
The fabrics I used all happen to be in my ginormous stash.  I have a bunch of nylon/lycra active wear fabrics that I pick up on sale from Fabric Mart and Fashion Fabrics Club whenever I can so that I am able to make a ballroom gown on a moment’s notice, if I were to so choose to do so.

Since I made the decision to just make two front pieces and sew them together, I was able to just cut a double layer of each color.

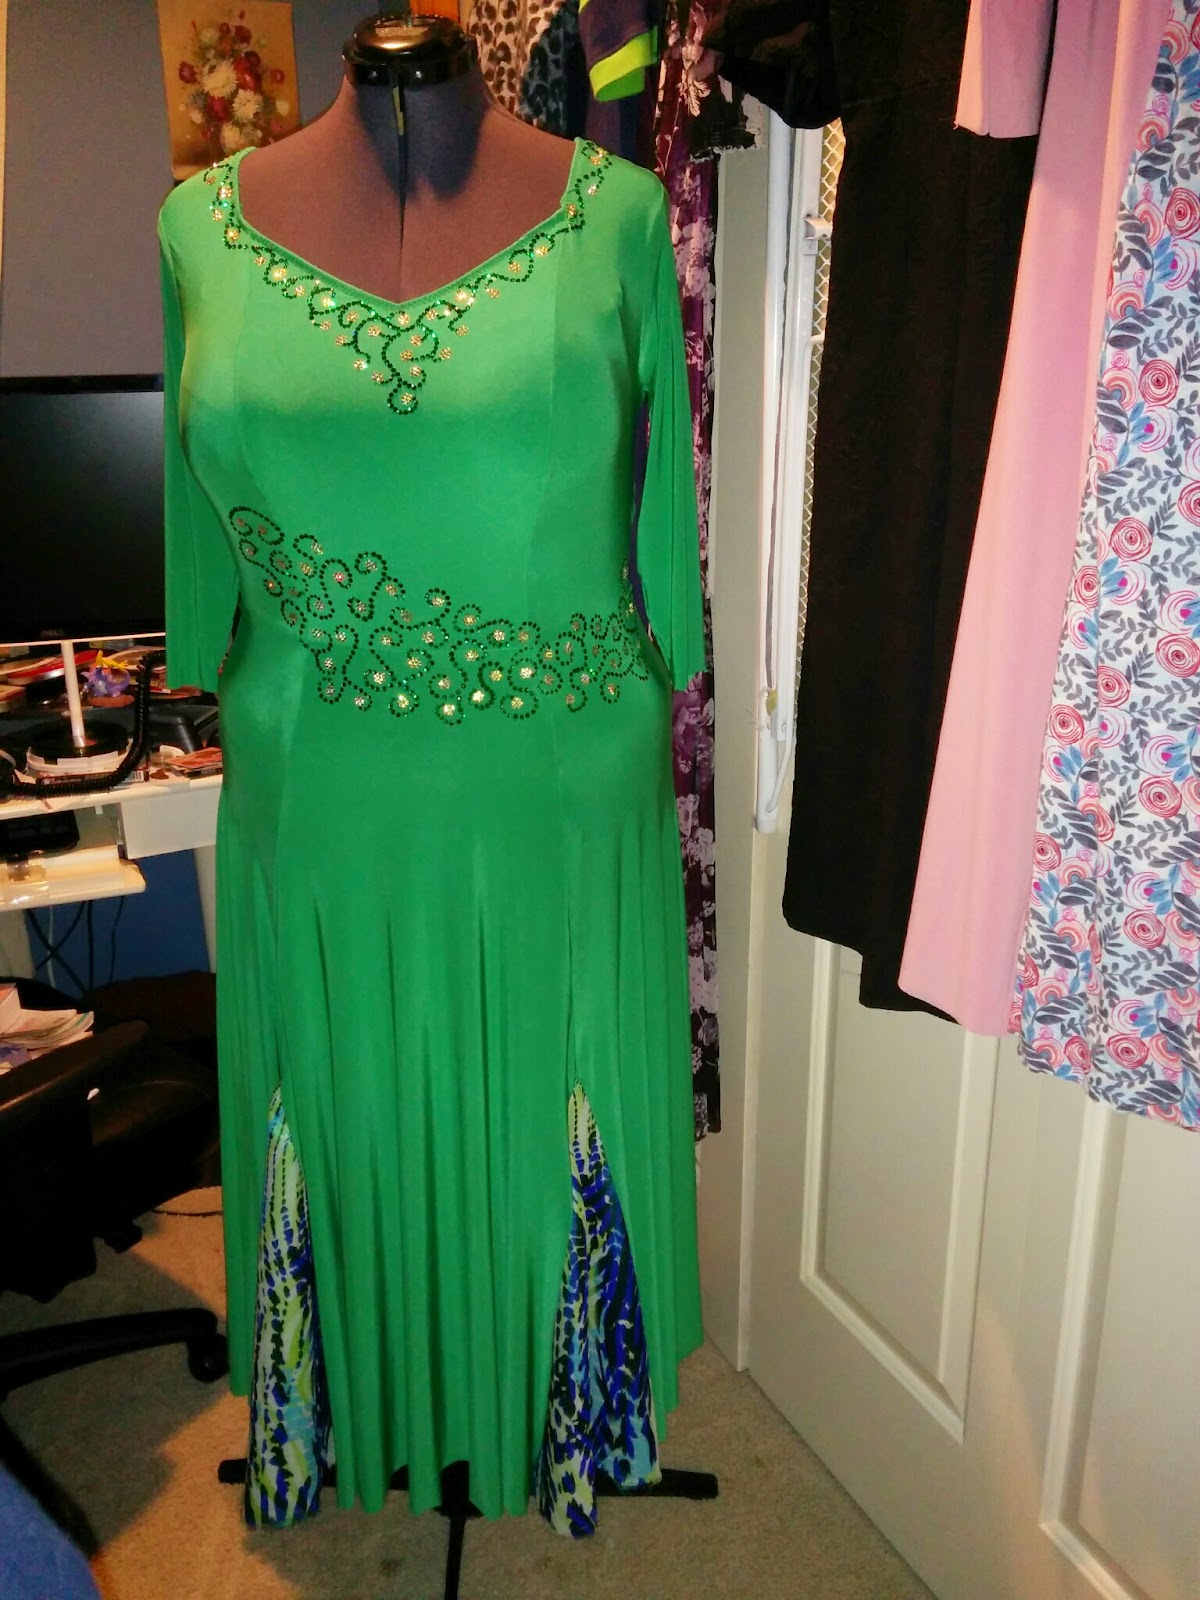
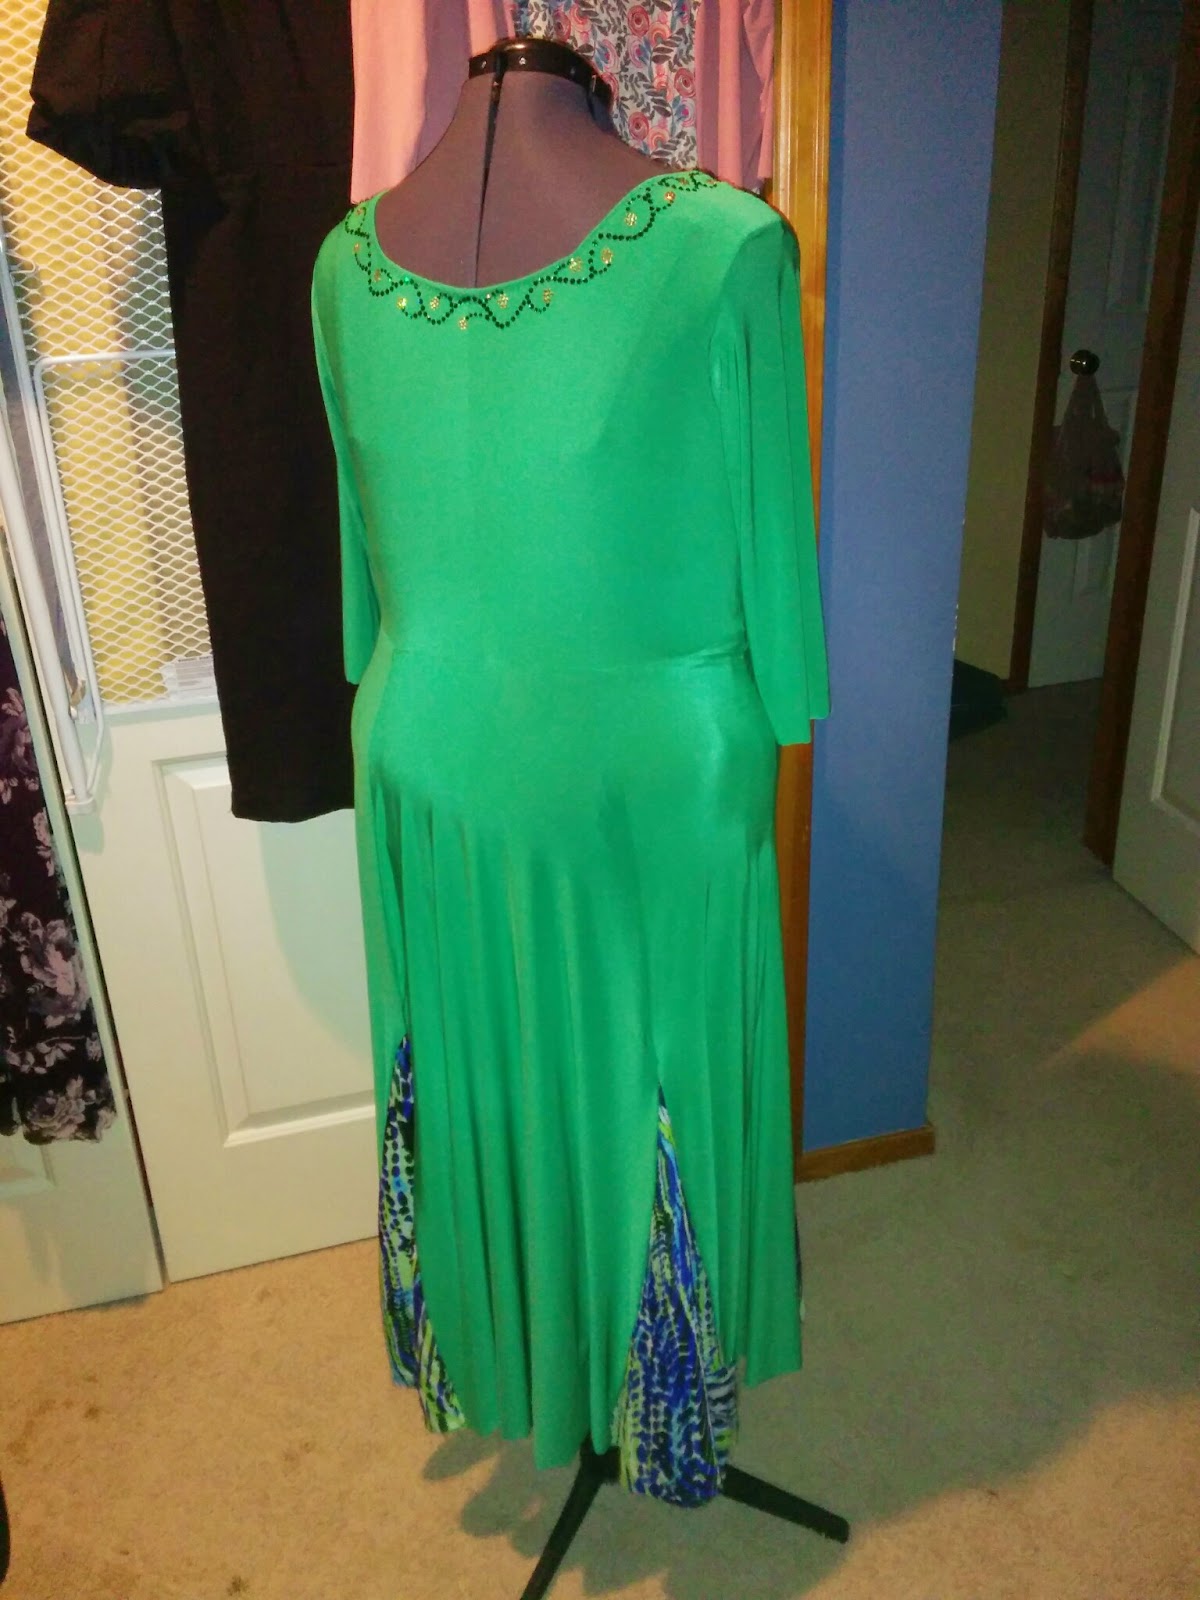
I then just sewed each half of the main dress together and cut one red and one yellow sleeve and sewed it all together.  I would have liked to split the sleeve into yellow and green like in my sketch, but I was doing this the day before I needed to wear the dress, so I got a little lazy.

And the back is just a mirrored image of the front.
And here we are on the Link light rail, heading down to Seattle Pride.

I didn’t take all that many photos of the actual parade, but I did get particularly misty eyed when I saw Wizards of the Coast walking, so I had to grab a photo.  I had just left a couple weeks before and had been in a lot of the planning meetings for their first ever appearance in the parade.  I’m so proud to have been a part of that company.

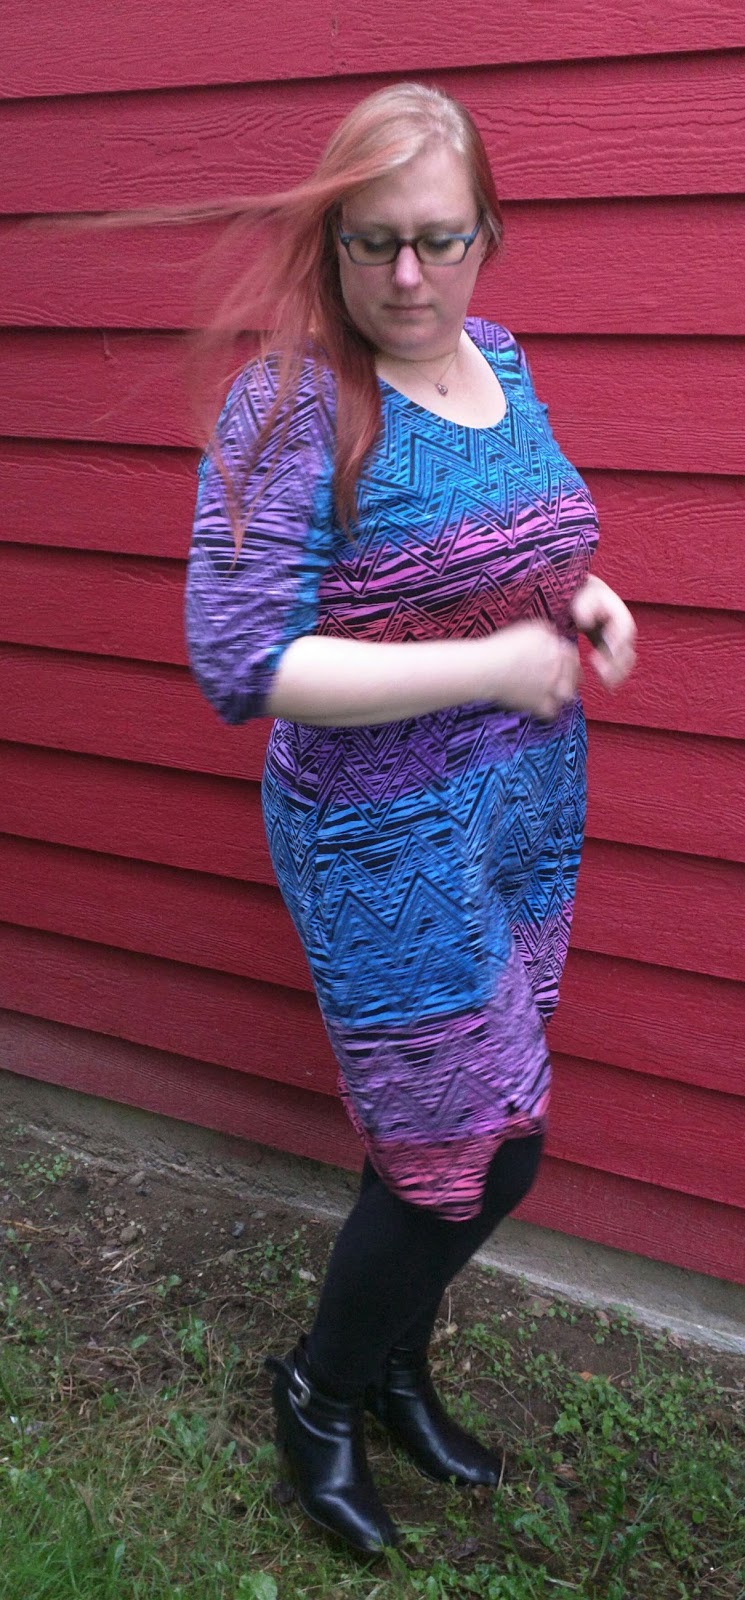
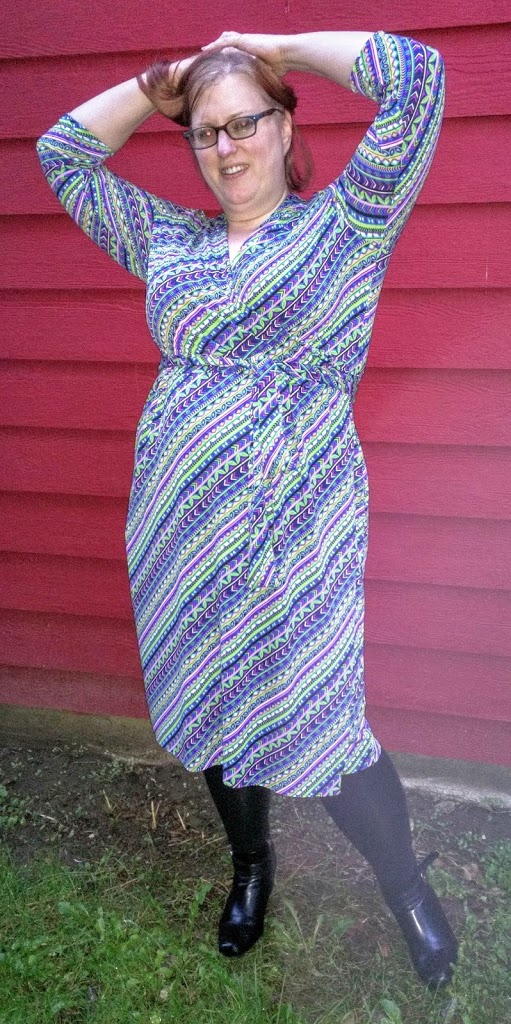
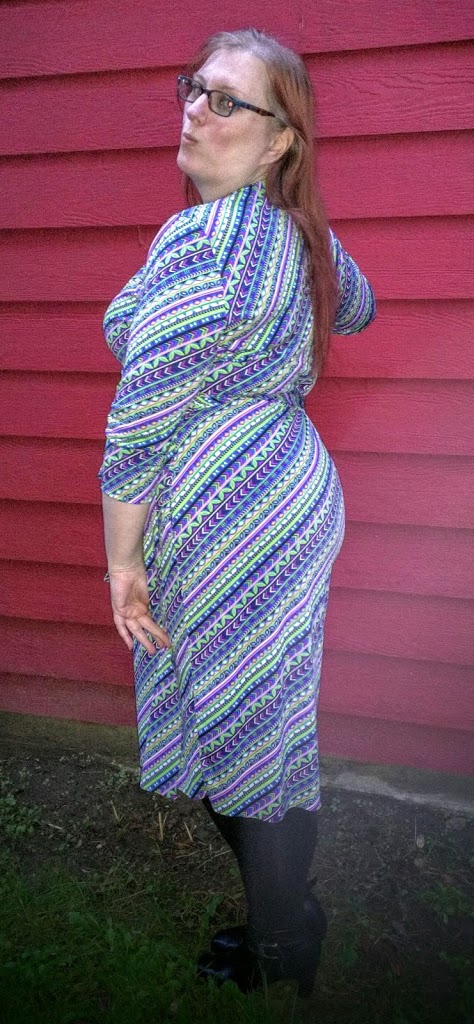
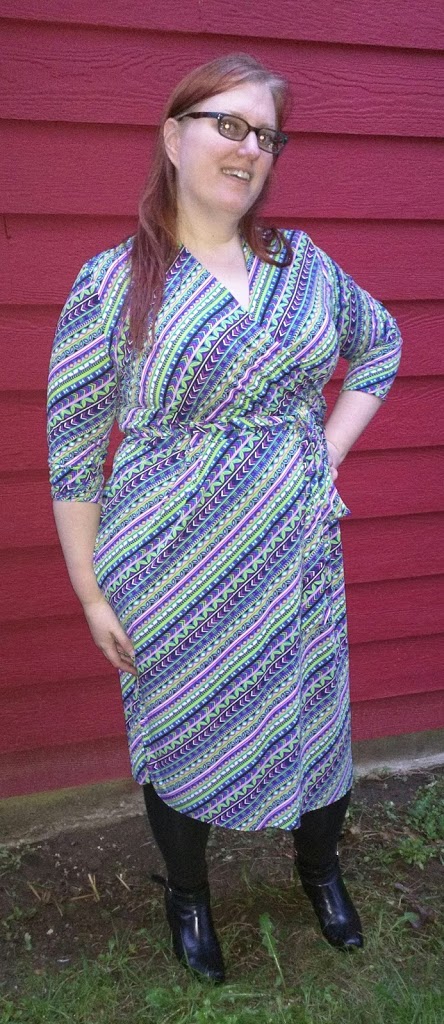
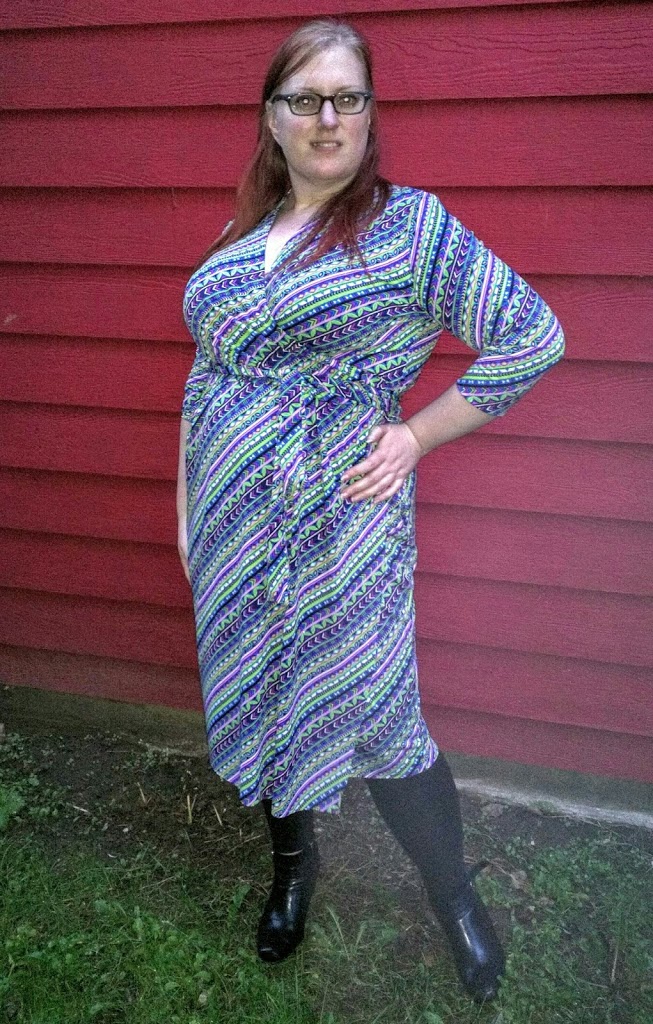
After the parade, we had dinner downtown with the kids and then the hubby and I went to see Romy and Michele the Musical.  He managed to get a couple not terrible shots of me on the streets of Seattle.

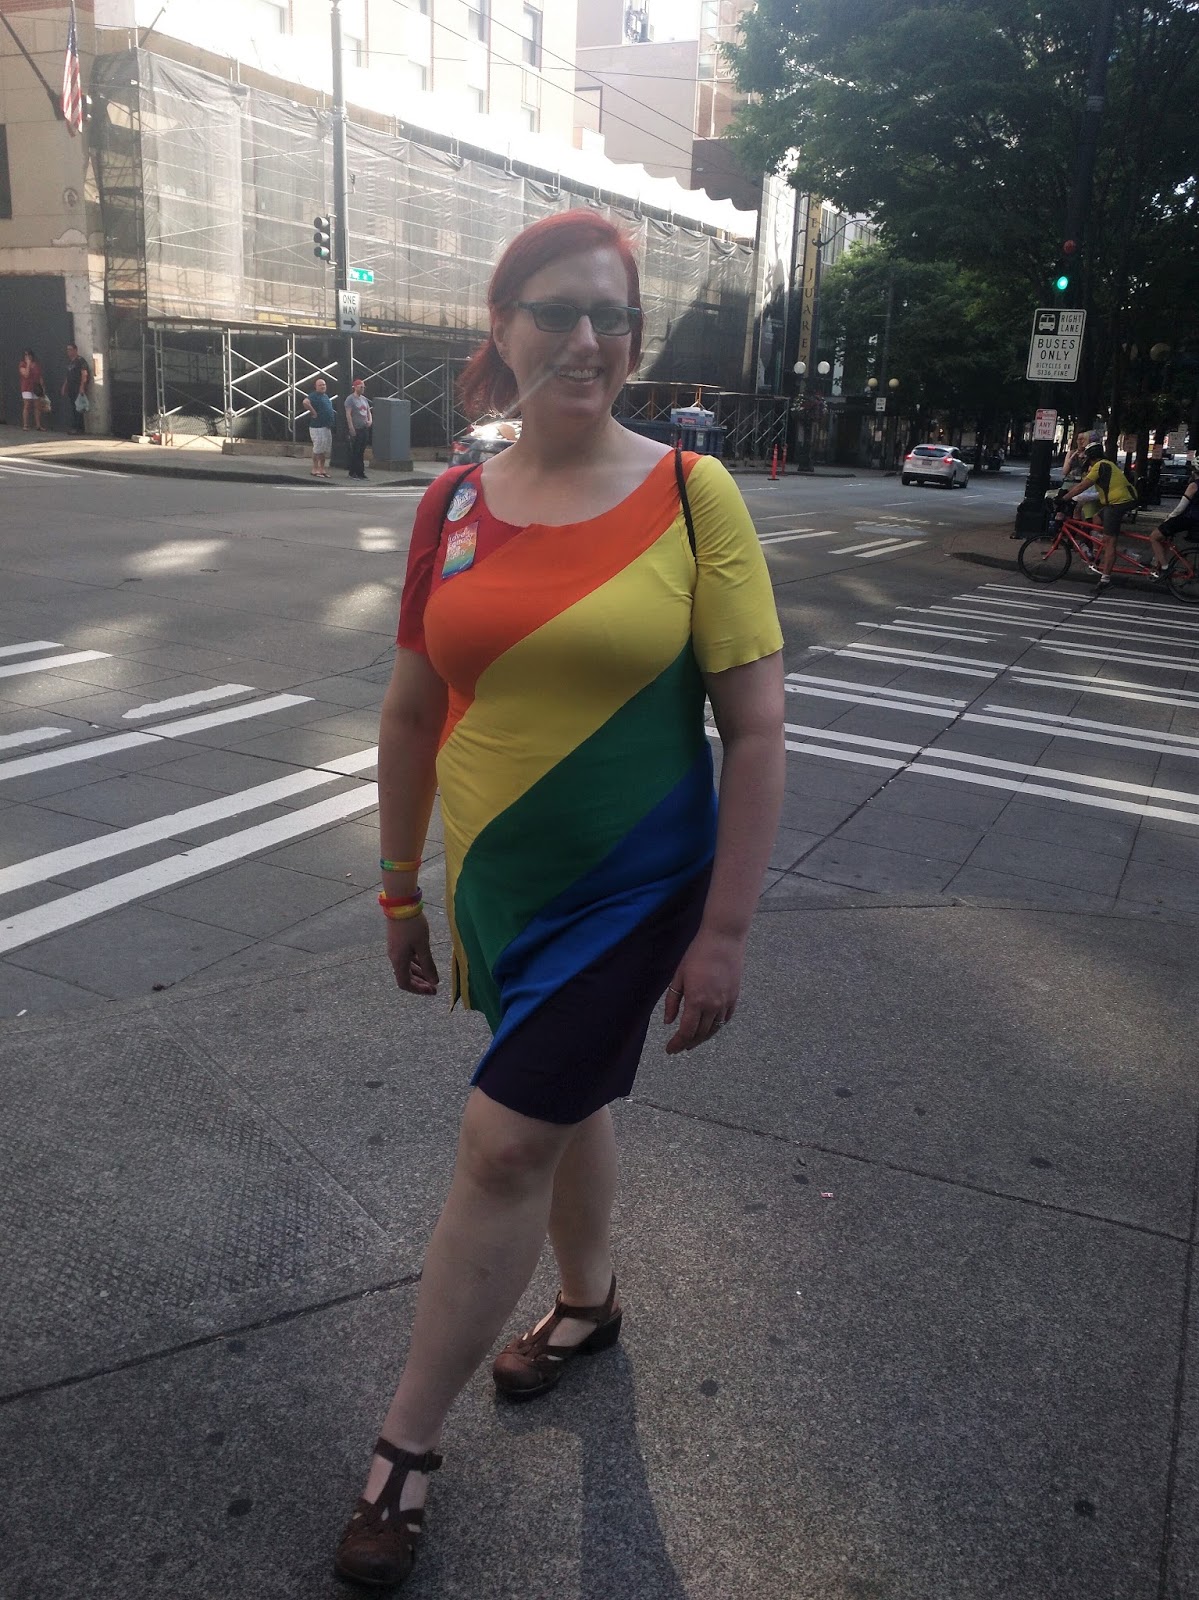
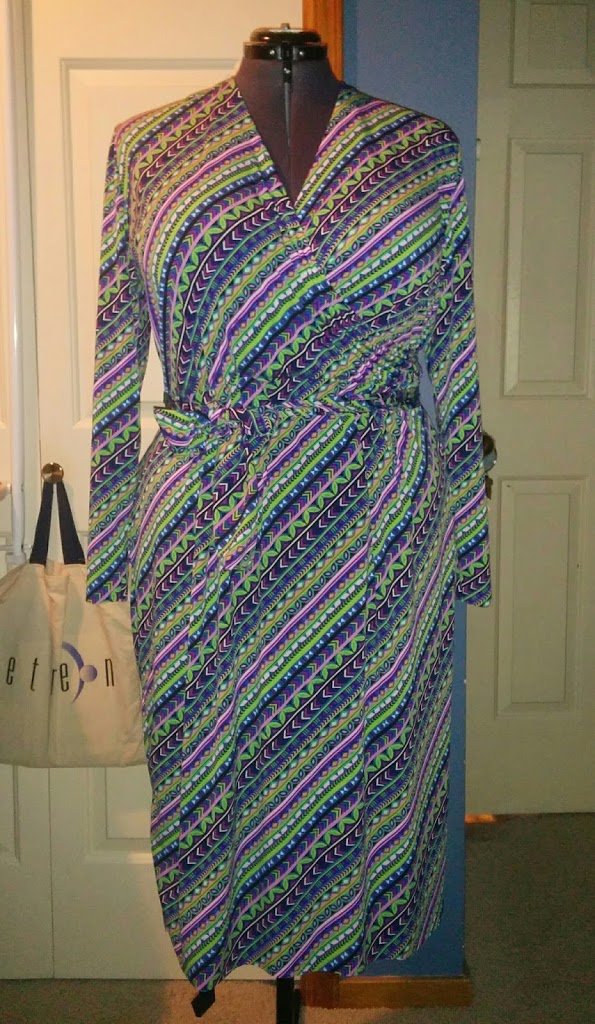
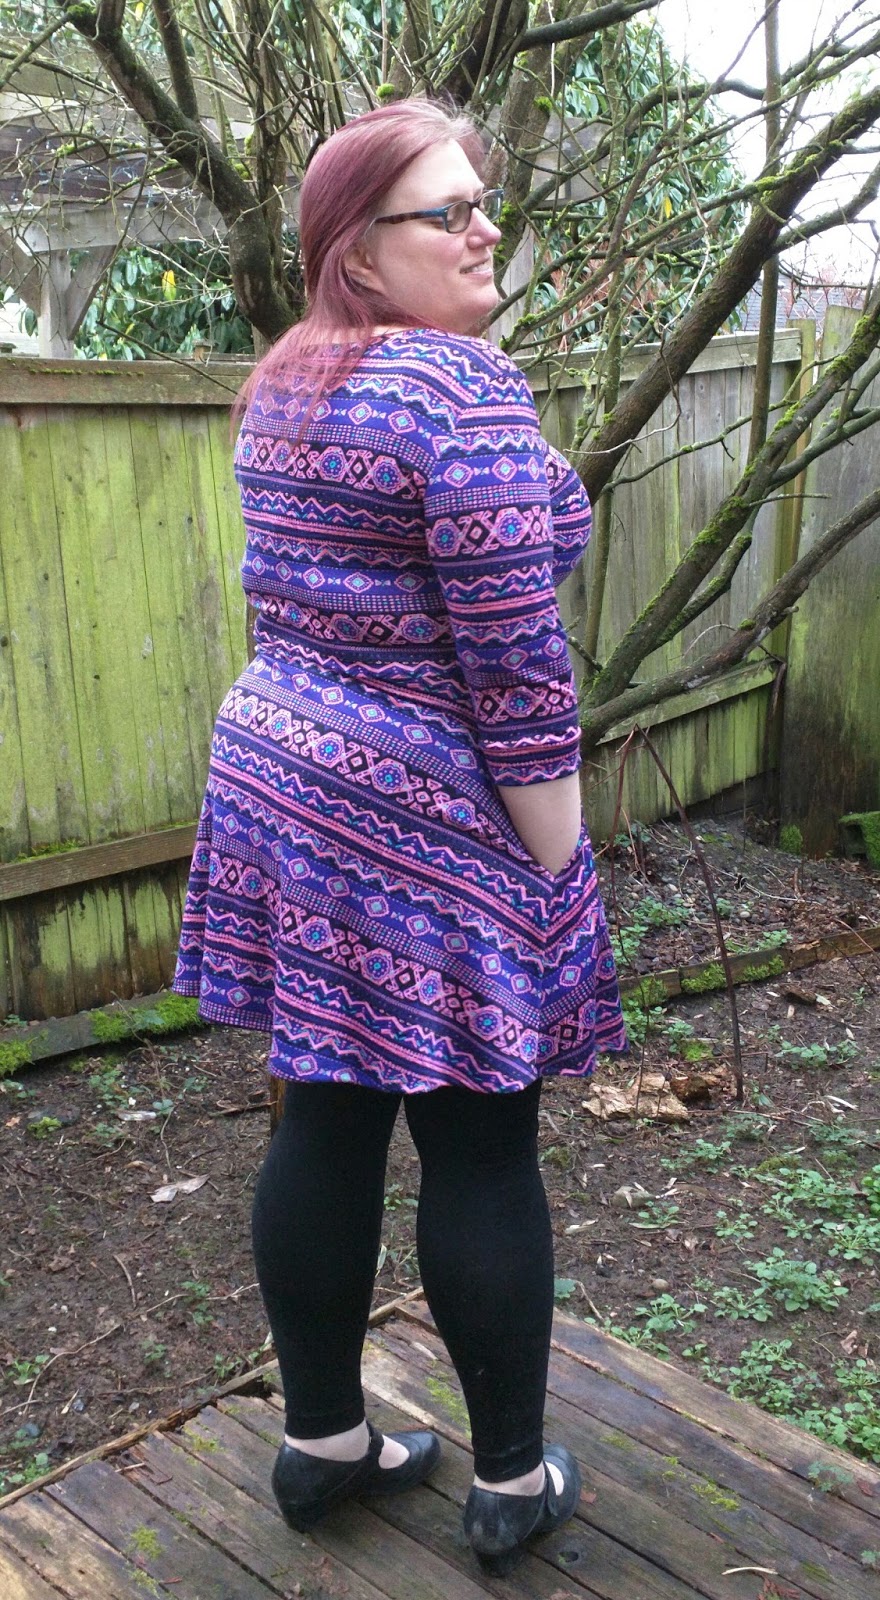
You can see a little of the stripe matching on the side.

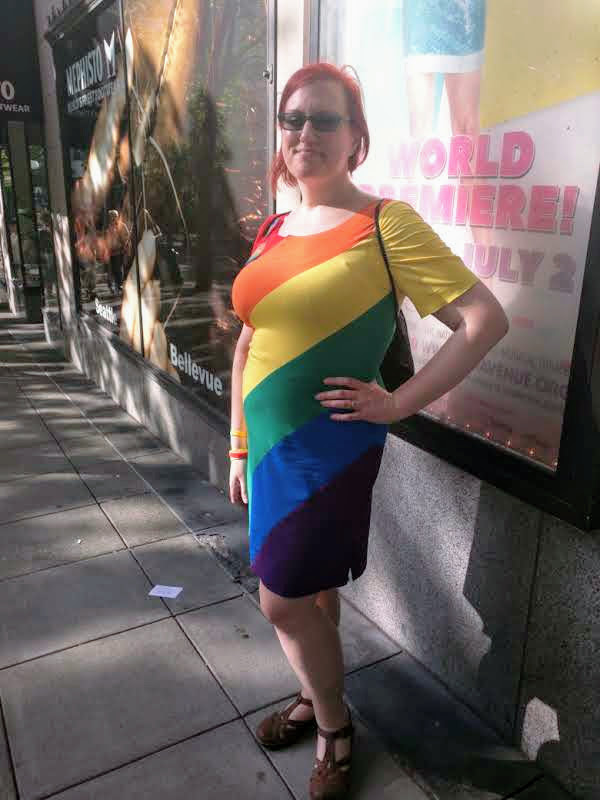
In front of the show poster that is cut off and obscured.  haha.

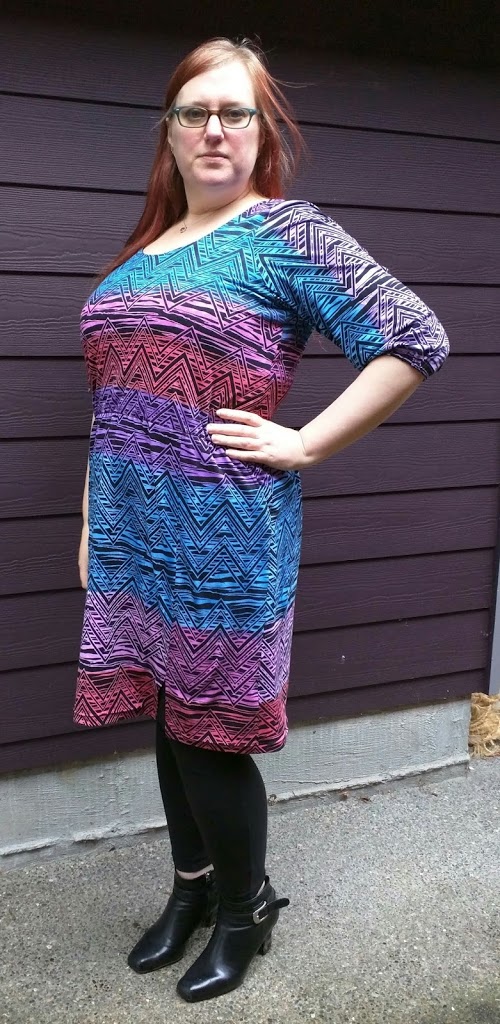
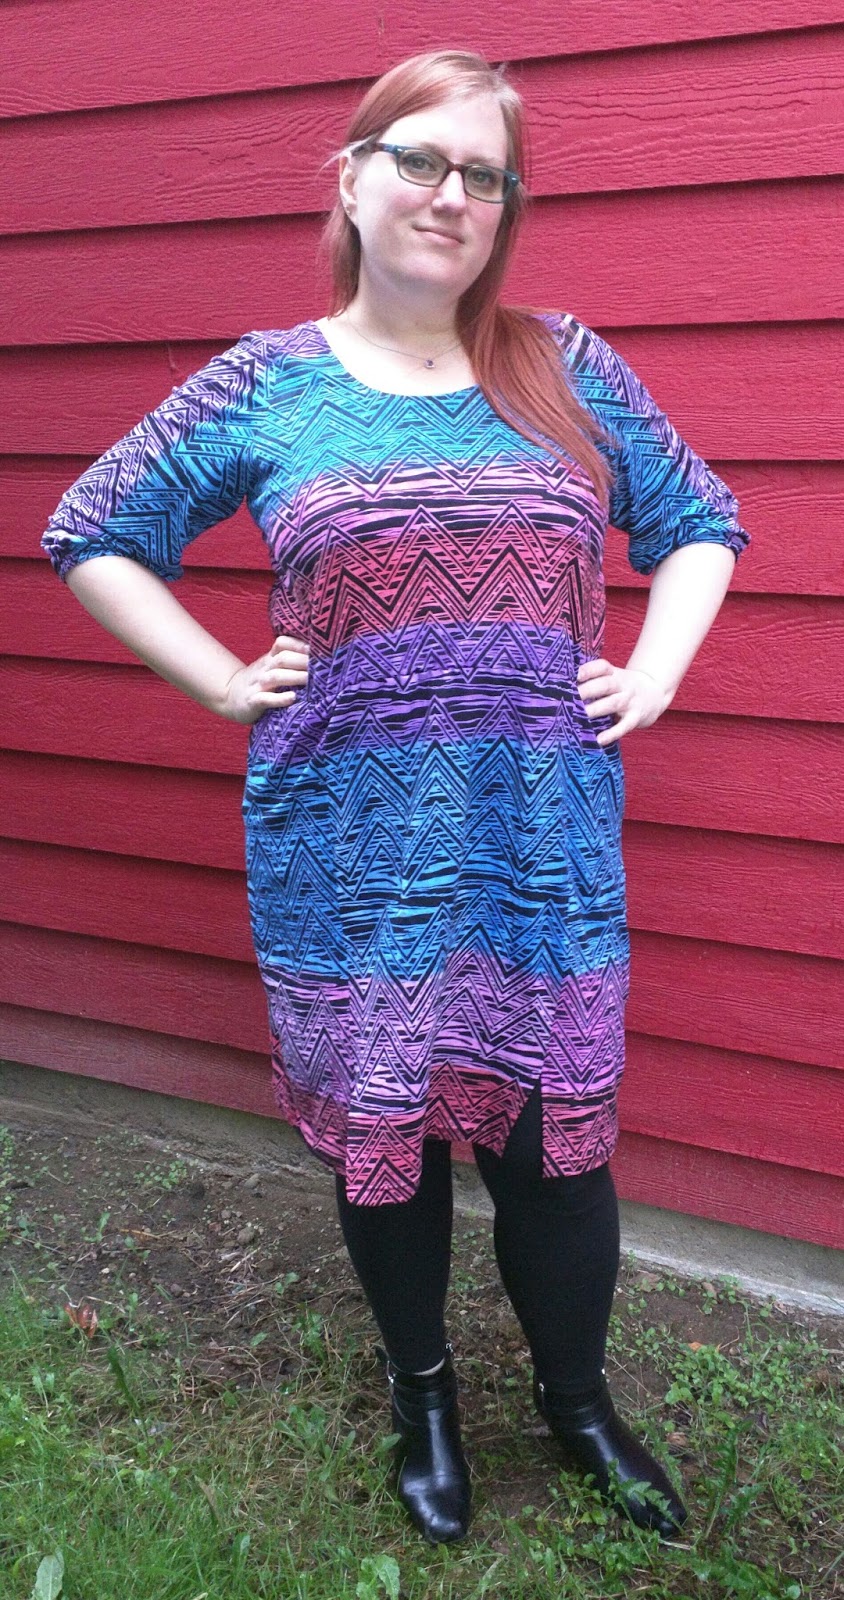
I’m quite proud of this dress and I’ll be happy to wear it again next year and I might even decide to just wear it around because it’s a pretty awesome dress.  I also plan on reusing the pattern for a striped version, possibly in Seahawks colors.

A Painted Perry

When I made my camouflage Seamwork Perry, I liked it so much that I immediately cut out another one from a cotton Spandex knit from a previous Girl Charlee* knitfix fabric.

I couldn’t do pattern matching when cutting the dress out, so I decided to just cut it out however I could then I used some Jacquard Textile Color* to paint colored stripes onto the fabric to try to mask the pattern mismatch.

I started painting the pieces way back in May.  I did some additional painting some time after that, but then I finally just finished it a couple days ago.  After it was all dried, I heat set it with the iron following the directions.

I cut bodice lining pieces from the same black cameo thermal knit fabric I used to line my Fabricista sweater dress.

I liked the elastic loop and button I used for the camo Perry, so I decided to do that again.  Since I planned this before sewing the dress together, I basted a loop of elastic that I’d colored with a blue Sharpie to the back bodice piece before sewing the shell and lining together at the neckline so that the raw ends are enclosed.  Then sewed on a blue button the finish the closure.

Also I couldn’t find a couple pieces – the front pocket piece and the sleeve cuffs.  I swear I cut them out, but it’s been so long and they aren’t with the other pieces, so either I’m remembering wrong or they got lost.  So, I cut the missing pocket piece from that same black cameo knit and instead of replacing the sleeve cuff with a different fabric, I just hemmed the sleeve 1″ to create a channel then cut pieces of 1/2″ elastic and fed it through the channel.

I also sewed all of the vertical seams with 5/8″ seam allowance instead of 3/8″ to try to size the dress down a bit.

I’m not super happy with the fit of the waist elastic.  I followed the instructions and cut the elastic to my waist measurement minus 2″.  But I must have stretched it out while installing it, because the waist doesn’t have as much definition as my camo one.

There are a few spots where I missed fully applying the color.  When I started with the blue, I was trying to go for a hand painted look, so the missed spots were a feature.  But now that it’s all put together, those spots are a little distracting to me.  Also, some of the coloring between the pieces don’t quite match shades, or the color lines across the seams aren’t exact.  So I may end up doing another pass of the painting.  Although, I am pretty happy with how it looks as is.

*affiliate link – I gotta try to help support my sewing habit somehow.

Named Olivia Jersey Wrap Dress

For the last 10 months I have been going to a bariatric clinic and lost 40 lbs with the intention of having weight loss surgery to help get the rest off.  I hit a small speed bump due to some rules of my insurance policy and I had to change clinics, which was a huge disappointment to me, but I did end up having a sleeve gastrectomy performed on Nov. 2.

Leading up to the surgery, I knew I wanted to make something to wear home from the hospital.  I have been wanting to try the Olivia Jersey Wrap Dress from Named Clothing since I acquired it as part of the Monthly Stitch‘s Chill Out IPM pattern bundle.  And I knew I was going to be sore, so I figured a wrap dress would be easy to put on, would be comfortable and still look stylish.

Looking at the measurements, my waist and hips fall into the size 20, but the bust measurement is 3 1/4″ smaller than my bust size.  However, after cutting out the size 20 pieces and comparing the bodice to some of my other knit dresses that I know fit, I decided to not do an FBA.  Well, lo and behold, the dress fits perfect exactly the way it’s drafted.

Well, did I say perfect?  It could actually use a sway back adjustment.  But that’s about the only change I would consider doing.

It covers quite nicely.  I was assuming since I didn’t do an FBA that I would be showing off a ton of cleavage, but nope.  The neckline doesn’t gape at all and there is a large enough overlap that there is no chance of flashing. I definitely will be making more of these dresses, but I might not make the next one in this size.


The outside photos were taken today and the indoor photos were taken after I got it to a wearable state, the night before my surgery.  I hadn’t sewn the facing down yet, so that’s a little sloppy looking, but I did that today.  I wore my new dress home from the hospital yesterday and I got several compliments from the nurses at the hospital.  I was going to just say thanks and let it go, but my husband made a point of telling them that I made it.  Lol.

Oh, and the surgery went well and I’m feeling pretty good, although it hurts a lot to cough or get up from sitting or laying down, but a lot less after I’ve taken my lovely pain medication.  I took two weeks off work to recover and I have a few things I cut out some time ago that I plan on getting sewn up so I can wear them a bit before they are too large.

Perry Camo

My current favorite dress is one that I made out of slightly flawed camo fabric that I got in a bargain bundle from Girl Charlee.  I wanted to try out the Seamwork Perry, but I wanted to use my inexpensive fabric that I didn’t care about, in case it didn’t turn out.  It turns out that this dress is just darling and I love the fabric choice!
I don’t think I ever would have paid full price for camouflage fabric, but I just love the way it looks as a dress.  And I’ve gotten several compliments on it the few times I’ve worn it so far.

The fabric is fairly on the thin side, so I lined the bodice with the same burnout knit I used to line my velour Skater Anna, just to give it some extra coverage so my bra doesn’t show through.

I love the sleeve detail.  At first, I thought I might have made a mistake cutting out the band because the it was way shorter than the end of the sleeve, but I just stretched that band extra hard as I sewed it on and now the sleeve has this lovely little poof at the end that I think is just cute as can be.
The back called for a hook and an eye to close the keyhole opening, but I thought it would be cute to use a button and a loop of elastic.  As it turns out, the neckline is well big enough that I don’t ever have to undo the button, but it is functional just the same.  I found a green button that matched perfectly in my stash and I used a bit of white elastic cord and used a black sharpie to make it match.

 I then took the ends of the cut elastic cord and used my 3 step zigzag stitch and stitched them together side, but side, into a loop.  Then I hand stitched that to the back opening, making sure to make the stitches on top of the (crooked) top stitching so they don’t show too much.

Here’s what it looks like closed up.

And here is how it actually looks on me.

The shoulders are cut a little narrow and the sleeve head comes way up onto my shoulder, so I widened the shoulders on my pattern a bit so that hopefully next time they will look a little better.

And here’s a photo of my Perry on my dress form.

This was a quick make, even though I didn’t quite take the 2 hours the pattern says it’ll take because I lined the bodice and fooled around adding the button and loop detail and also just because I’m a bit of a slow sewist.  But I have already cut out my next one and plan to make a few more.

My new rhythm dress!

This post has been a long time coming.  I mentioned a few times in the past that I wanted to put together a rhythm dress.  Well, I put one together and wore it to my last dance competition.

This project all started with a dress made from a gorgeous purple slinky knit that I found in a thrift shop in Laguna Beach for $5.

Then I cut the bottom of the dress off asymmetrically.

I purchased some 6″ lilac chainette fringe.  I sewed a row on upside down about 1/2″ from the cut edge along the bottom edge of the dress with a zigzag stitch, right sides together.

I turned the edge under under to create the hem and then sewed a second row of the fringe just above the hemline, but close enough that I caught the turned up edge of the dress hold it in place.

So I ended up with two rows of fringe along the bottom of the dress, so it looks nice and full.

The fringe doesn’t stretch, so I was a bit concerned that the stitching might end up popping, but that part of the dress doesn’t end up getting stretched out and since it’s applied on an angle, there hasn’t been a problem yet.

For this to be a “proper” dance dress, it needs to have a built-in leotard.  In comes Jalie Bella fit and flare dress pattern.  The dress in this pattern is basically the same as the one I purchased — an armhole princess seamed fit and flare dress, but it has an optional leotard underneath.

I made what was basically a muslin of the leotard in a blue nylon/lycra activewear knit that I had in my stash.  According to the pattern measurements, I needed to add 2″ to the length and that was the only alteration I did to the pattern.  It fit perfectly, so I made it again in this swimwear knit that I purchased from Pacific Fabrics because it matched both the purple of the dress body and the lilac of the fringe.  I used the blue muslin leotard as a lining to this leotard.

After trying them on together to see how it looked, I decided that I would like to open up the neckline  more and make the purple dress sit off my shoulders and show off a little skin and a little more of the leotard fabric.

I also have discovered that, even though these dresses have a lot of stretch in them, I don’t want to pull them up over my head because I’ll end up messing up my hair and makeup that I sat and had done so beautifully by the wonderful professionals at these events.  I designed my green Modern Nature smooth dance dress to pull on like a swimsuit, but the neckline ended up getting pretty stretched out after I decorated it with the rhinestones and pull it on that way a dozen or so times.  So I’ve decided that I need to add zippers to my ballroom dresses from now on.  So, I ripped open the back seam of the dress and added an invisible zipper.  The dress and the leotard are joined at the zipper and I also sewed them together along the front where the purple dress comes straight across the front of the leotard.

Here’s a photo of me and my instructor Yaunique at the Portland DanceORama.

And here are a few action shots that the professional photographers at Maude Productions took at the Portland DanceORama

I have purchased some rhinestones and plan on decorating my new rhythm dress soon.  I really like the way it looks now and I’m a little afraid that adding the rhinestones will detract from the simple beauty of the dress.  But I also really want a super sparkly dress to wear too!

Edit 6/21:  I forgot to add a link to one of my dance videos so you could see the dress in action.  I have a few videos in this dress that you can see on my YouTube channel, but the Bolero is the only rhythm dance we actually have choreography for and the other Bolero video is to a cover of the M.I.A song Paper Planes, which just felt strange to dance to, even though Yaunique did actually remember to do the dip in that one.  ðŸ™‚

Rose Red Lady Skater


May is inspiration month at The Monthly Stitch.  I have noticed that I have many dresses made out of fabric with lovely prints.  So, the easiest way for me to put together an outfit is to make leggings and/or cardigans in solid colors, neither of which I’ve successfully made yet (perhaps foreshadowing IPM…?)

So, as I was looking through TMS archives to find an inspirational post, this one for  Rosemary’s Fabulously Red Lady Skater caught my eye.  It’s a solid color, it’s my favorite dress pattern, it’s red, which I’ve traditionally avoided wearing, but lately have been told I should wear it more often.  So that seemed like a perfect dress to copy.  Especially since I even already had fabric on hand.


I had recently picked up some Rose Red Poly/Lycra Abstract Jacquard Double Knit from Fabric Mart with the intention of making myself a red dress.


And here’s a photo I took of it to show off the texture.


I’ve made the Kitschy Coo Lady Skater several times, but I tried something a bit different with this one.  The fabric is a bit scratchy, so I decided to line it with something that would feel better against my skin.  So I chose a very soft black and red animal print rayon blend jersey that I picked up from a flawed fabric bargain lot from Girl Charlee.  At first I only planned to line the bodice, but as I was constructing it, I thought about how the waist seam would end up being itchy and the dress being on my legs sitting at my desk all day might bug me too, so I cut the skirt pieces too.

I sandwiched the pieces together at the waist seam, as I did with the plaid version I made at the end of last year.  I didn’t line the sleeves, but my insides were looking so good that I thought maybe I would try a French seam to attach the sleeve.  This red fabric is pretty thick, so both of those plans were just terrible ideas.  Granted, I didn’t clip the curve of the sleeve seam, but still, the thickness of the French seam made the shoulder look bumpy and very bad.  Luckily, I only did one before I realized it was a mistake.  As for the waist seam, I just felt like the seam was too visibly bulky with all 4 fabrics joined together like that, and all 4 steam allowances all bunched up together.  So I started ripping out seams.  Which added a week to this project.  Mostly because I pouted some for a while at the fact that I had to do so much seam ripping and also because the lighting in my comfy spots are terrible for being able to rip out stitching that so closely matches the thread to the fabric.  But I did find some daylight times to be able to do it eventually.

Once I reassembled the dress with the lining hanging completely separate, the dress looked so much better constructed than it did previously.  And I just love how it looks on the hanger with the black and red animal print peeking out.

Here’s the finished dress inside out on my dress form.


I even added French tacks to keep the lining from shifting around too much.  I followed this tutorial from Ohhh Lulu.


And here I am wearing it out in the driveway.

My husband and I walked down to the park at the end of the street to take these photos.  Not many turned out very great.  Here’s me doing my best Vanna White impression.


And this one was me trying to act shocked in response to my husband making some crack about how he’s stalking me in the woods.  My new glasses have transition lenses, so I don’t really notice them changing and am always surprised to see I’m wearing sunglasses in my photos.  haha.


That 70s dress

I’m not sure why I haven’t posted about this dress sooner.  I cut it out MONTHS ago and it sat there in its gallon Ziploc on my sewing table until February when I sewed it up for The Monthly Stitch‘s UFO challenge.  But I didn’t get the photos done in a timely manner and I missed February by a week and didn’t want my first post there to already be late.

So now here I am finally posting about this dress.

 This is the SisBoom Meghan Peasant Dress made out of a cotton jersey blend knit from a past knitfix.

The fabric definitely screamed “70s!” at me.  So I thought this pattern would be good, especially with the bell sleeves.  I actually ended up chopping several inches off the length because when I tried it on before I hemmed it, I thought it would look the part better as a mini.

It came together pretty fast.  I’m not sure why I took so long to sew it up.  Probably because it called for bias tape for the sleeve gathers and that sounded like work.  But it was super simple.

I have yet to wear this dress in public.  I imagine I eventually will.  I’ll probably pack it with me on our trip to Disneyland this next week with some shorts to wear under it, of course.

McCall’s 6801

Several months ago, I started making view C of McCall’s 6801 from a cotton lycra fabric that I got in my knitfix bag in July.  I got to a step that needed to add seam binding to the side seams and didn’t have any, so it got added to the UFO pile for a while.  The February Monthly Stitch UFO challenge made me fish it out and finish it.

I made the size according to my measurements and sewed it up exactly according to the instructions.  But the dress ended up being way too big.  So I took it in quite a bit on the side seams and I ended up just cutting off the seam binding anyway.  I think the gathers on the side would be held in place much better using the seam binding, but I don’t mind the way it is now.

The back neckline gapes some. But it could just be stretched out from trying it on so much.  I steamed it a bit and it seemed to shrink up, but I took it off and put it back on a couple of times since then, so it may have stretched back out again.  It’s hard to tell.

The lining was cut from a firm nylon Spandex blend fabric and I took it in slightly more until it was smaller than the outer dress and could help smooth things out so the dress could skim over my lovely lady lumps.  I think it worked out pretty well.

I am quite pleased with this dress and my husband likes it too.  I plan to try it again in a smaller size in the future before making any pattern alterations.

Evolution of a ballroom dance gown – part 4

I’m not sure why I didn’t write this post sooner.  Well, better late than never, right?  Warning, it’s fairly wordy, so beware!

The dress (I nicknamed it “Modern Nature” after the song I used for the solo I made it for) as it is shown in part 3 of this series is the version I wore to the Seattle Dance-O-Rama (DOR) in 2014.

After DOR, my dress more or less sat for several months untouched.  Then, in early 2015, I had a Quickstep routine that I planned on performing, so I decided to do some improvements to my dress.

I never really liked the yellow fabric I used for the skirt godets.  It was thin and had glitter on it and it stuck to itself as well as the green ITY fabric of the body and was just generally very annoying.  But it had been a last minute choice from JoAnn’s where there weren’t a lot of options that I liked and I didn’t have the time to look around.  So, I literally cut them out.

Since then I had been ordering some various fabrics from Fabric Mart and Fashion Fabrics Club that I thought might be nice for a future ballroom gown.  So I had some “Cobalt/Lime Animal Stripe Chiffon” in my stash that I thought looked nice with the green fabric of the main dress.  The chiffon was too chiffony to work well by itself.  I happened to have some green crepe back satin from JoAnn’s in my stash as well.

When I layered that under the chiffon, it was so pretty; the shine of the satin really came through and gave the chiffon some dimension (and stability) that it didn’t have alone.  I used a regular glue stick to baste the chiffon to the satin to keep it from shifting around while I cut it.  I cut new godets a bit bigger this time around and attached them in the seams that previously had the yellow ones.

I then glued more rhinestones until I had a sort of blobby belt going around my waist.  I’m not super happy with how they show up from a distance, but live and learn, right?

I wore my dress in progress to a couple low key events (the basting, cutting and sewing was surprisingly time consuming and I always put things off to the last minute anyway.)  But I had the godets fully attached for an in studio event as shown in this video:

It’s funny watching a video of yourself dancing wearing a dress you made yourself.  There’s just SO MUCH to pick apart!  These are the things I noticed right away:

  • The skirt flares out from pretty much my waist and it should be closer to my body down through my hips.
  • The panels in the center front and center back look too wide without godets in them.
  • The sleeve length is odd.
  • It doesn’t sparkle enough!
So, I went home and took each seam in quite a bit for several inches below the waist and cut the front and back panels in the center to add godets.  That helped fix the first two problems.
Another problem that I already knew about from when I wore my dress at DOR was that after I danced several heats in a row, I would start to sweat and the sweat started to show through the dress, starting with under my arms, but only on the sleeve, not the bodice.  The bodice of the dress has two layers of the green ITY and a swimsuit lining, so it’s three layers, but the sleeves were only a single layer of the green ITY, so there wasn’t anything to soak up the perspiration other than the outer fabric.  This is something I definitely need to account for in my future dance dresses.
So, I removed the sleeves completely and cut the sleeve out of the swimsuit lining to the length I wanted them to be so that I would have lined sleeves.  Unfortunately, I didn’t have enough of the green fabric to recut the sleeves.  I experimented with the idea of trying to put a stripe of the chiffon + satin fabric across my forearm to make the seaming there look more intentional and to also tie that fabric in to the upper part of the dress, but I couldn’t figure out how to make a woven and knit work together the way I pictured it in my head.  Instead I just sewed on the amount of green to make them into long sleeves ending with a point.  I find that in my videos I don’t notice the seam across my forearm.
Some photos of me in the backyard.

Here are some in-action photos from the Banff DOR I participated in back in April 2015.

And here’s a video from the event.

Watching these videos, I still think I could take the side seams in a bit.  But I think I’ve lost some weight since last year too, so I’ve been thinking I might more or less scrap  this dress.  If I did, I figured I could cut out the fabric around the rhinestones into interesting shapes and use those as appliques on a future dress.  I do enjoy the style of dresses that have more dimension than this one does, so I’d like to incorporate that into the future.
I still have the pattern I drafted to make this dress, but at this point, I’ve made so many alterations here and there over the years that I didn’t notate, that I think it might be easier to just start the entire drafting process over again for my next dress.

Next on the agenda is to put together a rhythm dress, hopefully before I go to the Portland DOR at the end of April.

Lady Skater in a Pink and Purple Ethnic Ponte de Roma

I have made many Kitschy Coo Lady Skaters and this is the latest.  I cut this out several weeks ago and finally got around to sewing it up last Friday.

I love this pattern so much.  To call it TNT would be a huge understatement.  It’s my Go To dress, especially if I only have 2 yards of a fabric.

I had heard that making it in Ponte de Roma makes a very nice draping version and I’m quite pleased with how this one turned out.  I have a couple more ponte fabrics that are destined to be new Lady Skaters.

After I made my first version, I shortened the bodice by an inch and made the shoulders a bit more narrow, but those are the only alterations I did to the pattern that I have used over and over.  Oh, except adding pockets, of course.  I use the pocket piece from my Colette Moneta to make in-seam pockets and place them 4 inches down from the top of the skirt piece.

This dress is a fast make and I can practically do it with my eyes closed by now.  But I love how the fit and flare style looks on my body, so I’m always happy to have another to add to my wardrobe.

« Older posts

© 2026 Clothing Hacker

Theme by Anders NorenUp ↑