My husband and I had a Hawaiian vacation the first week of December last year and I had a long list of items to sew for that getaway that included a lot of easy to wear beachy dresses.
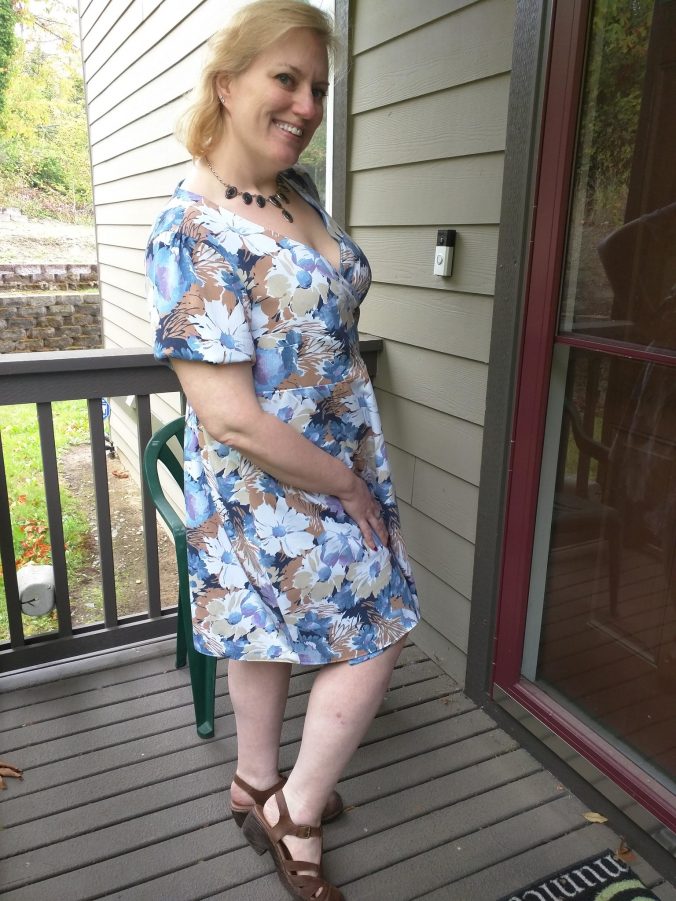
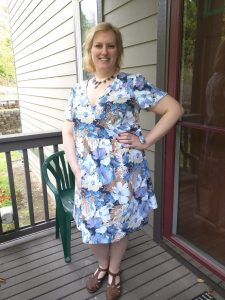
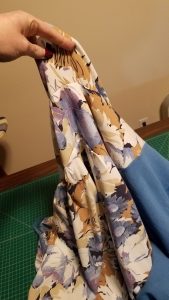
I love a good wrap dress and the Seamwork Reggie has been on my ToSew list for a while, so it made its way onto my vacation list. But, because I can’t ever just leave well enough alone, I decided to make it fully reversible.
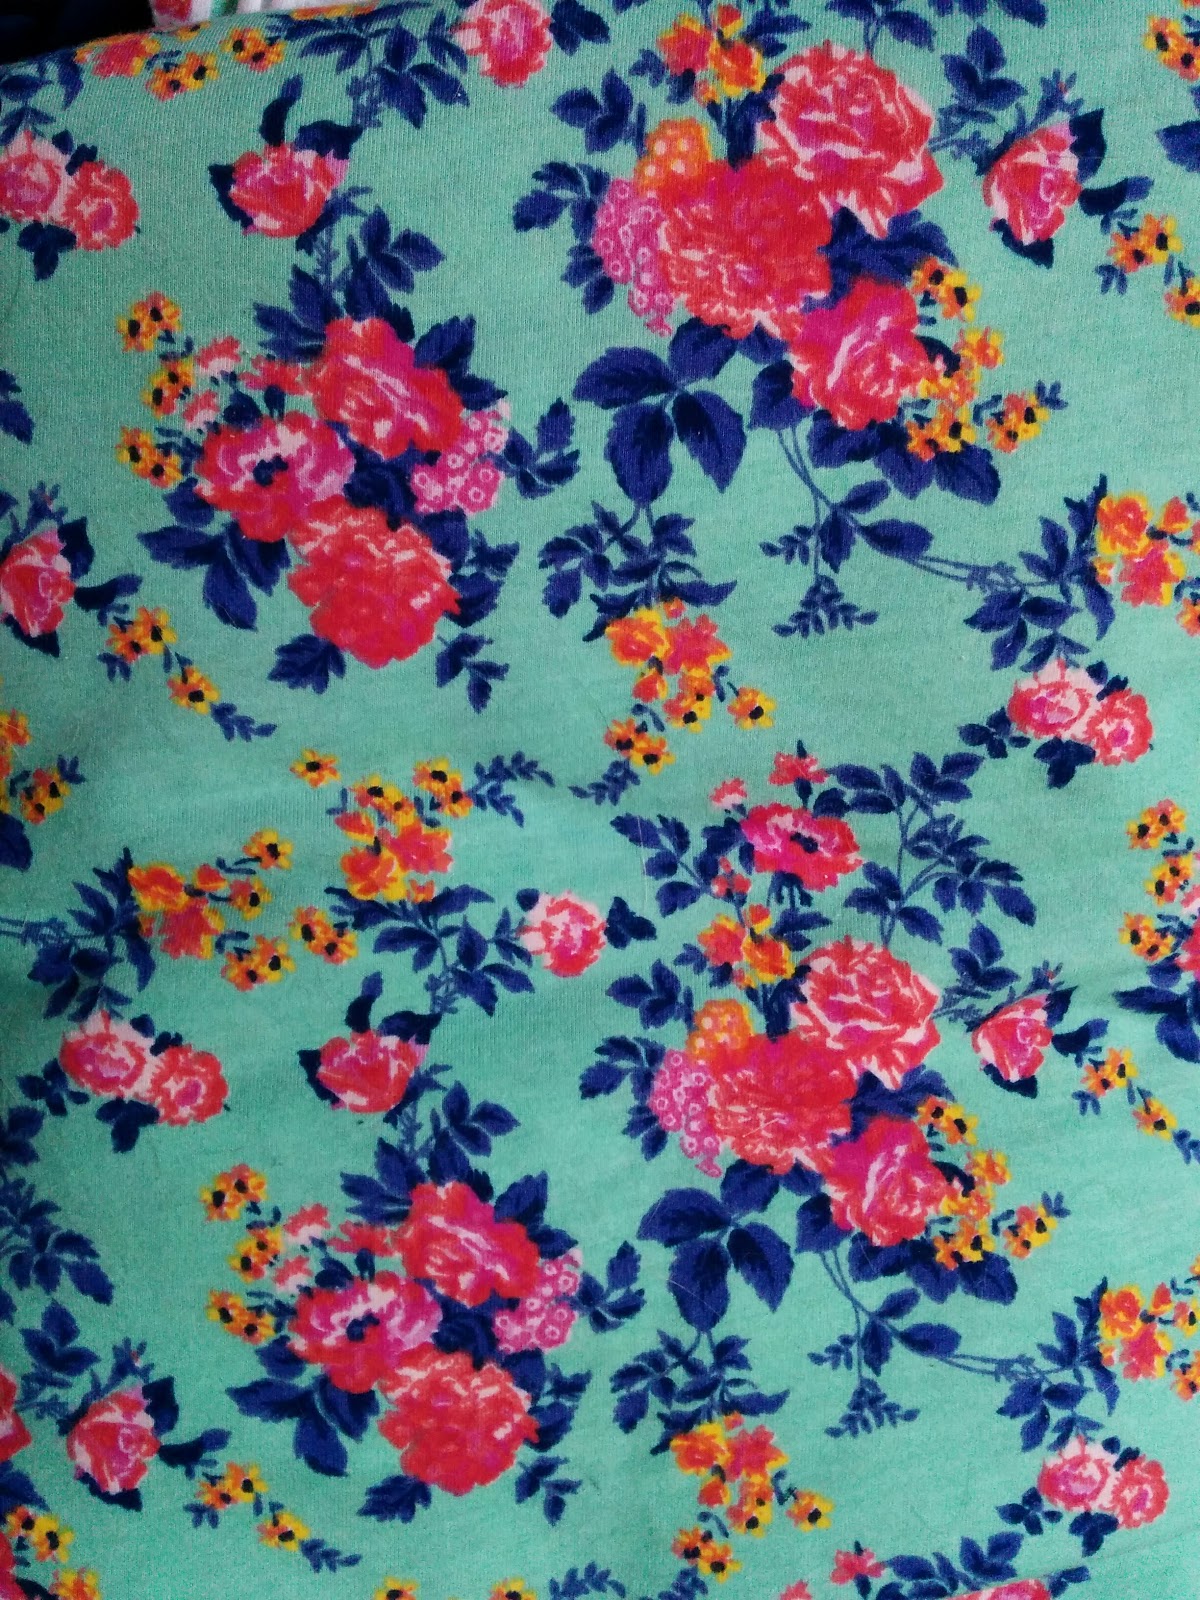
The solid blue is a cotton gauze that I had long enough to forget where it came from and the floral is a mystery fabric that I got from Seattle ReCreative. It feels mostly cotton, but it could be a blend and it has a lovely texture to it.
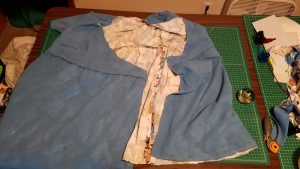
I basically just made two copies of the dress, omitting all of the facings and adding the waist tie to the opposite side waist seam from where I basted the front tie on both copies, then put both dresses together, right sides together and sewed with a 5/8″ seam allowance. Except for the hem, which I sewed at 1 ¼”.
Then I trimmed the seam allowance all the way around with my pinking shears then turned it through one of the arm holes. Turn the sleeve hems under and topstitch everything all together and voila! Easy peasy!
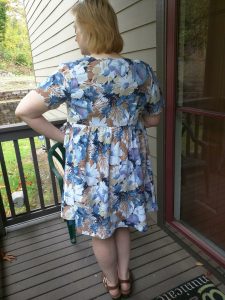
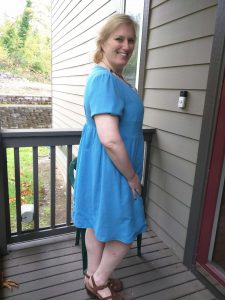
As it turns out, the dress is a little big on me. It is still wearable, but the way the ties are attached, I can’t get it to be more snug. Because of that, I don’t wear it much and I only actually wear the print side.
Even though this one didn’t turn out as great as I’d hoped, I would like to make some more reversible dresses. They are nice for traveling, although I don’t seem to travel as much for work these days. Have you ever made a reversible garment?
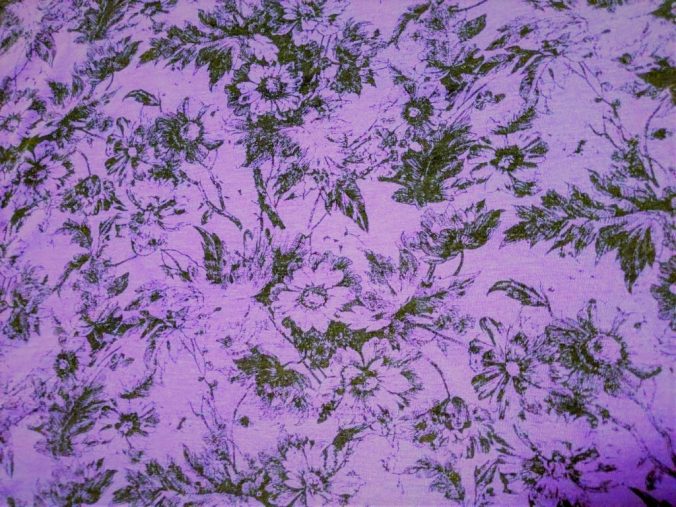
I wanted to make a new knit dress because it’s been a while since I’ve made a new everyday dress, but I was having decision anxiety over what to make and which fabric to use. So, I made my husband come into my sewing room and pick a fabric for me to use. He picked this lovely purple cotton lycra knit that has been in my stash long enough for me to not remember where it came from.
I only had 2 yards, so that limited my pattern selection without needing to color block. I keep my patterns indexed in Evernote, and one of the tags I use is “2 yards or less” to indicate that I can make the pattern with less than 2 yards. So, when I filtered my pattern list on “dress, pdf, knit, 2 yards or less” I got 14 hits. Several of them are ones I haven’t even made yet, so I need to fix that someday, but right now, I was looking for something I knew I could make in a day. So, I decided it was time to make my old favorite TNT Lady Skater pattern.
I have had great love for the Kitschy Coo Lady Skater and have not bothered to hide it! I hadn’t made one since I lost weight and I had originally made some changes to the pattern to get a better fit, so I actually thought this might be a good time to find a different pattern for this simple dress silhouette to try out. But I actually couldn’t find another fit and flare knit dress that could be made with less than 2 yards.
So, I reprinted my beloved Lady Skater, which was the first PDF pattern I ever made, and realized how far along PDF patterns have come since that one! The pattern doesn’t have layers, which is fine because at least half the time I forget to go turn off the sizes I’m not cutting anyway. The pattern has no line distinction for the sizes and only uses different colored solid lines. I only have a black and white printer these days, so it was very obvious that the pattern isn’t great for printing in black and white. Luckily, the pattern is simple enough that it wasn’t actually a problem. But I did go over the size I wanted to cut out with a highlighter anyway, just to be sure.
My measurements fit squarely into the size 6. Previously, I made the size 8, which is the biggest size it comes in. The changes I made to that size 8 were: I took the shoulders in a bit, I raised the waistline by an inch and I did a small swayback adjustment. I compared the size 6 to the size 8 and the shoulders were not as wide as my adjusted size 8 shoulders and the waistline was the same as my adjusted waist on the size 8. So, I decided to just make the size 6 once as is and do all the fitting over again.
I added pockets, using the Colette Moneta pocket piece placed 4″ from the top of the skirt pieces. Because, of course all dresses should have pockets!
The fitting changes I want to make to my next version:
take a bit of width out of the shoulders, because I hate having that little bubble on the top of my shoulder when I lift my arms.
sway back adjustment to remove some of those wrinkles on my back
maybe I need to add a bit of length to the back of the skirt to allow for my bodacious booty.
Do you have any patterns that are worth starting over with?
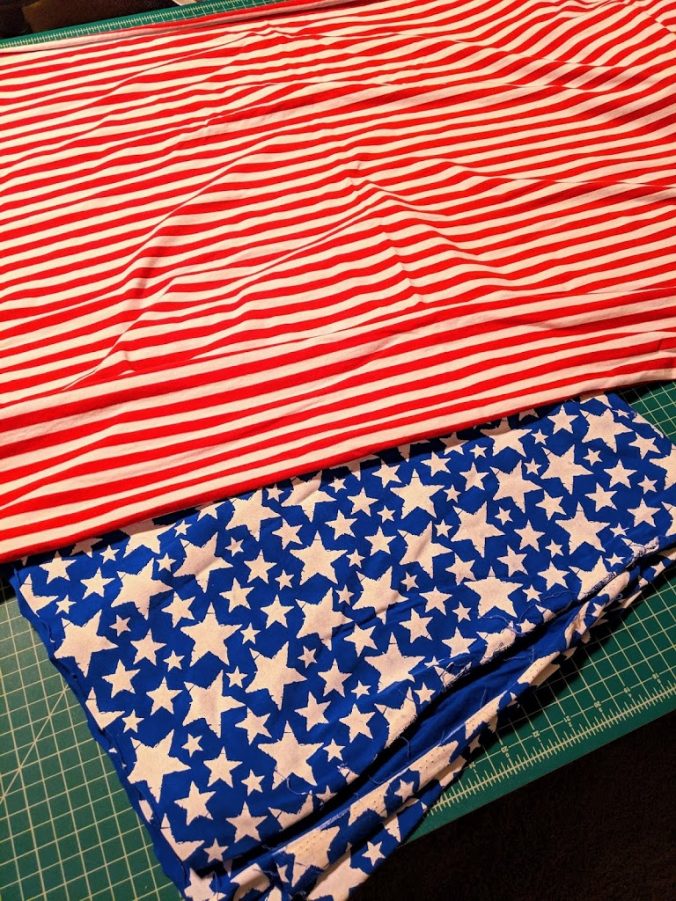
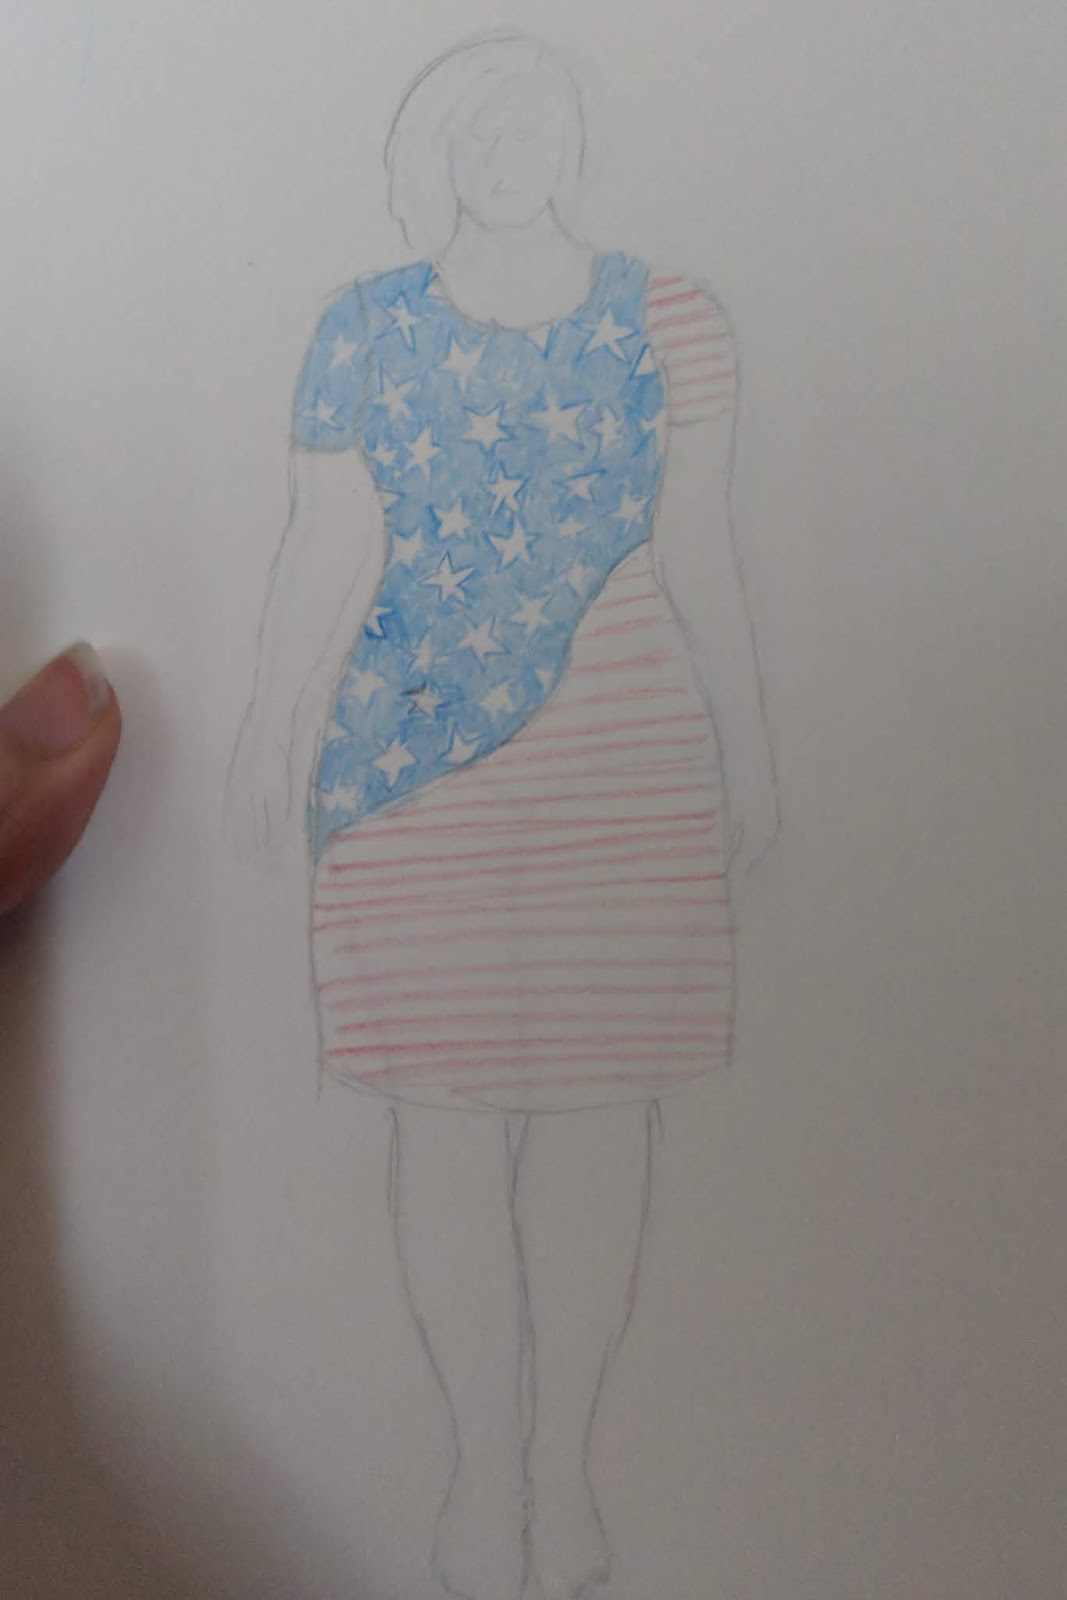
I have been wanting to make a 4th of July dress for some time now. I have purchased a few fabrics for that purpose, some a little more subtle than others. I had a dance party that was encouraging patriotic outfits, so I decided to go quite literal by using these two fabrics:
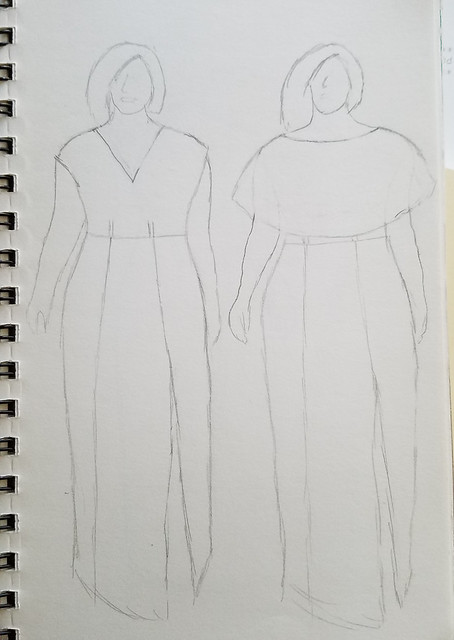
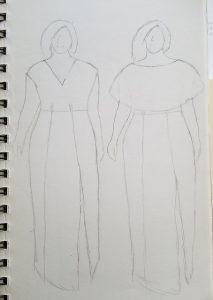
I had visions of what I wanted to make and was planning on using the Colette Moneta. But, as it turns out, I only had one yard each of those two cotton lycra fabrics, which isn’t quite enough for the Moneta. So, I decided to colorblock a Seamwork Mesa again and created a sketch of what I was envisioning.
Once I had a sketch that I liked, I basically just followed the same steps I did for my rainbow Mesa a couple years ago. The main difference in my process this time is that after I printed out two copies of the front dress piece, and taped it all together to make the full front piece, instead of cutting up that piece, I just drew in the lines I wanted for my two sections and I traced each piece onto Swedish tracing paper, then added the seam allowances. That way I still have that full sized front piece to use for the next time I color block the Mesa. (Spoiler alert: I already have the next one planned and sketched out.)
Ripley loves to help!
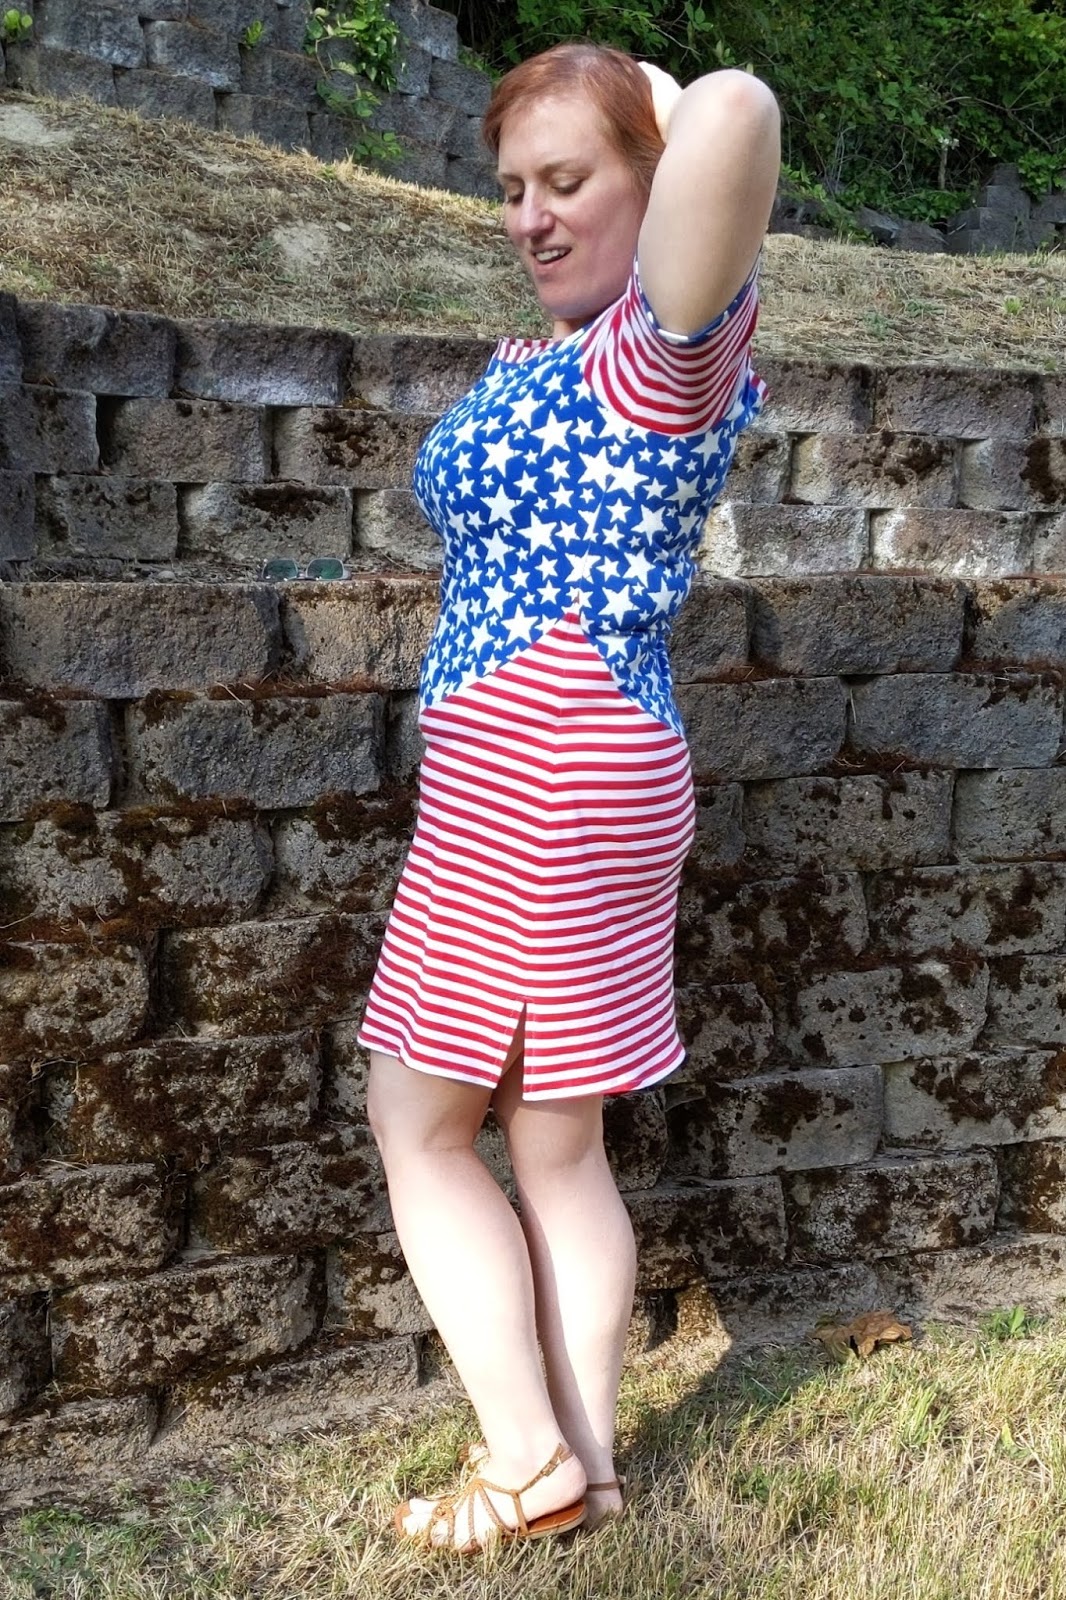
I cut a neckline band out of the blue and white, but then thought it might look cuter with a red and while one, so I laid it out to see and decided that was the way to go.
I also usually put bands on my sleeves too, so I just made them opposite on each sleeve too. I really love how the dress turned out. I was a bit concerned that the “waving” line would be hard to get to lie flat, but I didn’t have any problems with that at all.
I managed to get the stripes to line up pretty well on the left side. The right side, not so much, but it’s the shorter seamline for the stripes, so it’s not all that noticeable and I’m not concerned about it.
I like that I can just cut out each piece double with this pattern to make the front and the back of the dress without needing to modify each pattern piece separately.
We didn’t leave the house, other than to take these photos on the actual 4th of July. But I went to my party on the 5th and got a ton of compliments. I like the way this dress turned out and I’m glad I finally have a patriotic outfit to wear for when the occasion calls for it.
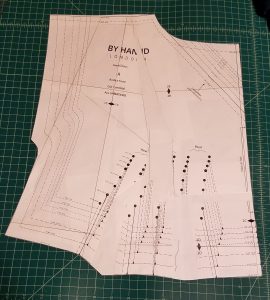
I have a special place in my heart for the By Hand London Anna. First of all, my daughter’s name is Anna, so that alone would make me interested in taking a look at anything named after her. Plus, when it first came out, all the photos I saw were stunning. I’ve made 3 versions already and I was incredibly pleased with each one. So, when I needed a formal gown and didn’t have a ton of time to mess with fitting, I decided to go back to my beloved Anna since already I knew the pattern pretty well. I wanted to add some extra drama, and I sketched up a couple quick silhouette options, including one with a neckline capelet and had decided to go that route.
Previously, I had to grade up a size to a ~US 18 and I didn’t bother doing any other fit alterations. But I’ve lost a significant amount of weight since I last made an Anna, so this time around, I decided to make a size US 14 with a 3″ FBA. I read up quite a bit on other ladies’ experience with doing an FBA on Anna and decided to not do it the way the BHL blog recommends, since I was adding a large amount. I just used the normal Y method that I usually use, then rotated the dart and absorbed it into the two pleats, trying to distribute it equally. It’s very hacky looking, but here’s what the finished piece ended up looking like.
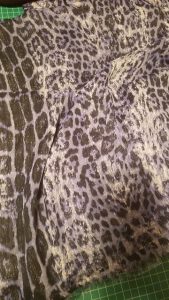
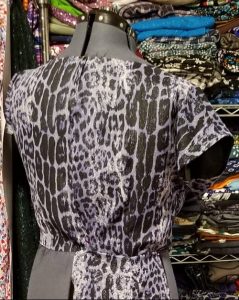
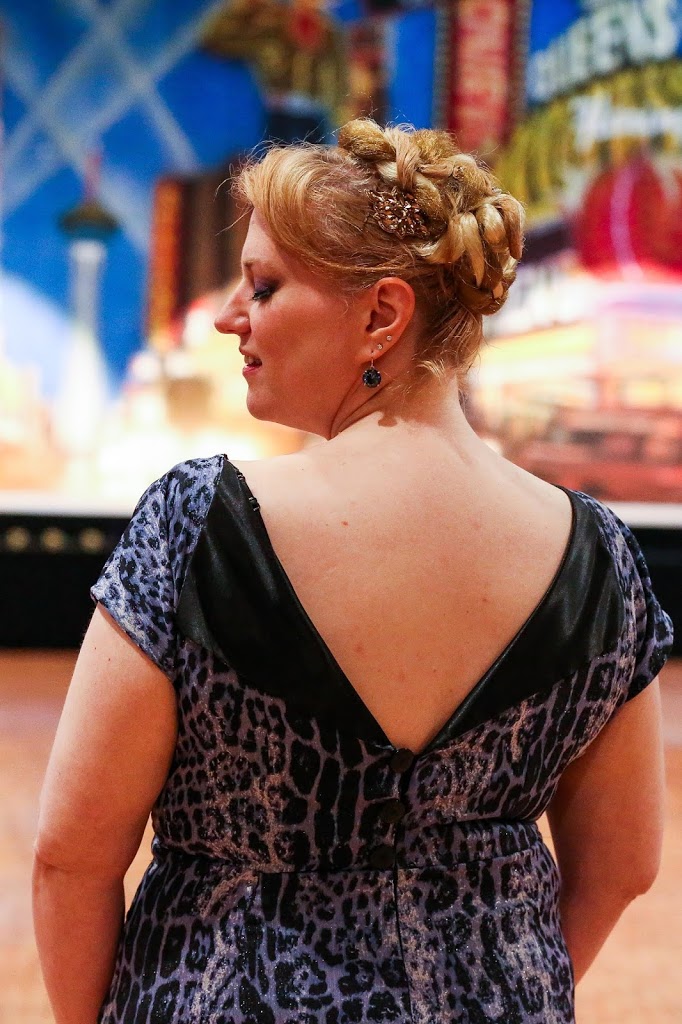
This dress was going to be for the awards dinner of a dance event and it is always a formal evening with a theme and this time the theme was Viva Las Vegas. I had this periwinkle/black/white shimmery animal print crinkle chiffon fabric that was gorgeous and just screamed Vegas to me. So, I decided I had to go with it.
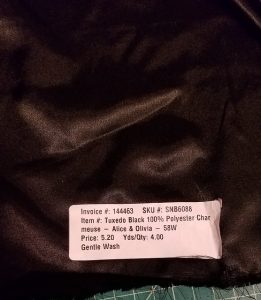
The fabric was too transparent, so I looked through my stash and I found a black charmeuse satin to underline it with.
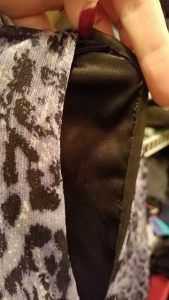
I thought the shiny side would feel nice against my skin, so I put the fabrics wrong sides together and I cut them together and cut a single layer — not on the fold. I also hand basted the fabrics together to keep the chiffon from shifting around too much and I’m really glad I took the extra effort to do so. It made it so much easier once I started sewing all those skirt pieces together! I made cut and sewed up the bodice first and I finished the arm holes with black packaged bias binding, hand stitching it to the underlining layer only, instead of turning and sewing the edges in place as the instructions direct. This is the first time I’ve done it this way, because I usually line my Anna bodice and I also have always added sleeves before, but I really like how clean this method came out.
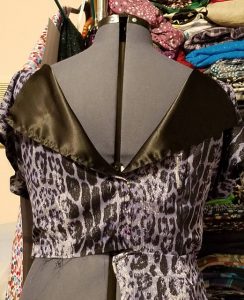
After I made up the bodice, with the neckline unfinished, waiting for the capelet, I put it on my dressform and was looking at it sitting there, already second guessing my plan. I was chatting with a friend/coworker who was working late out of town and sent some photos, she didn’t agree with my plan either, so I started thinking of other ways I could add some extra drama to the dress. I started thinking about cutting a V back and draping some long flaps from the V to create a little back cape thing (yes, I REALLY want a dress with a cape of some sort!!) and so I unpinned the back of the bodice to see what it would look like with a V back….
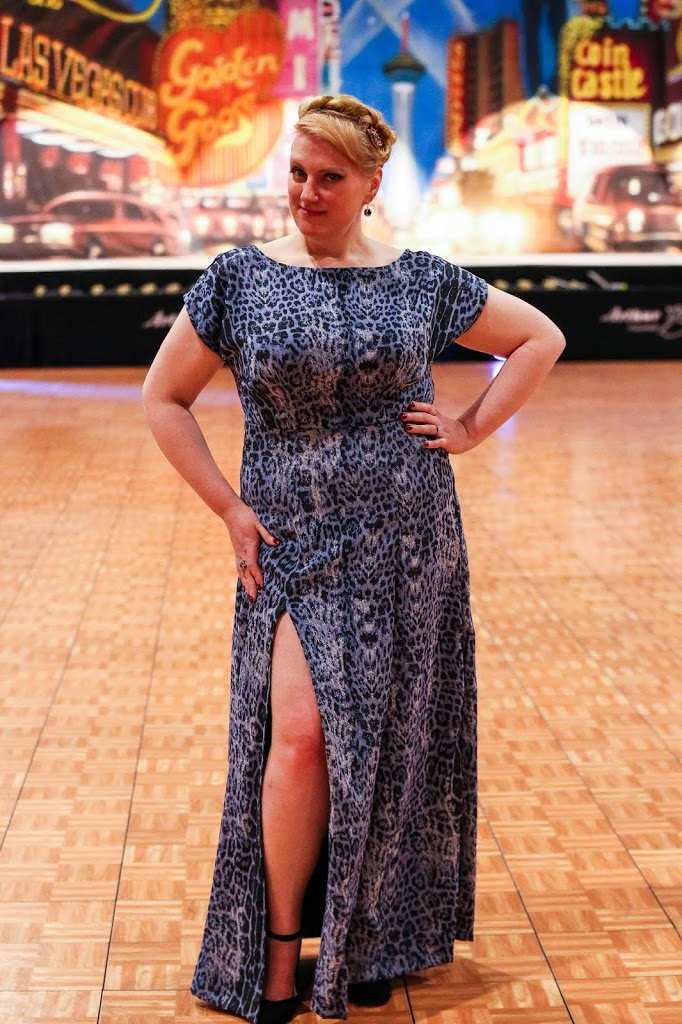
…and the fun side effect of underlining my dress with the shiny side of the charmeuse on the inside meant that the good side showed in the flap that folded out once I unpinned the back. I LOVED IT! So I ran with it. I took out the basting stitches and stitched the two layers together on those edges right sides together and pressed. I finished the skirt, attached it, inserted a shorter zipper and figured out where to insert it where it would cover up my normal bra. I somehow misjudged and had to improvise, because by this time, I was running out of time before I had to pack it up to go to my event and there was no way I was going to unzip that invisible zipper. So I found 3 big, shiny black buttons and added them so that I could close the V a little higher than the zipper did, just to cover up my bra. The top one is the only one that actually does any real work. The other two are only for show. They get a little lost in the pattern, so now that my event is over, I might make some sort of change there. Either use different buttons that stand out more or redo the zipper to be about an inch higher, I’m not sure yet.
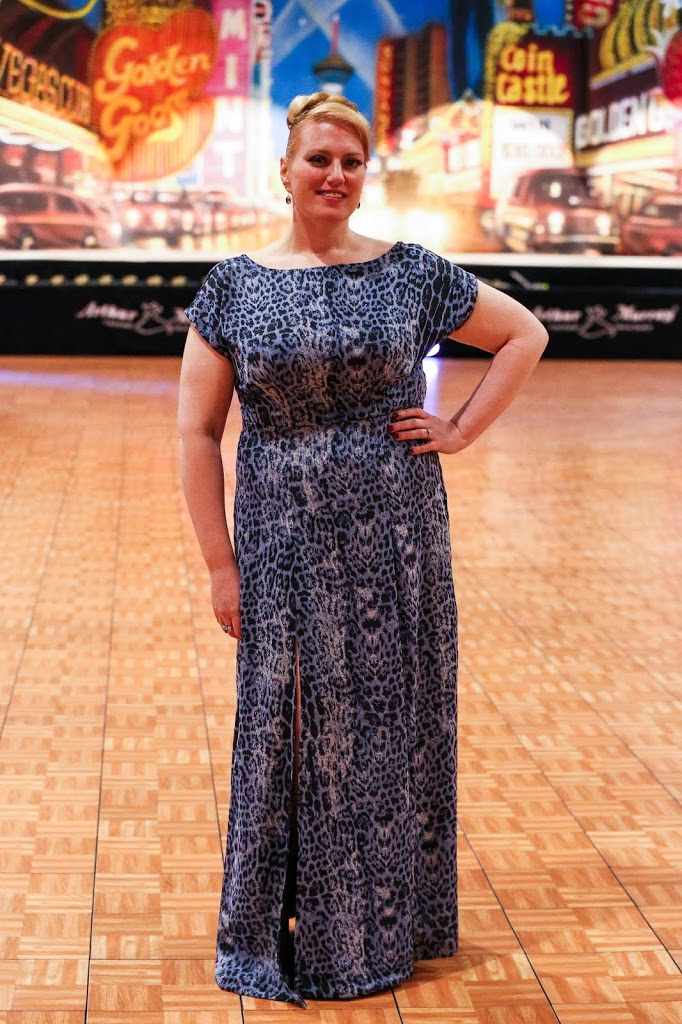
But with no further ado, here are the professional photos that I conned the amazing Heather from Maude Productions to take special for me.
I have decided that this is my new favorite dress. It feels amazing to wear. It’s so slippery and nice against my skin. And the fit feels just about as perfect as it gets. I got several compliments on this dress. People are well used to the fact that I often make my own dresses for these things, so the first question is usually, “Did you make this one?” and I was very proud to say “Yes I did!”
Oh hey! It’s been a while. I have actually been sewing all this time since that last post. I’ve even been occasionally posting my makes over on Instagram. But I miss having a nice write up on my work that I go back to look at, so I decided to dust off the ol’ blog and start posting again.
I am a programmer, not a graphic designer, and I have never really been happy with the look of my blog. So I’ve been changing it up over the past couple of weeks in anticipation of getting back into actually using it again. I am liking this look much better, but there are still things I’m not happy about and I will still be doing more work to improve the look and functionality. Please leave a comment if something doesn’t work right (and what device/browser you are using) or if you just have any suggestions or feedback.
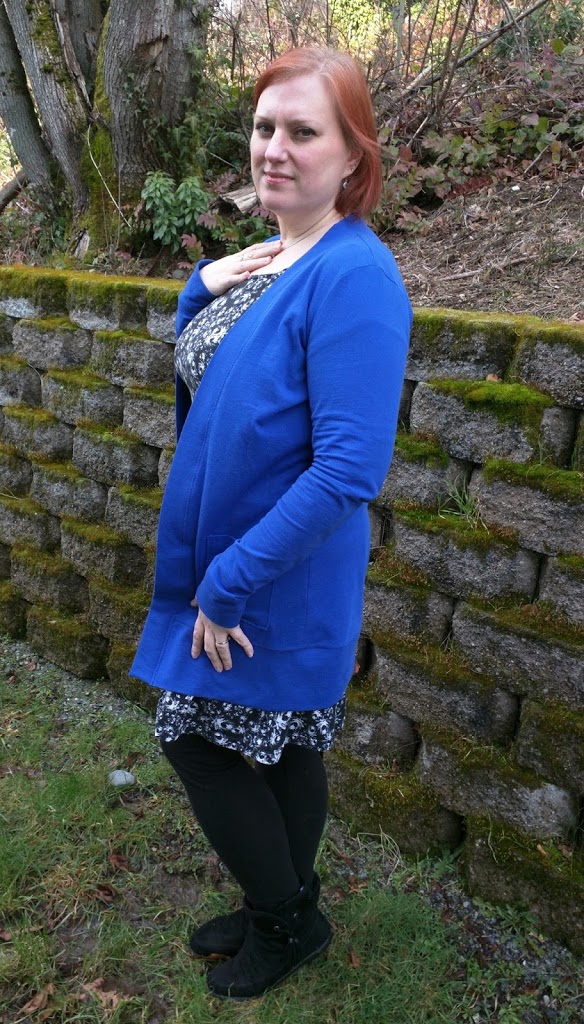
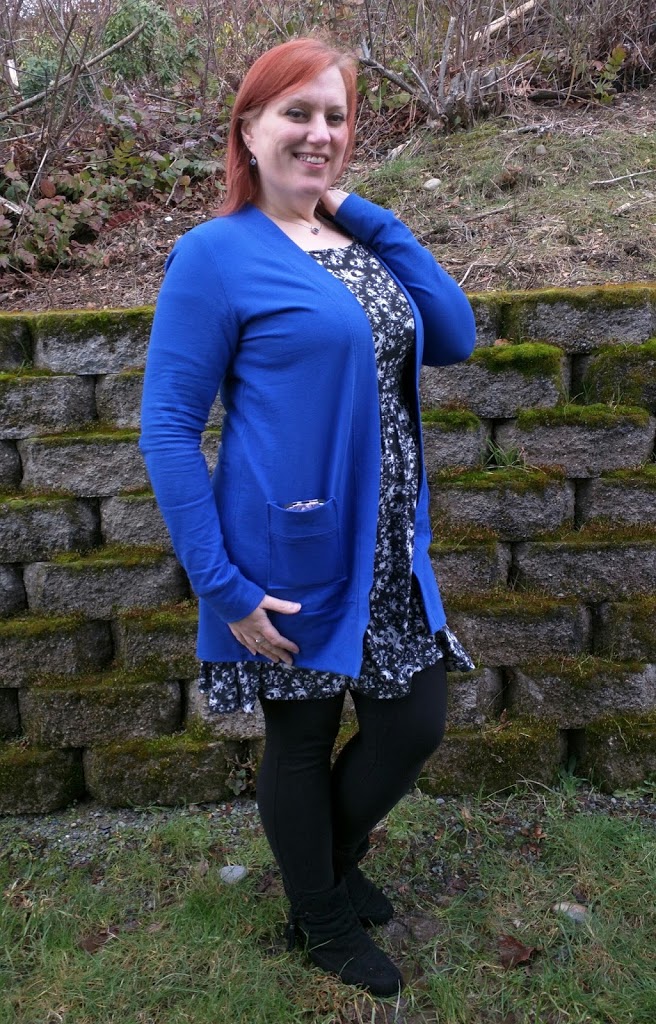
I haven’t posted in a while, mostly because I haven’t really made much that I’m super proud of. Since my last post I made another Blackwood Cardigan just like my blue one but this time in a lovely mango sophia double knit that I picked up from the sewing expo. I do love that sweater and both of my Blackwoods get heavy rotation in my wardrobe and will likely be seen in my MMM photos this year. (In fact, I’m wearing my blue one today.)
I also managed to throw together a couple costume pieces that I’m definitely not proud of, but got the job done. And as it would be I don’t have any photos of either costume, but I do have this video of my Ursula dance wearing a dress I put together using the Jalie Bella dress pattern.
I took out a lot of width in the skirt flares and just didn’t sew the panels all the way to the bottom to make the panels somewhat resemble tentacles. I cut two of the center front panel, adding a seam allowance, and hacked it into a sweetheart neckline with a purple netting at the neckline and sleeves. I hacked this together quickly the day of the event and I didn’t finish the edges, so the netting at the neckline has all run. I also split the center back panel so that I could add a zipper to the back. This dress uses the leotard from the same pattern so that I don’t have to wear separate dance pants.
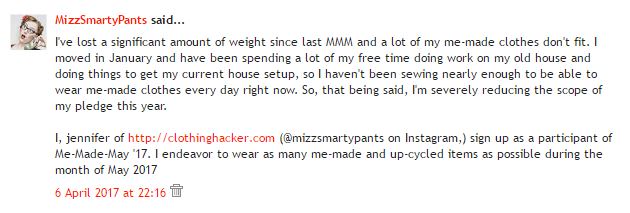
Now for the main topic of my post today. Me Made May 2017! I signed up with a realistic pledge a while ago, and, of course, I hoped (and still do) that I’ll be able to make and/or alter some items to fill in where my wardrobe is lacking this month. But here is the pledge I made:
So that’s my pledge. I’m going to do the best I can. I have a few dresses that still look ok on me — my Monetas and my Wrens. I made my first Wren knowing that I was going to be losing a lot of weight, so I intentionally made it a size smaller than I would have otherwise at the time, so that helped. And I think the Monetas just were snug enough that they just are a little loose now.
Here’s a photo of what I wore yesterday on May 1. It’s the first Kitschy Coo Lady Skater that I made. A wearable muslin. I took a relaxation day after my dance competition last weekend, so I was just lazying around the house and running errands, so I didn’t mind that it was fairly loose on me.
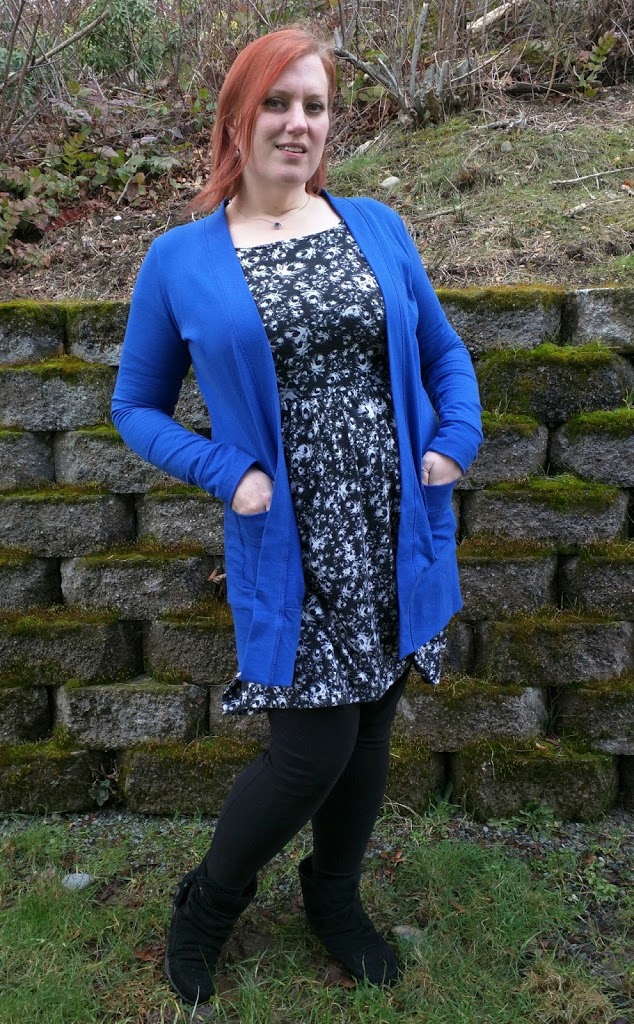
And this is today. A Moneta and my blue Blackwood.
I will be back to document more me-made outfits soon.
It’s been a while since I’ve posted. I’ve not done much sewing lately because I’ve been moving and getting my new house put together and also getting my old house fixed up and ready to rent out. I’m still in the middle of both of those tasks, but when Helen from Helen’s Closet contacted me about testing out her new pattern, I jumped at the opportunity and made it work, even with my new sewing room still in boxes.
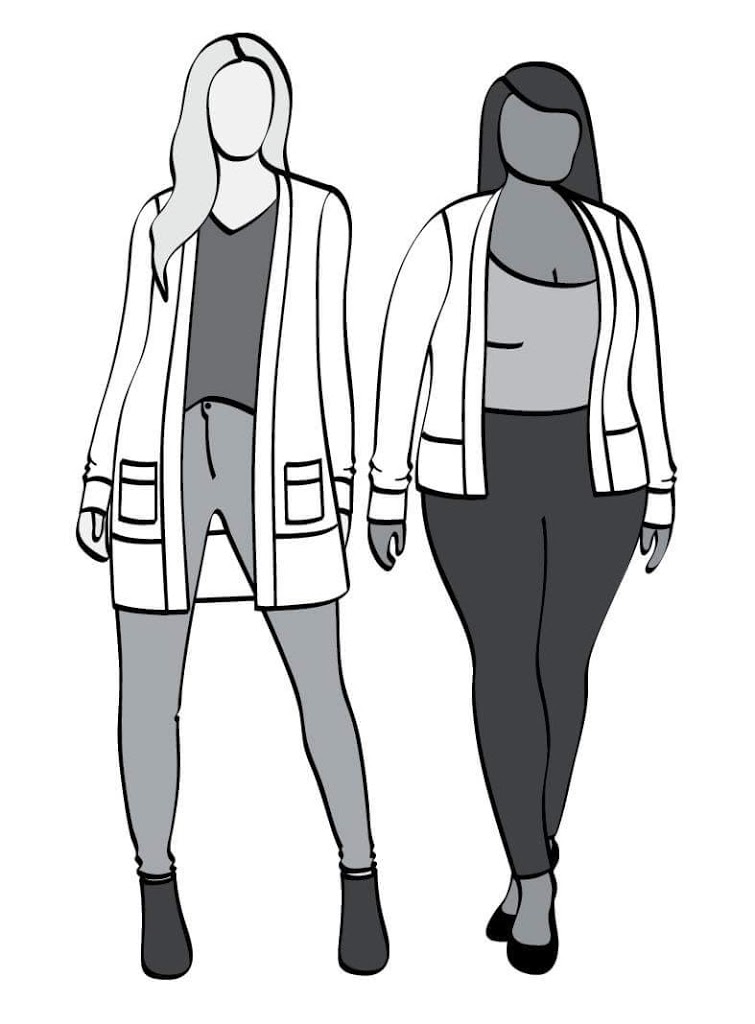
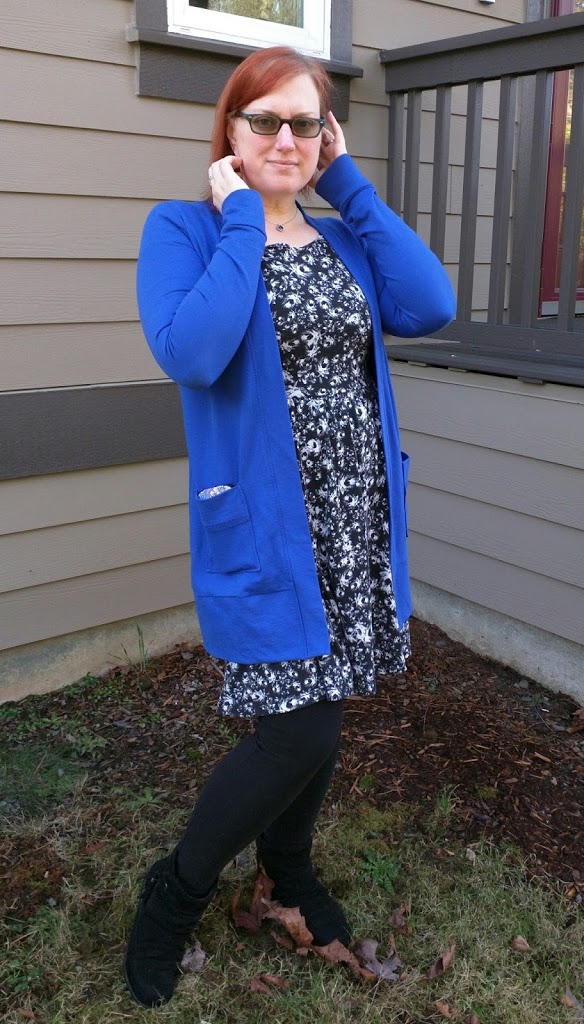
The Blackwood Cardigan is a close fitting sweater that is designed to be worn open in the front. View A extends to mid-thigh with patch pockets, while view B ends at the hips. The sleeves are designed to be long and end mid palm, not at the wrist, which I love.
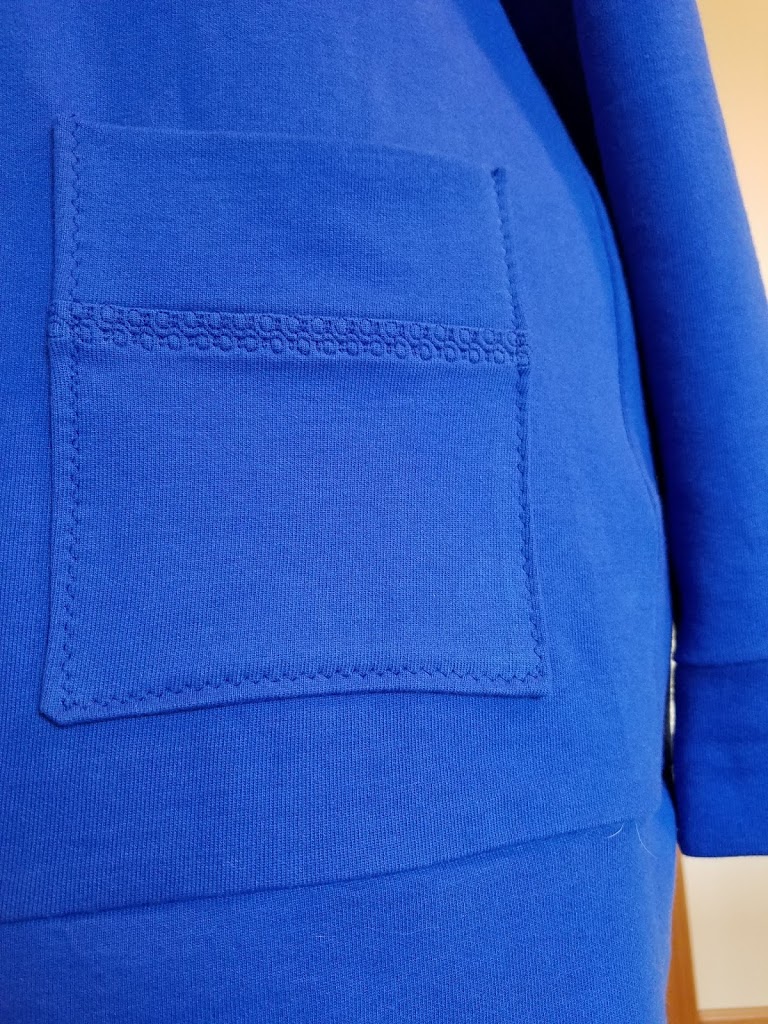
I made view A from a cotton sweatshirt fabric. When I made the pockets, I thought it would be fun to add a little decorative stitching detail.
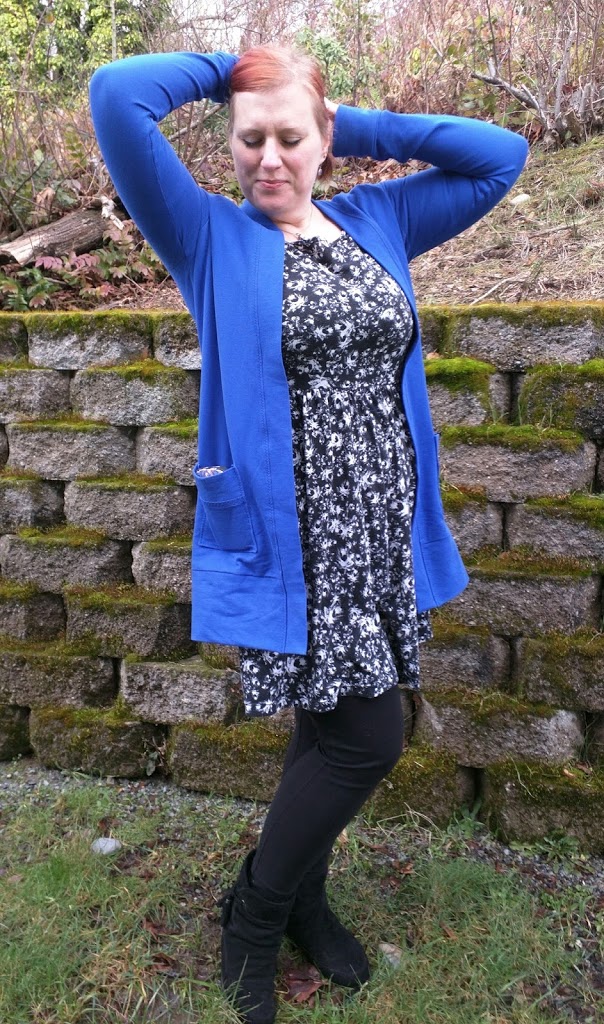
The upper sleeves are slightly tight on me, but also, my fabric barely has the required 40% stretch, so another fabric would be better. However, for my next version I’ll be doing a full bicep adjustment.
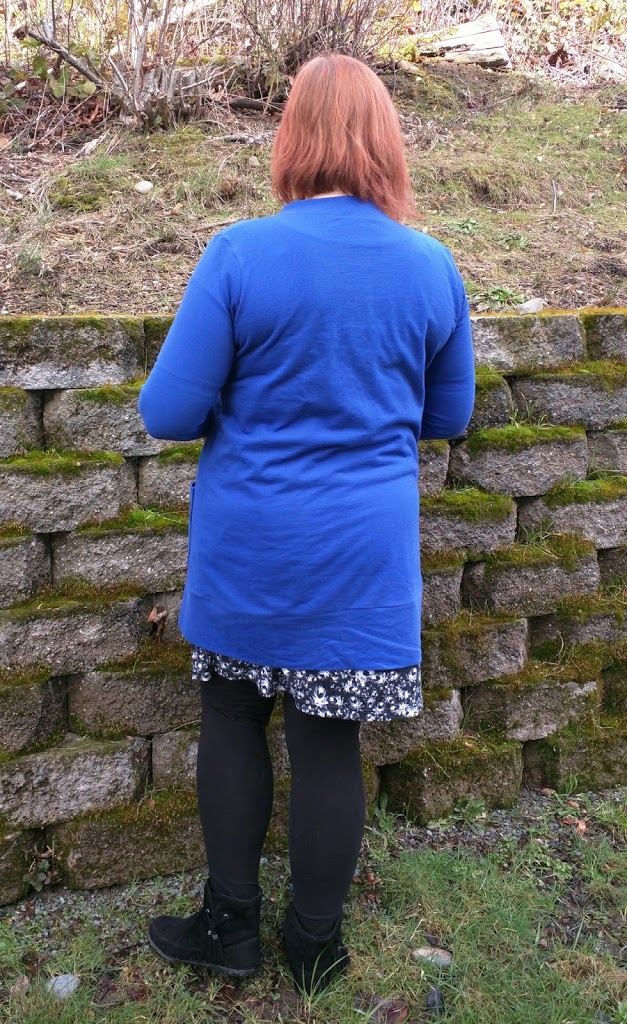
There are a few wrinkles at the lower back, even after trying to smooth it out, so I’m going to see about doing a sway back adjustment, although I’ve never attempted it on a pattern that doesn’t have a waist seam.
I love this sweater and I have worn it quite a bit. I really need to make a few more because I’m cold all the time at work now and other than this sweater, I only have hoodies to keep warm.
The Blackwood Cardigan pattern is 20% off for the first week, so go pick it up. But hurry, because the sale ends March 6th.
I decided to wait until 2016 was actually over before posting my Top 5 of 2016. But I’ve been compiling it for a while. So, with no further ado, here it is.
Top 5 Hits
Sweater dress from the Fabricista Fashion Challenge I love how this dress turned out. I’m a bit heartbroken that it won’t fit for much longer and because of the design, I don’t think taking it in will work very well.
Named Olivia Jersey Wrap Dress I love wearing this dress! It’s pretty much my go-to dress for comfort and looking nice. What I love best about it is that even now that I’m 26 lbs lighter than when I made it, still looks great on me and not baggy like a lot of my other me-made clothes. I really need to make several more of these!
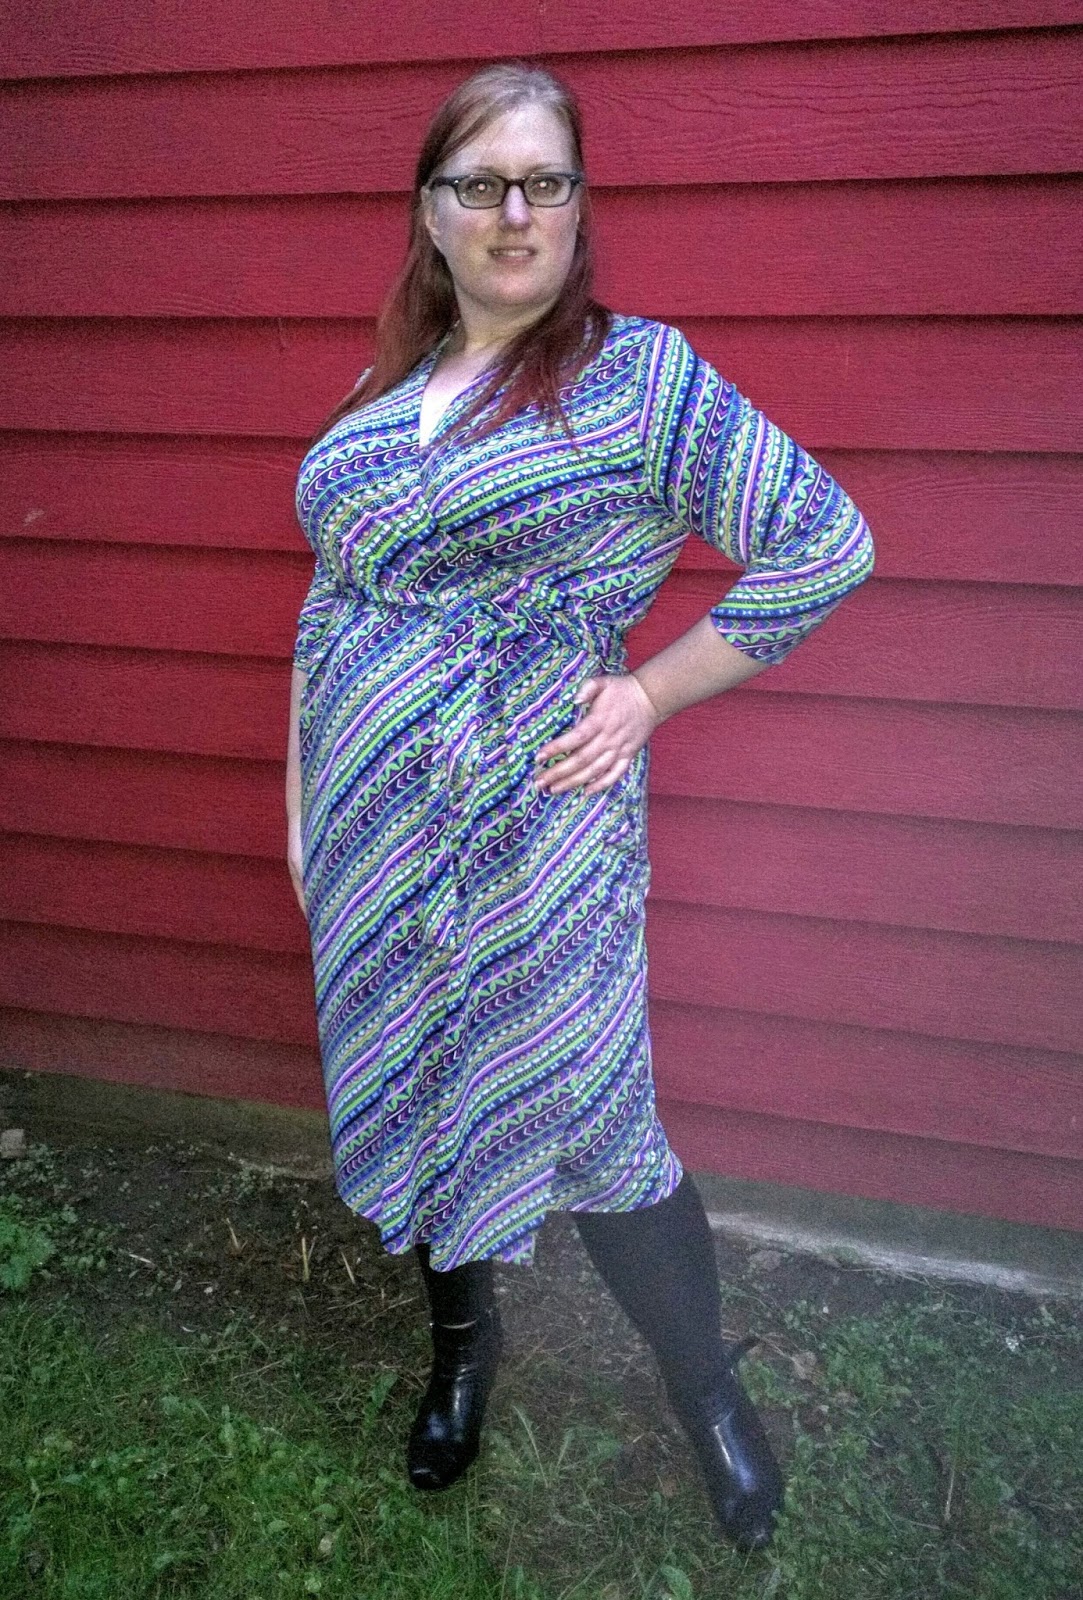
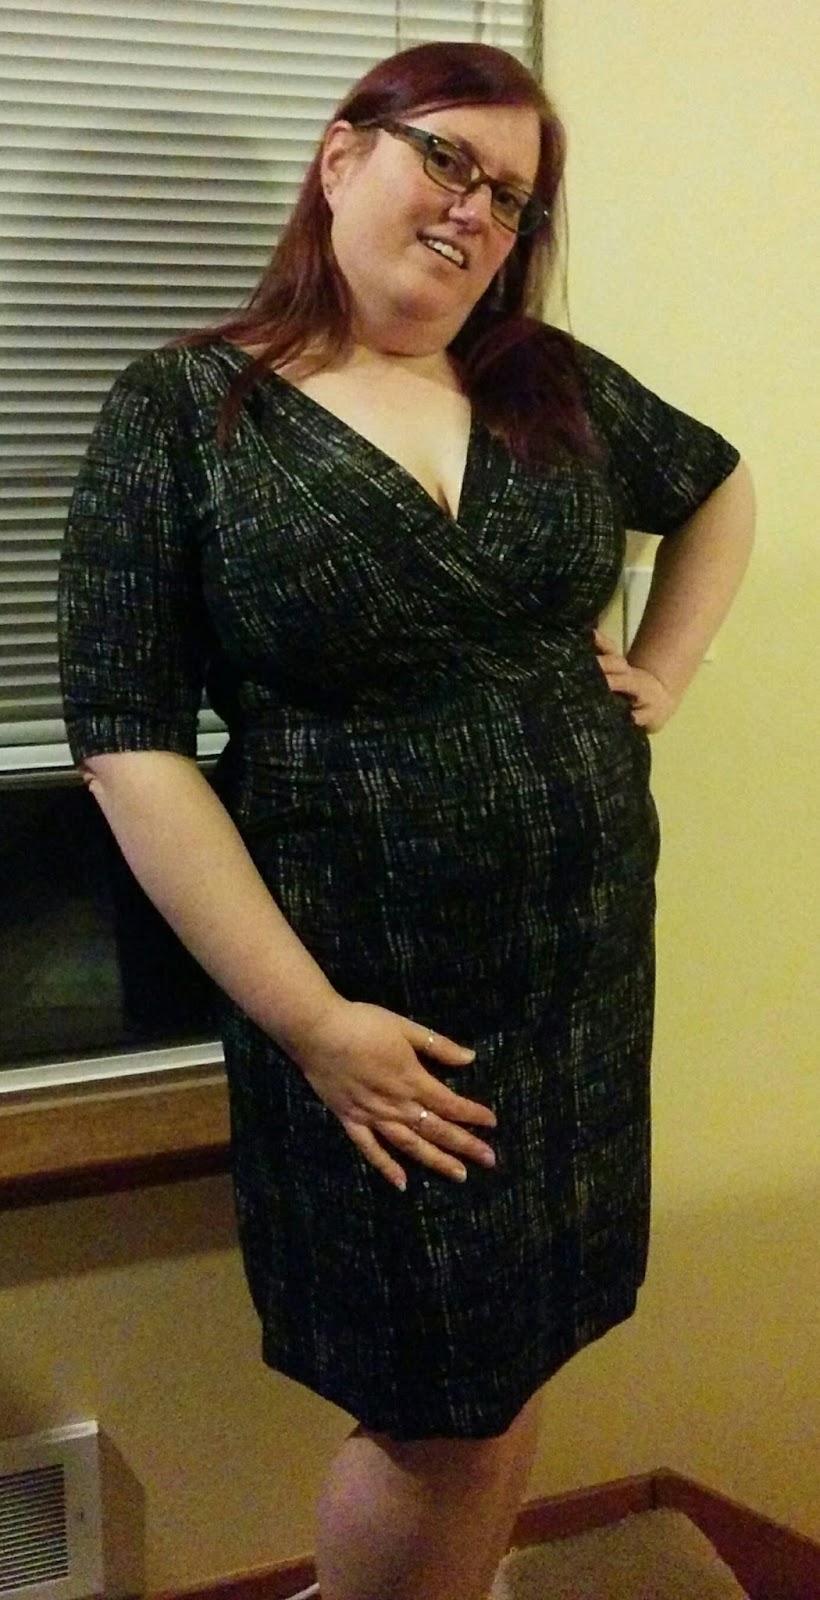
My purple Rhythm dress I’m quite happy with how easy this dress was to put together. Technically I didn’t make the actual dress, since I used a dress I purchased from a thrift store, but the dress was the same style that I’ll make when I use the Jalie Fit and Flare dress pattern and that won’t be much additional work than what I put into this one.
I love the movement of that fringe!
The Bohemian Maxi I just love the flowy movement of this dress. I feel so good when I wear it.
Colette Wren When I made this dress, I knew I was on my way to losing weight and most likely having weight loss surgery, so I intentionally made it a size smaller than I normally would. The fabric doesn’t have a great amount of stretch, so it was very hard to wiggle into when I took the initial photos, but now I love how it fits and looks. I love my Wren enough that I made another for my birthday dress with the gathered skirt (that I apparently never blogged…)
This blouse just didn’t turn out great and it photographed even worse!
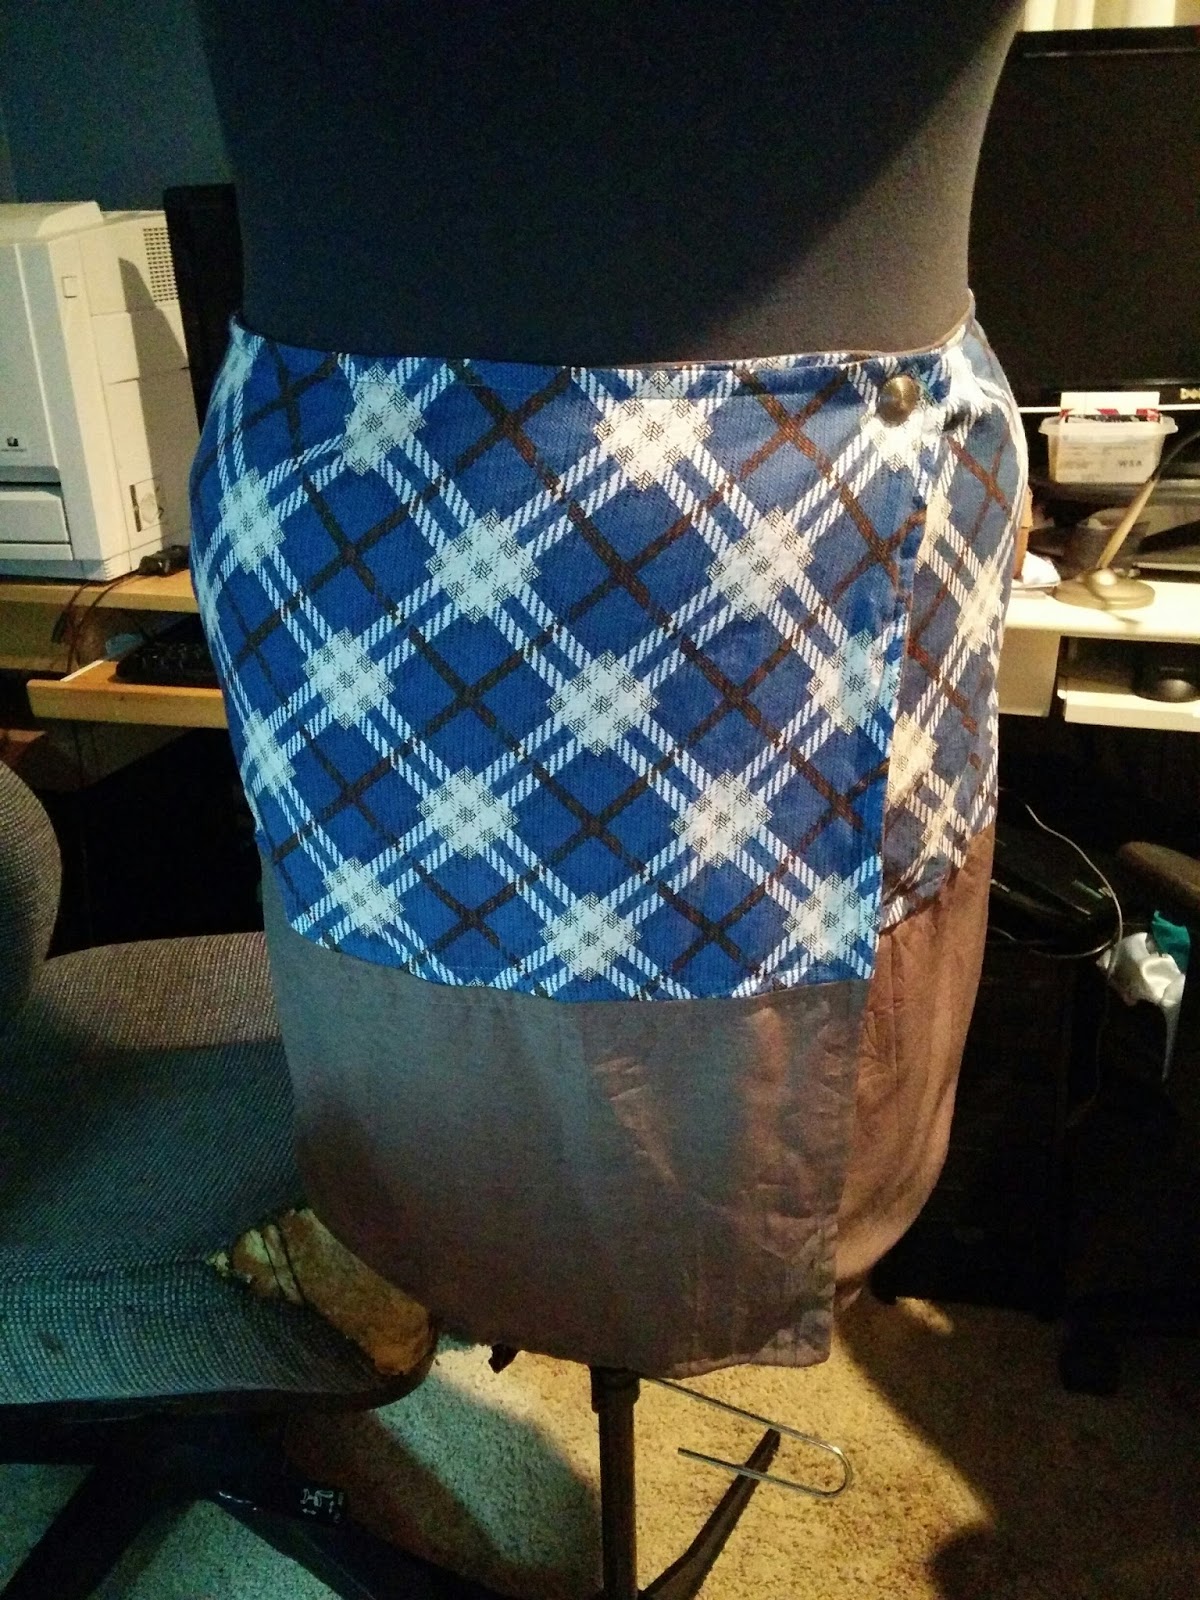
Seamwork Osaka The skirt isn’t terrible and I’d be willing make this pattern again. But the gray fabric was not suited for this garment and I just think it always looks messy. I haven’t worn it once. It’s a shame too, because that plaid was one of my favorites in my stash. Maybe I can salvage it somehow…
The gray fabric just looked terrible.
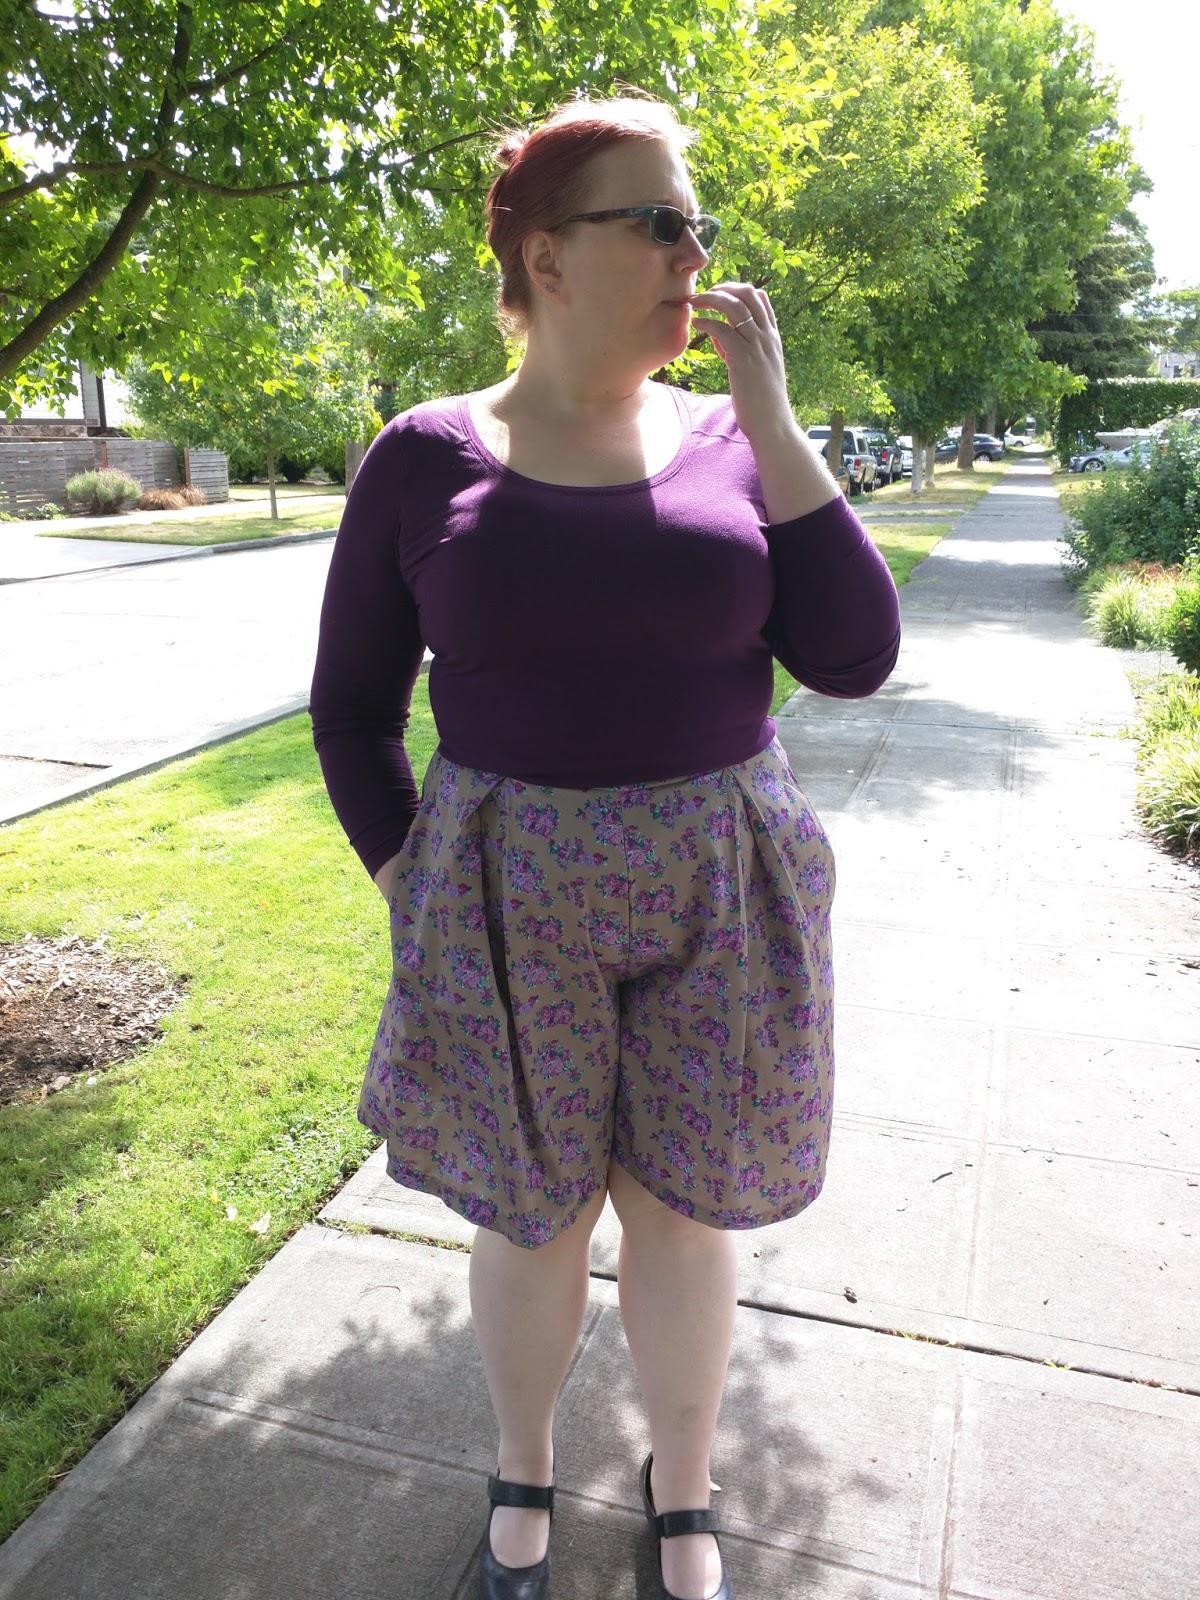
Floral Georgette Winslow Culottes Don’t get me wrong, I absolutely love this pattern from Helen’s Closet. And my second pair I made out of a linen/rayon blend that I did a full tummy adjustment on are perfect and I wore them a lot before the weather turned cold. But the combination of the fit across my big tummy and the lightweight, clingy fabric made that first pair just do a lot riding up in the crotch, which made me uncomfortable. So I never actually wore them other than for the photo shoot. I haven’t tried them on since I lost weight. My waist measurement hasn’t changed much, so they should still fit and maybe the fact that my tummy isn’t so large will make up for the lack of the FTA.
Terrible things are happening in the crotch area..
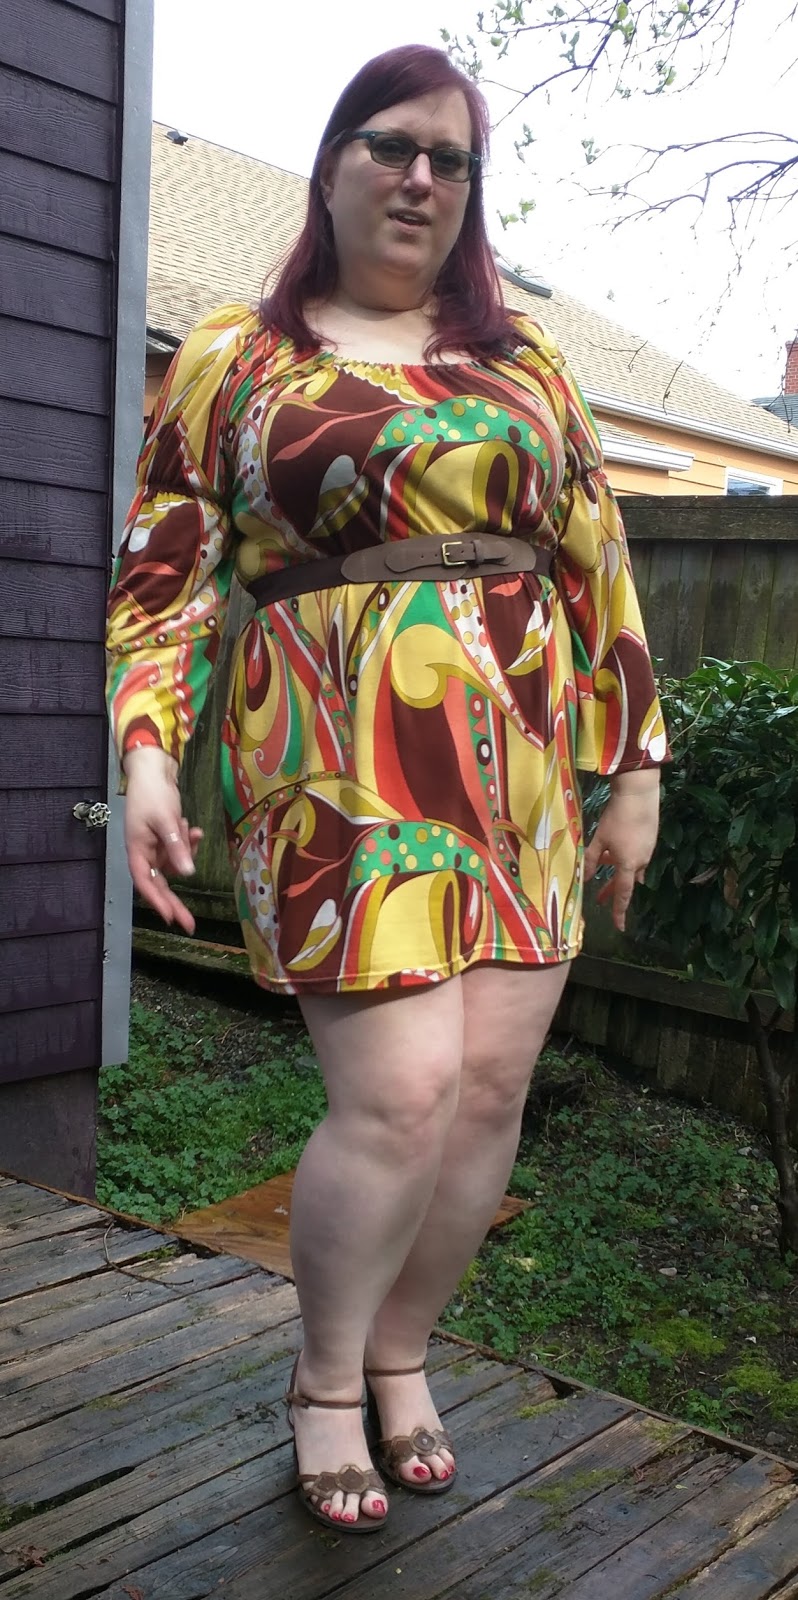
70s Style SisBoom Meghan This dress is cute, but it’s really too short for my comfort and the colors just aren’t me. And the sleeves don’t really behave right and they flip to the wrong side. I like the pattern and I will likely make a version of it again, but longer and doing the sleeves differently. I wish I’d used a facing for the sleeves so that you’d see something nice when seeing the inside and also to add a little weight to make them hang better.
McCall’s 6801 I made a couple dresses that were more body con and I just didn’t have the body confidence to rock them. I think I might have worn this dress once, but I can’t even remember for sure at this point. This is yet another one that I should try on now that I’m quite a bit lighter. I’ve lost several inches in my bust and my hips/butt/tummy area, but none in my waist at all, so I’ve been trying things on to see how they fit differently, but I ended up packing up a lot of me-made clothes without trying them on and this was one of them.
Top 5 Non-Sewing Highlights
My weight loss journey. In December of 2015, I was almost back up to my highest weight ever after losing over 100 lbs TWICE then gaining it back. So I made the decision to go to an informational session with a local bariatric clinic to find out about weight loss surgery. I was uncertain if it was something I should do, but after speaking to the surgeon after his presentation and asking a zillion questions and then doing more research and thinking on it for about another month, I decided to start the process. My first appointment with the clinic was at the end of January. My insurance required me to do 6 months of medically monitored weight loss, so I started that on Feb. 1. I hit a stumbling block right before I was scheduled for surgery when my insurance wouldn’t preapprove my surgery because they required it to be done with one of a couple particular clinics. But after I pouted and pleaded to no avail for about a month, I decided to just suck it up and go to another clinic. I ultimately had my vertical sleeve gastrectomy on Nov. 2, 2016 and I was back on my feet in only a few days and I feel better than I have every felt in my entire life. The number one thing I’m most surprised about is that I have SO MUCH ENERGY. I literally bounce around and drive my family crazy, especially when we are out doing things together. As of today, I’m down 77 lbs from my highest weight ever, 61 lbs from that first appointment last January and 26 lbs since my surgery. And the best thing is that I’m off my blood pressure meds that I’ve been on since my twenties! Going through the process leading up to my weight loss surgery was a highly emotional experience, and I recommend if you or anyone you know is considering it, to be sure to have a very supportive group of friends and family to lean on. I have to admit that a part of me is sad that I will no longer be a “curvy chick” right after I finally got to the point of body acceptance after all these years of hating the size of my body. But I have no doubt in my mind that this was the best choice for me.
Dec. 31, 2015
Jan. 5, 2017
I finally participated in The Big Climb. This has been one of those events I’ve known about forever and was interested in participating in, but never seemed to get my act together to sign up before it sold out. My Weight Watchers at Work leader runs a team for the event and she asked in our meeting if anyone wanted to participate and I jumped on the chance. I was very worried about it, because even though I signed on for it 5 months ahead of time, I didn’t really do any kind of training and 69 flights of stairs is A LOT OF STAIRS! But I went slow and rested a bit on the landings every few floors when I got winded or weak legged and I finished just fine in 38:20, which is an average of 34 seconds per flight. I’m signed up again for this year, so I have a baseline time to beat! If you are so inclined to donate money to a worthy cause and would like to support me in my fundraising efforts, you can visit my fundraising page for The Big Climb 31.
View from the top of the Columbia Tower after walking up 69 flights of stairs!
I conquered the Warrior Dash without skipping a single obstacle! Though I really struggled with a couple, having to retry one of them about a dozen times before success. This event was my husband’s idea because some of his co-workers were doing it. I was really afraid of it and I ended up hurting myself enough when I sorta fell off one of the obstacles that I was starting to wonder if I’d cracked a rib a few days later. But the feeling of accomplishment after I’d finished was amazing! And we’ve already signed up in time to get the early bird registration discount for this year!
Jumping over fire!
A nice, relaxing swim through very thick mud.
My husband and I straight out of the mud pit.
My husband and I after we cleaned up a bit with our cool souvenir hats on.
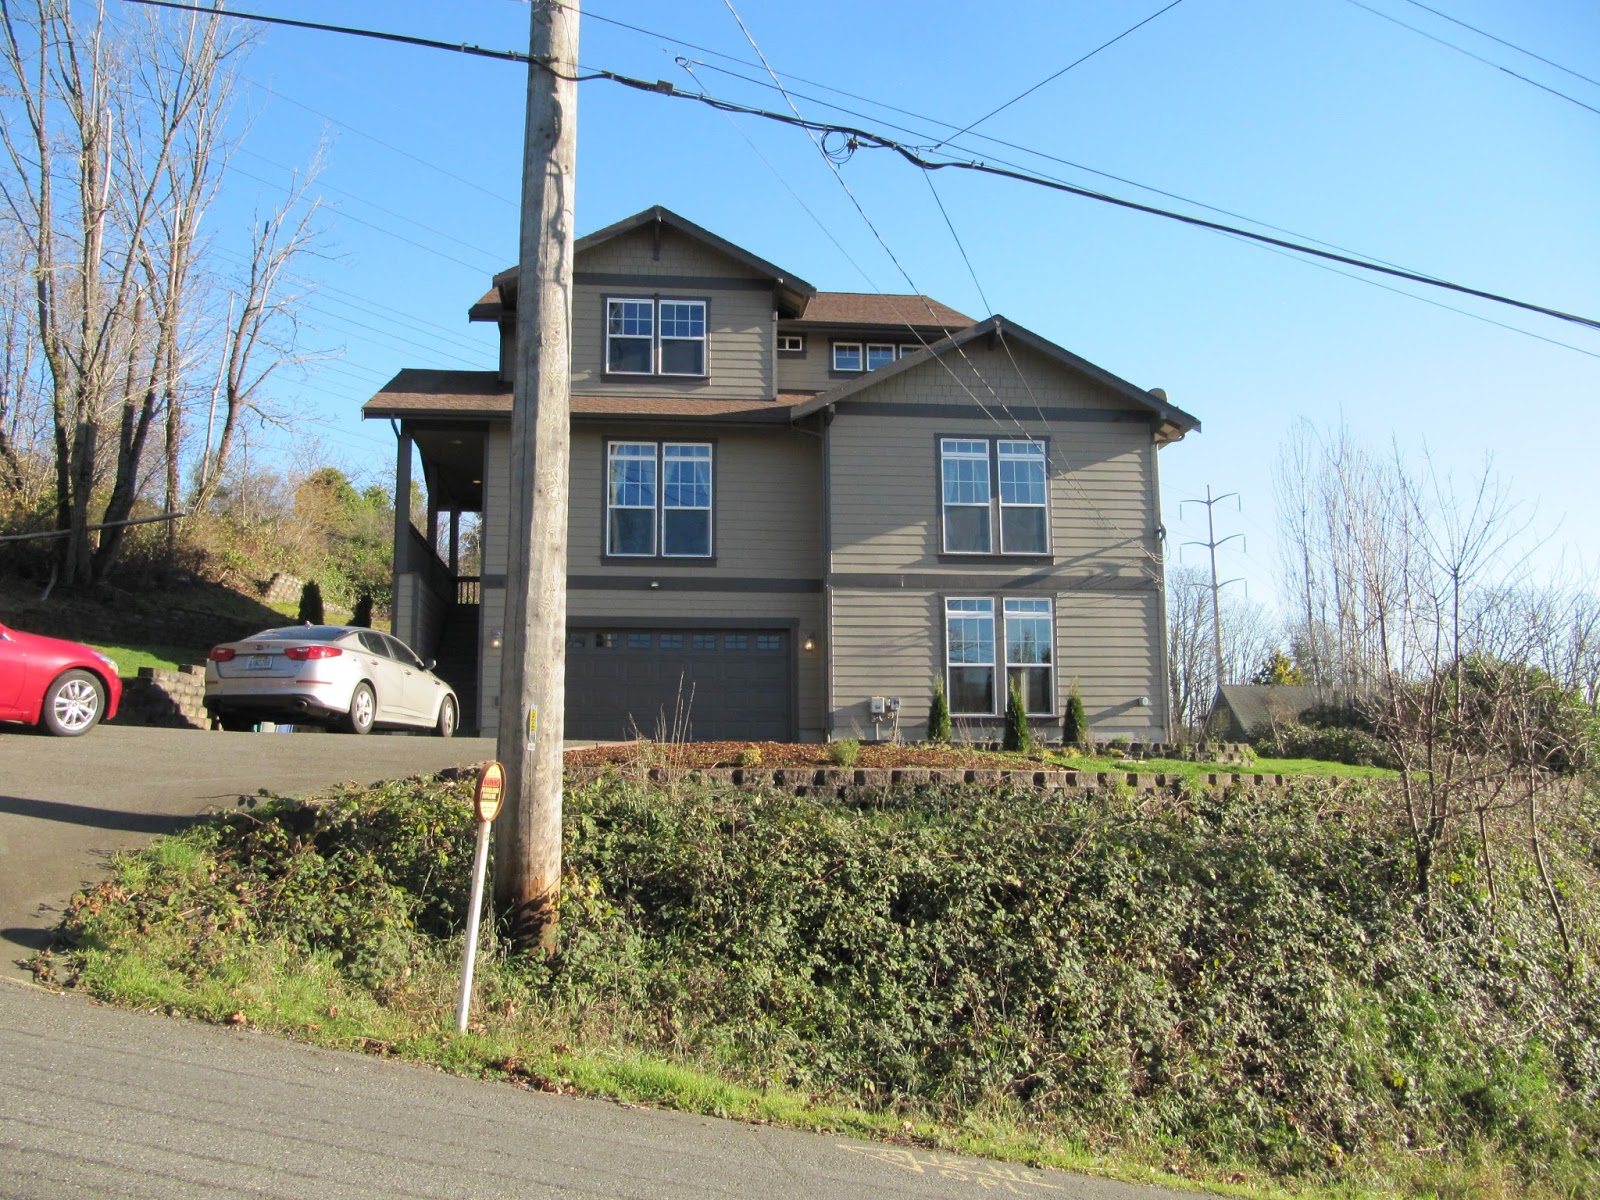
New House! After months of searching, we found a new house and it’s better than I could have even imagined! We won’t close on it until mid January, but the search is over and I’m very excited to get to have my very own sewing space!!! The new house is well over twice the size of our current house, but one of my daughter’s friends will be moving in with us and has been at our current house pretty often, so 4 adults were a little cramped in the small space. And because our current house is in a very hot Seattle location and the new one isn’t, the much bigger house on a WAAAY bigger piece of land is actually valued less than our current house. Location, location, location! But we do still have an actual Seattle address, so I don’t mind.
Our New house! (not purple yet…)
My future sewing room!
Birthday Haircut. I chopped off all of my hair! I’ve had long hair pretty much my entire life, except for a bad couple of years when I decided to rebel in middle school. But with the knowledge of (and past experience with) rapid weight loss causing hair loss, I decided to do what I can to make my already thin hair look as thick as possible. So, I went to the magician who does my hair for my dance competitions and gave her some photos of asymmetrical bobs and then let her have her way with me. I love it so much. It’s the shortest it’s been in the back for as long as I can ever remember, but the front is still long enough and the same style that I still look like myself when I look in the mirror.
Top 5 Reflections
I’ve discovered the fun and joy (and stress) of sewing competition and I want more! I’m making a goal to enter a couple contests this year. Of course, I’ll have to wait until I’ve gotten all moved and settled into the new house since everything is such a huge disarray right now.
I’ve learned that sewing deadlines help get me motivated and started, but I have a hard time actually meeting those deadlines.
I own WAAAAY too much fabric. I already knew this, but this move we’re packing for right now has put into perspective exactly how much I had squirreled away. So, I’m going to avoid looking at all my favorite online fabric stores, which is where I do 98% of my fabric shopping from. I expect I might end up buying a couple cuts from the Sewing and Stitchery Expo this year, because when I actually see pretty fabric, it’s hard to resist. But I already don’t really go into physical fabric stores unless I’m traveling.
I want to sew all the things, but I don’t have the time. I have some projects that I’ve been planning to do for well over a year. I even already have sketches and fabric pre-washed and PDF patterns assembled, but I just haven’t had the time to finish items that are already cut and on my sewing table. I think the move will help a lot with this for a couple reasons. Not only will my commute be reduced from 45 mins to 9, giving me over an hour extra on each day I don’t have a dance lesson, but I’ll also have a dedicated cutting table in my new sewing room, so it’ll be easier to get things cut and ready to sew.
Sometimes I just don’t want to sew because I feel lonely. I usually stream some TV show (currently working through Grey’s Anatomy) on my tablet while I sew. But because of the noise of my machine, I couldn’t sew and watch TV with my husband, even if I had a nice television in my sewing room. So sometimes I just don’t sew because I’d rather be spending time with him. That’s ok, but I need to find the right balance that works best for me.
Top 5 Goals (What would you like to sew in 2017, or what skills/attitudes would you like to learn?)
For this one, I went back and looked at my Top 5 for 2016 post to see what I put for my goals for 2016 and found that there were a couple of things I didn’t accomplish, so those go first on the list for 2017.
Pants. I now own the Closet Case Files Ginger Skinny Jeans in a paper pattern because of my week 1 win in the Fabricista Fashion Challenge. So I absolutely have no excuse not to try to make them this year! I already own a couple cuts of denim that will work for these jeans. I even took a pants fitting class at the Sewing and Stitchery Expo last year to prepare myself, but I still didn’t even attempt this goal.
Sew more new-to-me patterns. I think last year’s goal was way too ambitious. But I would like to try to make at least 1 new to me pattern each month in 2017. I’m not sure if I’ll be able to start with January since we are currently in the middle of packing up the house we’ve lived in for 12 years and will be unpacking into the new house starting on Jan. 17th, but I’d like to try to squeeze out one quick Seamwork pattern before the month ends. I’ve been wanting to make Winona, Arden, Lynn, Elmira, Kenedy (with the flutter sleeves add-on,) Camden, Wembly and Oslo since I first laid eyes on them and just haven’t done so yet. I even have all of them printed and a couple of them assembled.
Be a better blogger. This one will probably always be on my new year goals. I think I was better in 2016 than I was in 2015, but I still was pretty slow in getting posts written and up and I could learn to do more photo editing. Although once I start editing a photo, I’m not sure I know when to stop, so maybe it’s best to give them to you as unaltered as possible. 🙂
Sew sweaters and jackets! I find that I’m cold all the time these days. I’ve been wearing hoodies because I have a ton that I’ve gotten free from work or my husband brings me from his work or as a gift. That helps me stay warm, but I don’t look as pulled together as I would if I had something that fit better and was more coordinated with my outfit. So that’s something I’d like to focus on this year.
Enter at least 2 contests/competitions this year. I really enjoyed the challenge of both the Fabric Mart Pinterest Contest and the Fabric Mart Fabricista Fashion Challenge that I participated in last year. I would like to do more. I don’t follow Pattern Review as much as I should, but they run some contests and I need to be better about keeping an eye out for them. It might also be fun to enter something at The Washington State Fair this year.
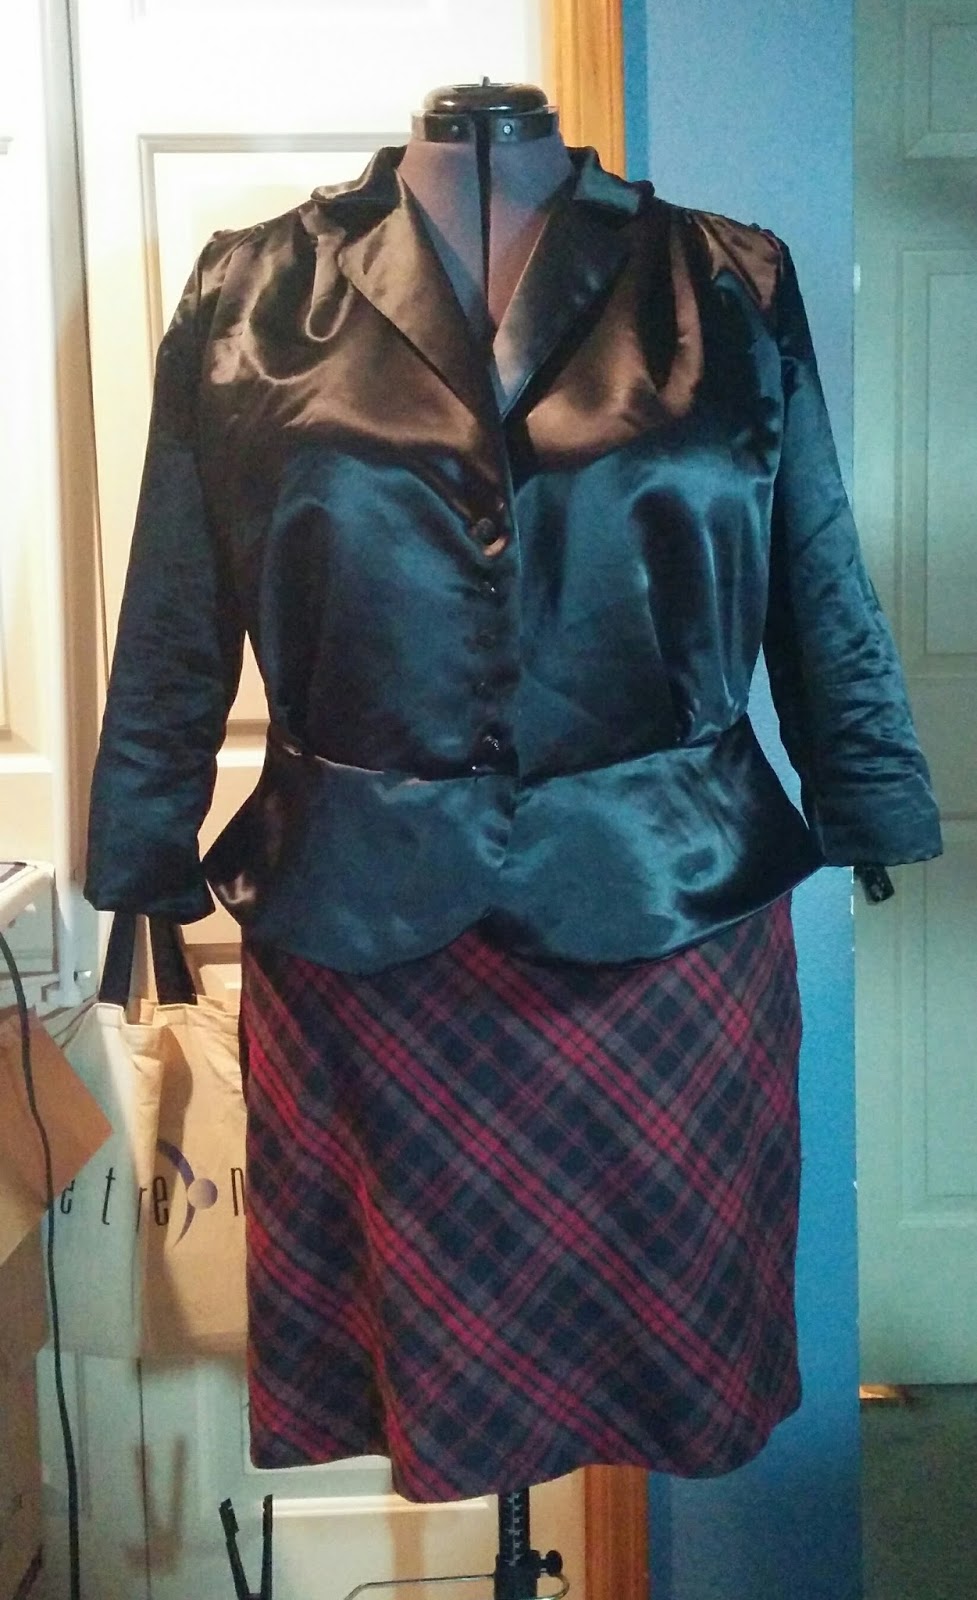
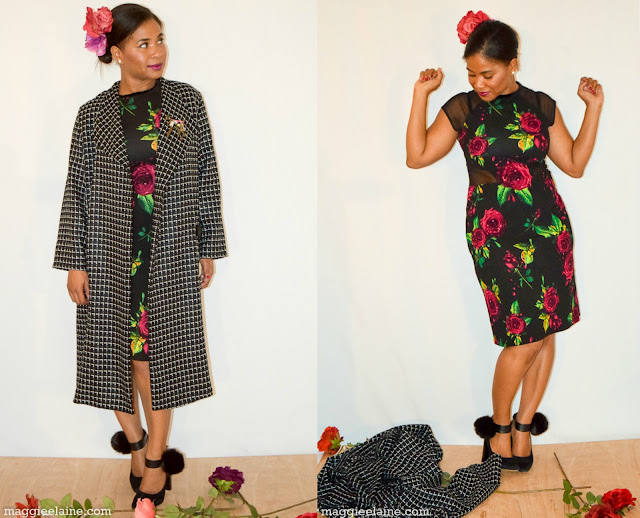
For those of you who weren’t following along with the challenge on the Fabric Mart blog, I was eliminated in week 3. I was bummed, of course, but my black peplum top was not my best work and it just photographed horribly. I don’t have any quibbles with the judges’ comments, which I thought I would share:
The tank and cardigan coordinate well with the skirt, fit and drape beautifully, and look very comfortable and wearable. They’re simple pieces, but well done, and they look great on you. It looks like the hems could have been a bit better stabilized to prevent tunneling, or the machine settings adjusted.
Brave of you to work with such a tricky fabric for the other top! The fit looks pretty good, perhaps a bit snug across the shoulders in back. I’m not sure the satin fabric is the best choice for those gathers on the shoulders and sleeves – the stiffness makes them look a little messy, though the lighting is also extremely unforgiving. The lapels look like they need a little more pressing to make sure the edge is crisp and the seam rolls nicely to the underside, or maybe edgestitching if the fabric doesn’t hold a crease well.
It was hard to see the details without some close-up photos…It seems like the colors probably match quite well to the plaid in the skirt.
Cardigan and Tank Top: One of these without the other would not have presented a finished look, so I am glad you made both! The swing jacket looks great on you. You should make this a staple in your wardrobe, in assorted colors. Quite polished. Satin
Jacket-top: The satin seems soft and can be tough for even the most experience Seventh Avenue seamstress – without adding interlinings, etc..to get at least some crispness at the hems.
The cardigan and tank set look great. The fit is nicely done and drapes well too. I could see them worn together or separate and with the skirt or with other things you may have in your closet. Burgundy is so in right now, and you’re all set! It’s a bummer the lace top didn’t work out. I would have loved to see it. The blazer was a good idea, but I don’t think it turned out as well as it could have. I think some facings, interfacing, etc would have helped it, but the fabric was a tricky one. I think a different fabric would have worked a little better. It would be nice to see it in natural light since the shine in the photos brings more attention to the wrinkles.
All in all, it was a really great (and stressful!) experience to be a participant in this challenge. I definitely have a whole new respect for the designers on Project Runway who do so much more in much less time that I had. And I was happy to actually get some sleep the weekend after my elimination.
I do plan to go back and revisit my trench coat. I had to leave off the epaulettes and the cuff straps due to time restraints and I didn’t top stitch the lapels at all and had to stop top stitching the belt because I ran out of the thread color I was using, which I have since re-aquired. I also will add some frog closures and I’ve decided I would like to add a hem band of the blue sateen at the bottom to add a little length and balance out the blue at the collar/lapels. I just have a few other projects that have higher priority at the moment.
I have barely been at my sewing machine since my elimination — the only project I worked on was a Good-To-Go Messenger Bag from Two Pretty Poppets with my 8 year old neice, who was in town last weekend with her family visiting us. Of course, I didn’t even think to take photos, but we made the small version out of these fabrics she picked out at JoAnn.
I love her fabric selection and I love how the bag turned out. It was a quick make, even spending a lot of extra time showing an 8 year old how to use a sewing machine.
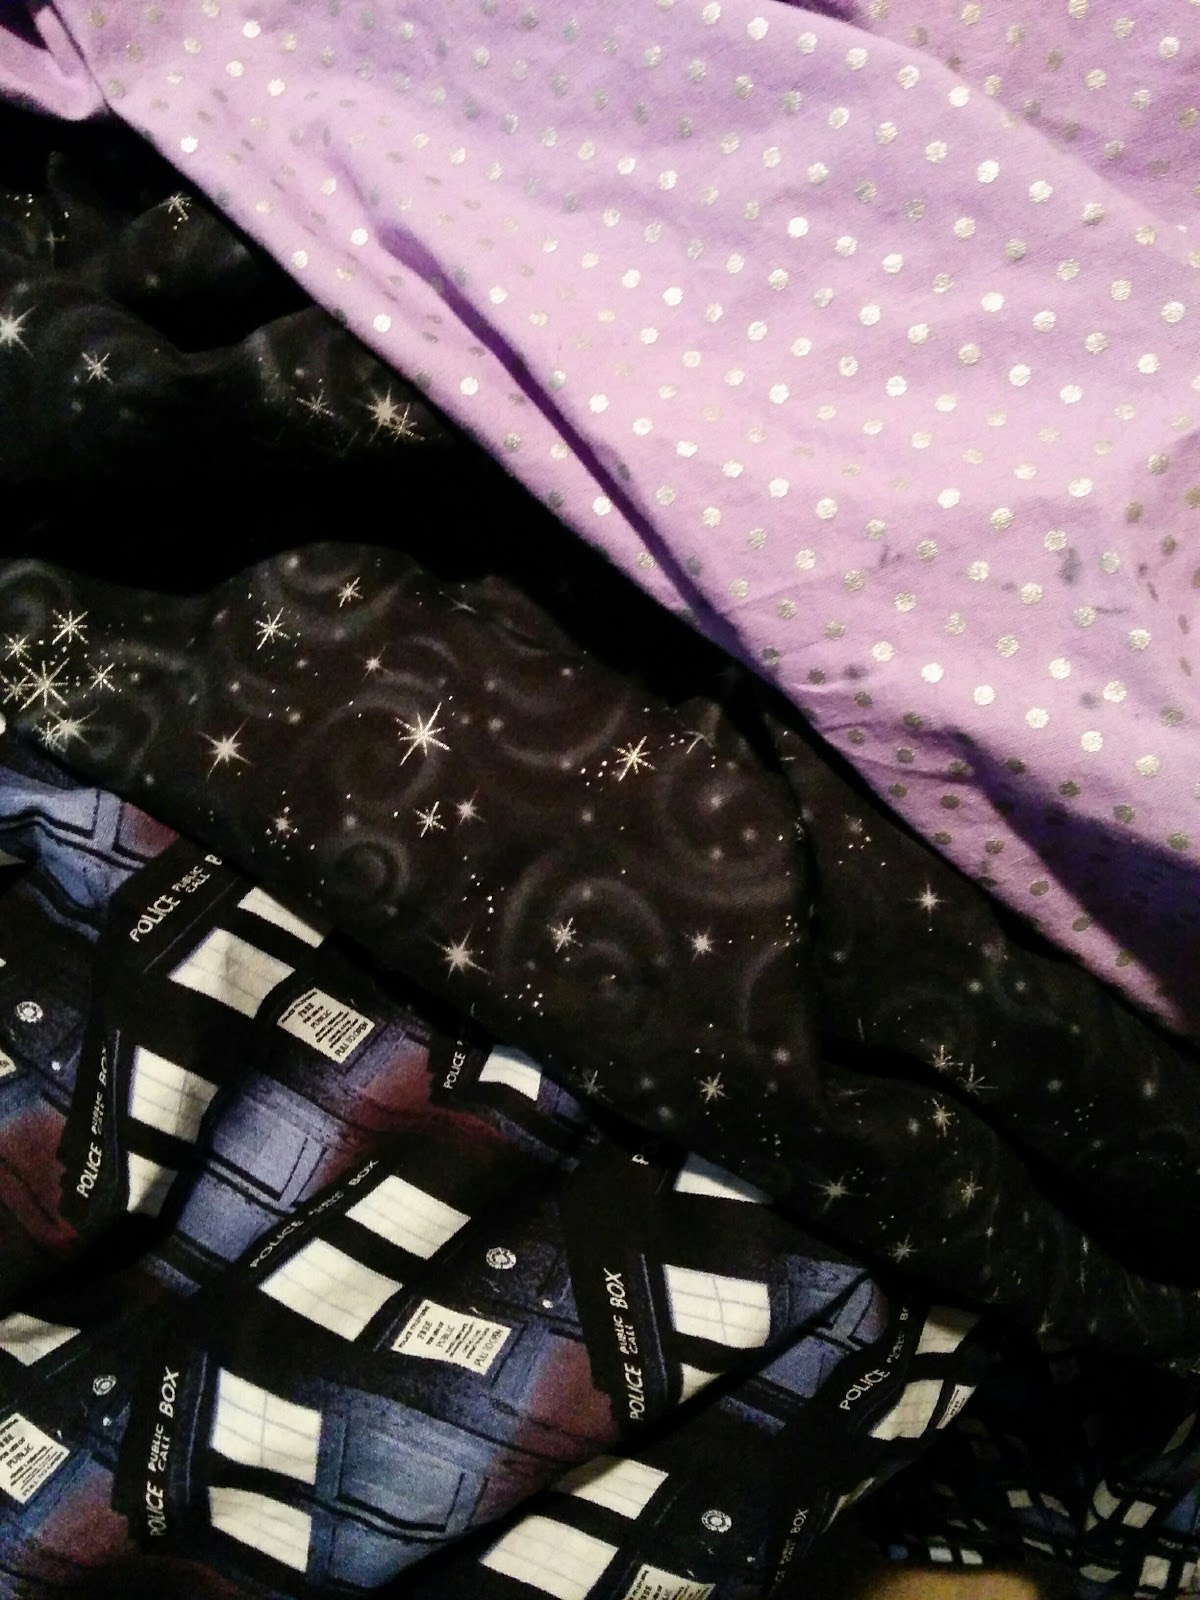
My current project that I’ve only barely started is my Halloween costume. I can’t share my plans yet. We have a themed decorating contest between the floors in our building and it’s a carefully guarded secret what our theme is and I know at least one person from another floor who very well might read this blog. But I shared this photo on Instagram.
Hopefully I’ll get my costume completed in time for our contest on Friday and I’ll be able to post about it next weekend. *Disclaimer on Girl Charlee’s “slightly flawed” lots — I’ve purchased many of them because they are inexpensive fabrics that are often very pretty and only have slight flaws along the selvege or small things that can be cut around, so they are great for wearable muslins. But I’ve had terrible luck with the woven bargain fabrics I’ve purchased and I’ve gotten a couple things that are completely unusable and all sales are final.


Recent Comments