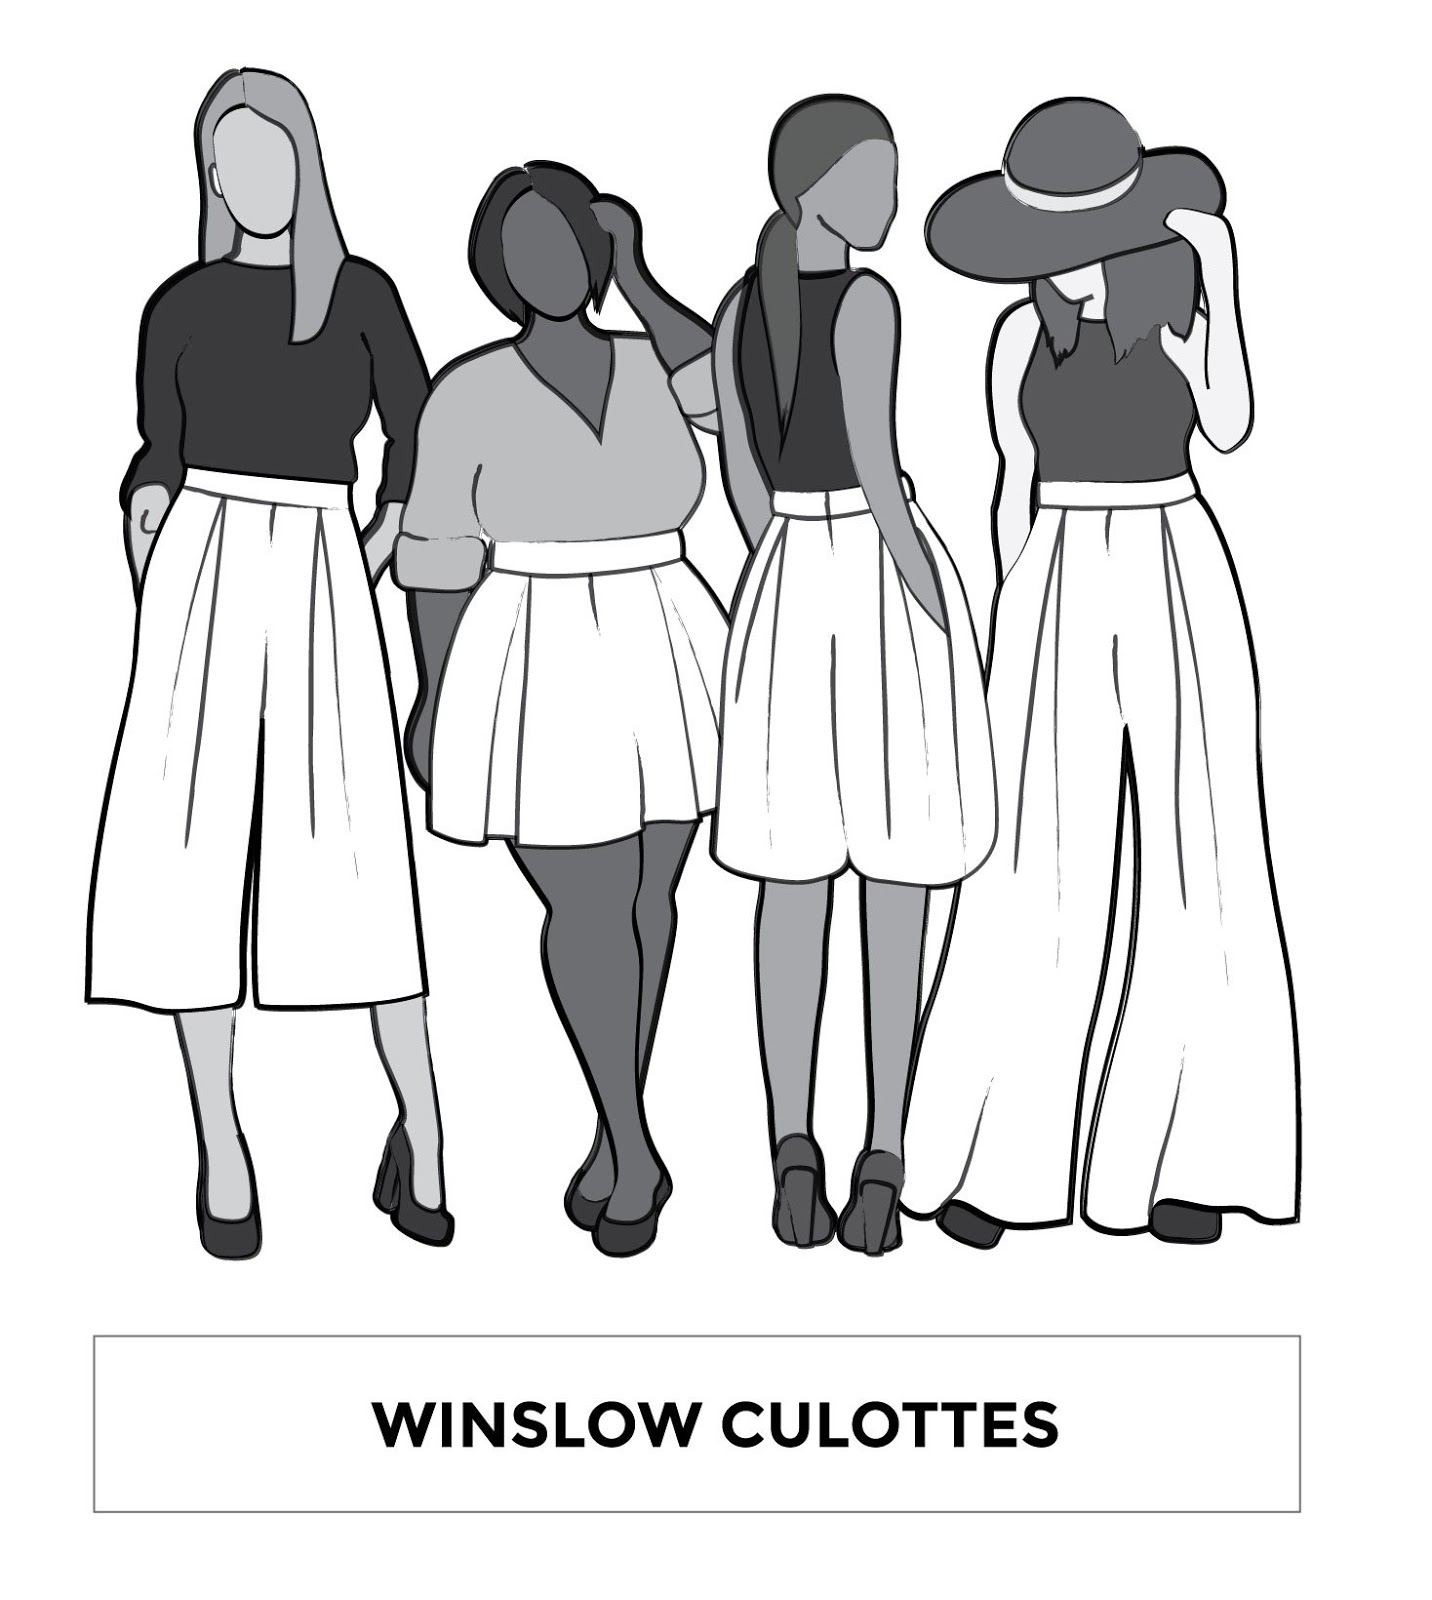
Just look how they appear to be a short and sassy skirt! But no, they are actually shorts! But, alas, the pattern doesn’t go up to my size and the amount of grading I’d have to do to get them to fit gives me a headache just thinking about it. And none of the other culottes patterns that I found held my interest nearly as much. Until Helen from Helen’s Closet put out a call for testers for the Winslow Culottes. Just look at this lovely illustration.
I applied immediately, hoping I would get chosen. And luckily enough I was!! In her initial email message to me, Helen mentioned that I was slightly outside of the size range but that she would be interested in seeing how they worked graded up.
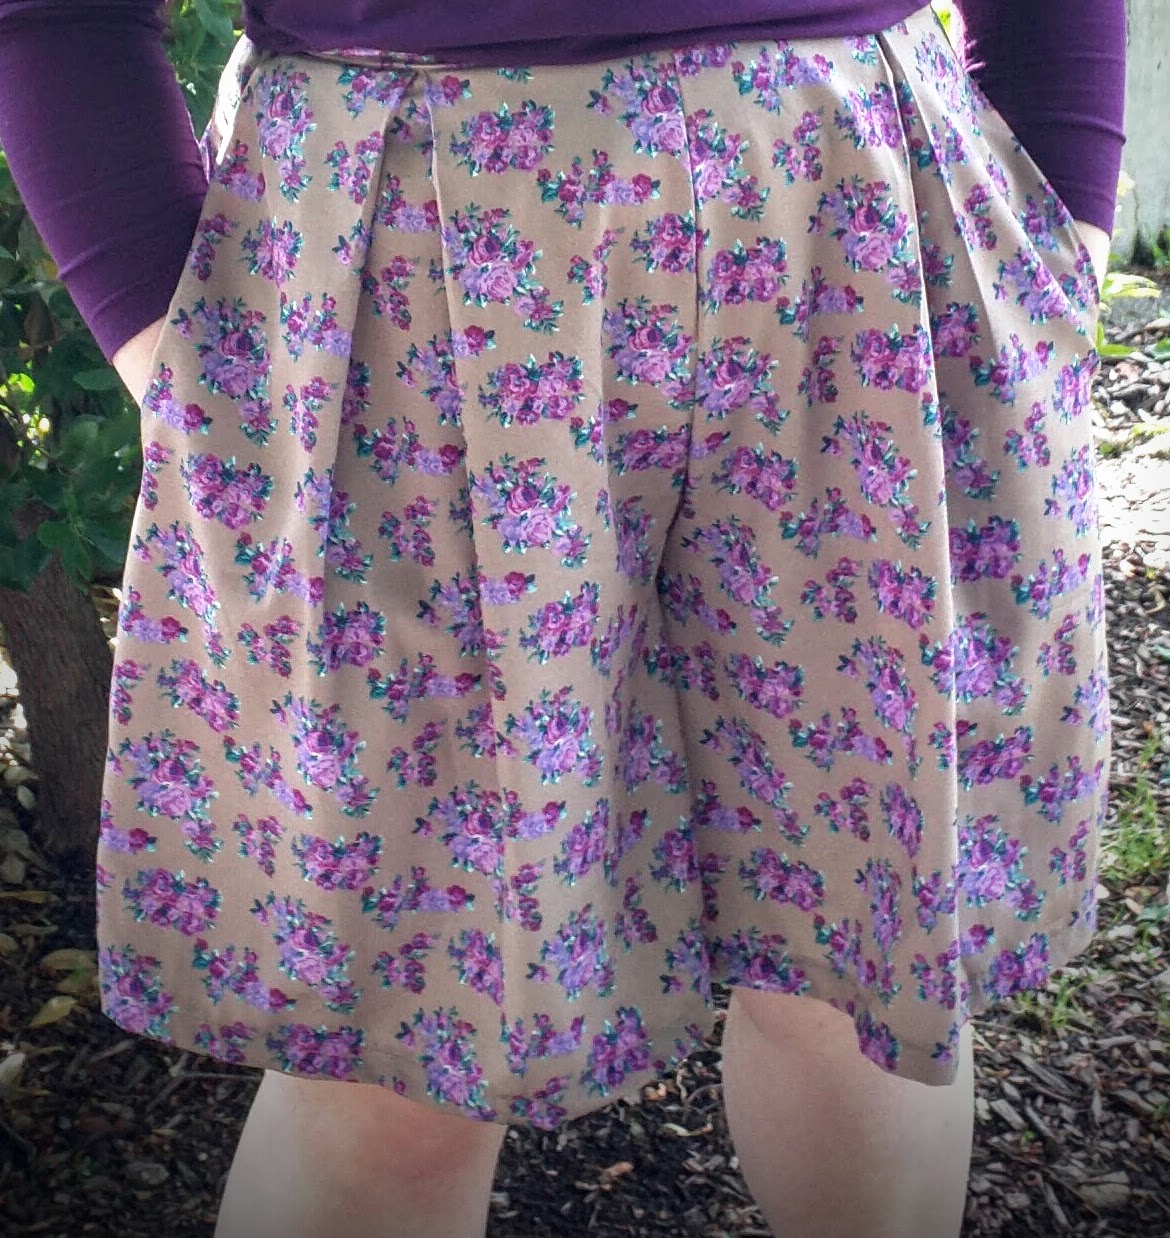
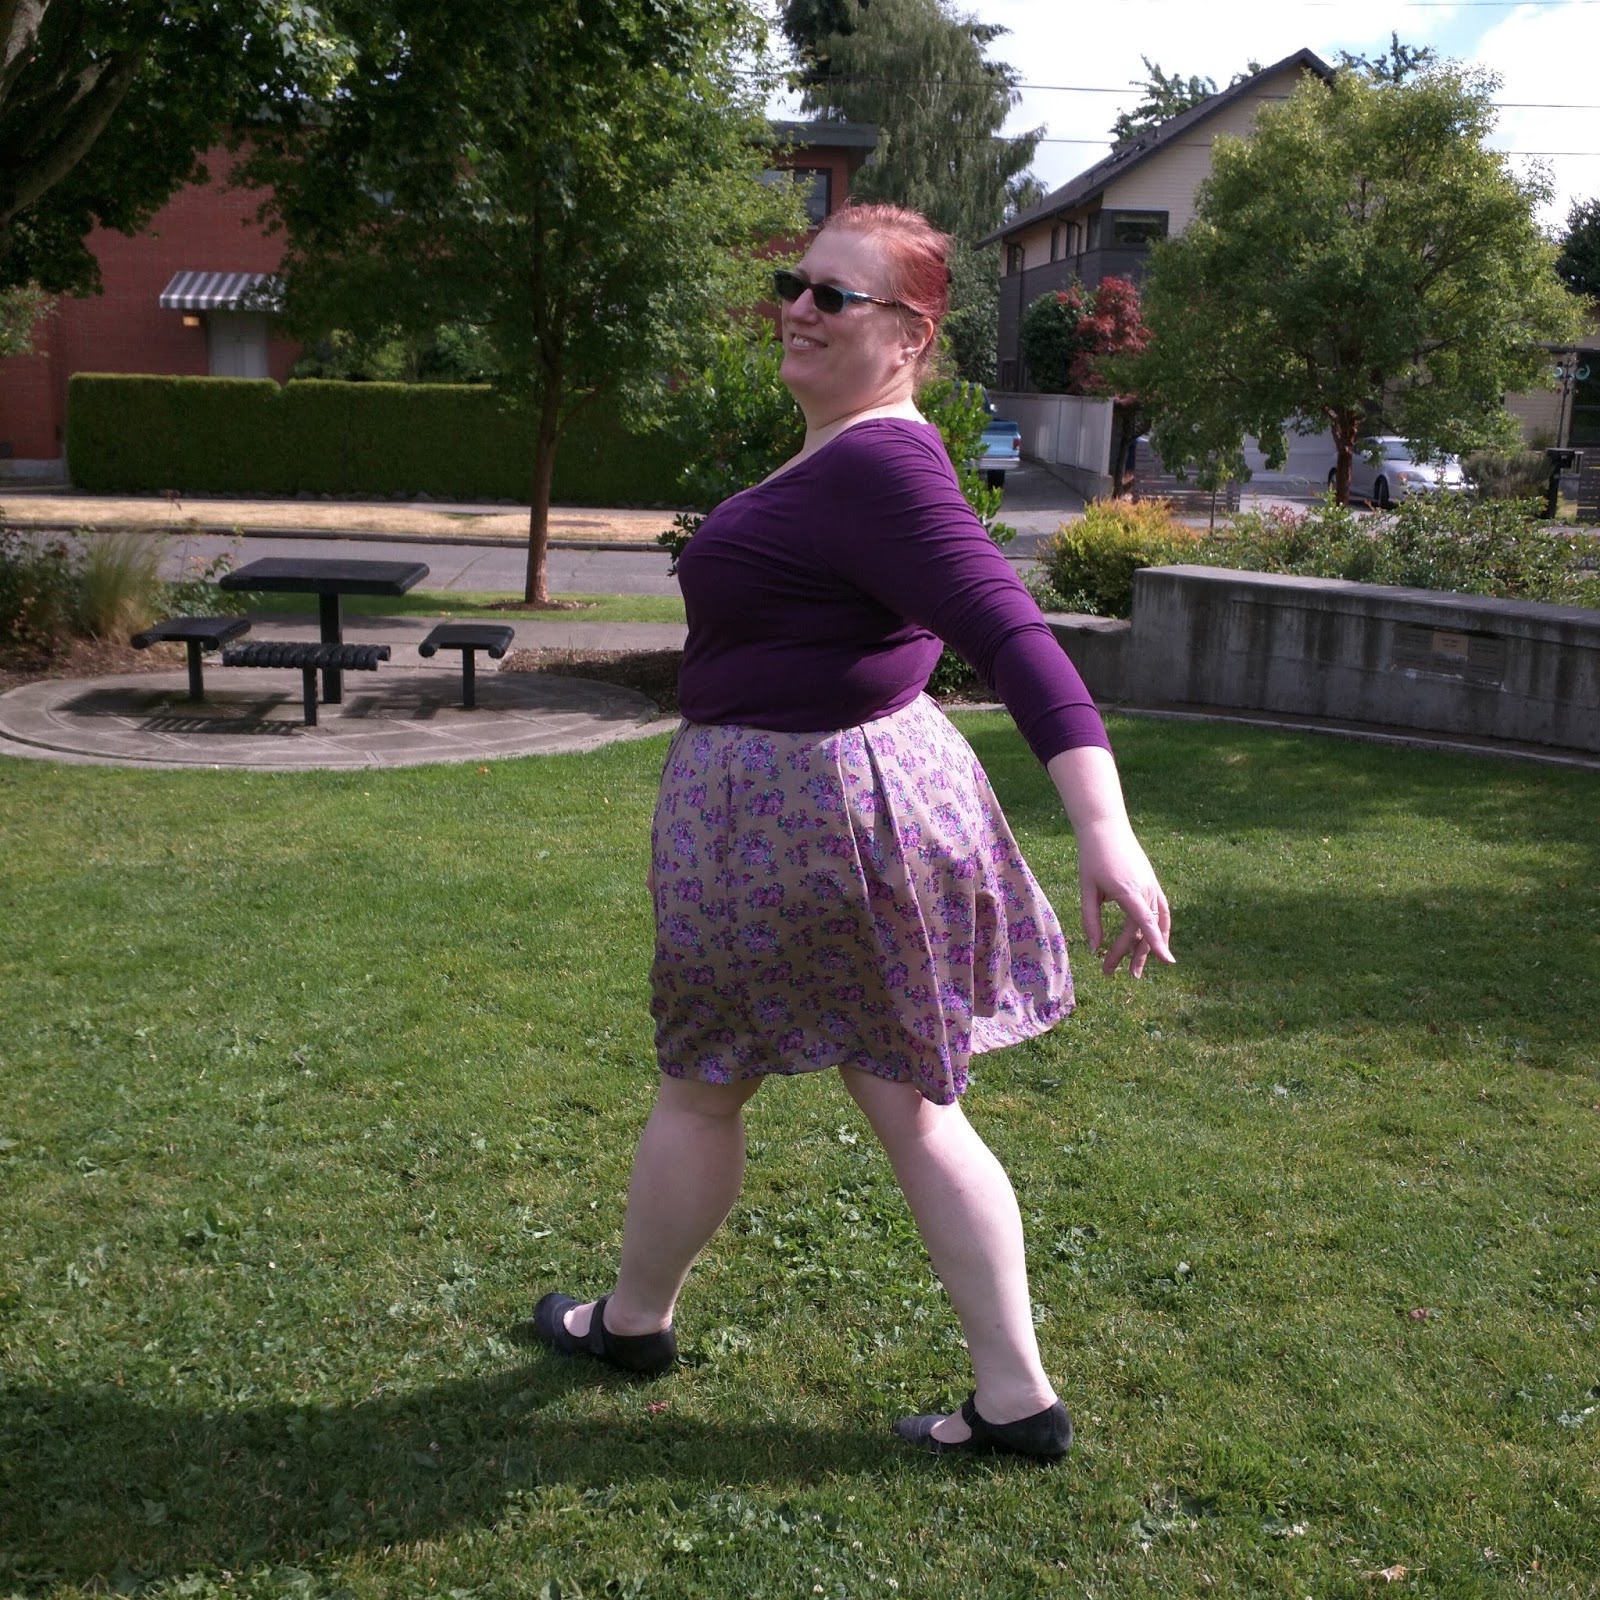
For my first pair, I decided to use this triple georgette fabric that has been in my stash for quite a while.
This is a fabric that I was a little disappointed in once it arrived because I thought the color was going to be a little more toward sage green than the camel color it actually is. But it’ll work perfect for using for a wearable muslin — no real heartbreak if it doesn’t work out, but a very lovely pair of culottes if it does.
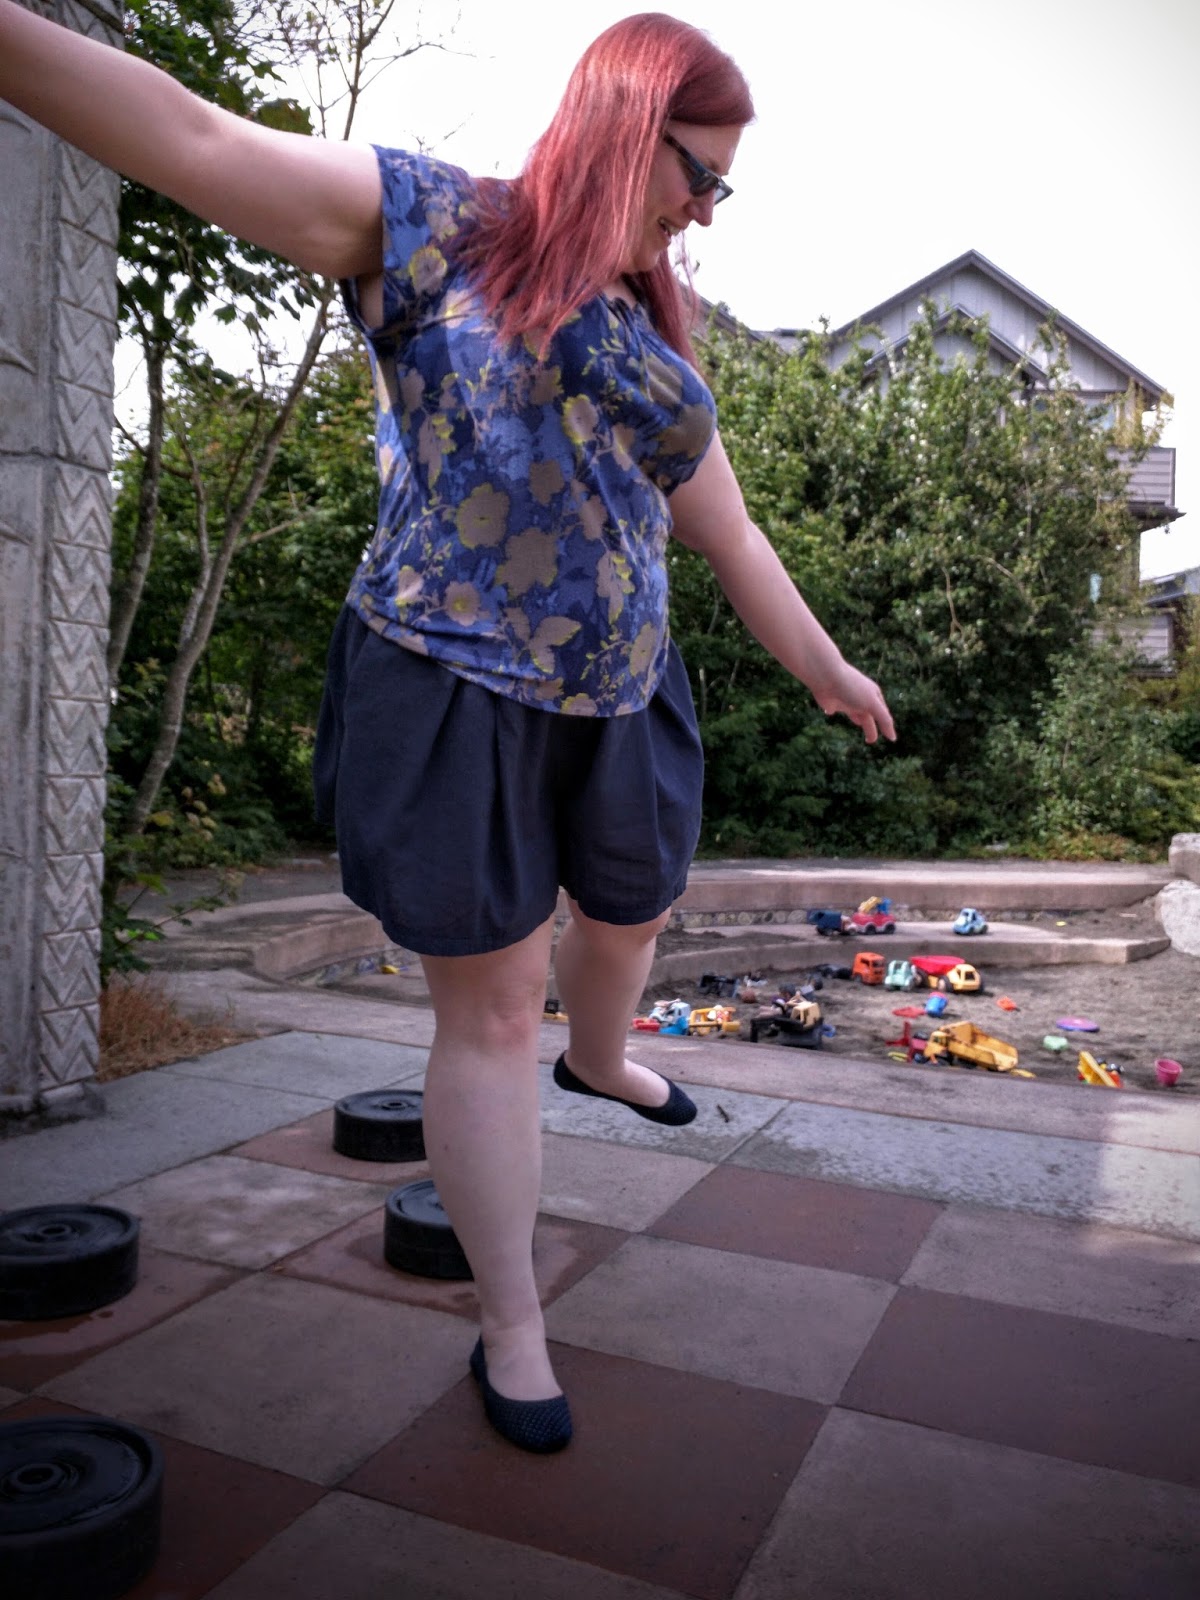
Once I sat there looking at the printed and taped pattern trying to decide whether to grade the pattern up or use as is, I decided to just cut a straight size 20, since my body size is reducing and I could squeeze all the “fluff” in my waist to make my measuring tape read 38″, which is the only measurement that really matters with these. I’m glad I did because by the time I finished sewing and took these photos, my measurements were actually right at the size 20. These are view B and the only pattern alteration I did to this pair was to lengthen them about 2″, since the pattern is drafted for someone 5’6″ and I’m 5’8″ with long legs.
When I first sewed them up, there was some pulling in the tummy/crotch area. I knew this wasn’t because of the pattern, though, because by the time I made mine, several other testers had already posted photos to our group and no one else had that problem. Turns out, my big tummy needs a special adjustment. I’m new to making separates, so I wasn’t already versed on what kinds of adjustments I need. To try to fix this pair, since they were already cut, I went back and reduced the crotch seam allowance as much as possible from right below the front waistband to an inch or so below the back zipper. This ended up adding about 1/2″ width right at the seam and made the crotch not pull quite as bad.
I’m fairly satisfied with this pair and my only complaints are about my fabric choice and the fact that I still don’t love the fit at the center front/crotch area.
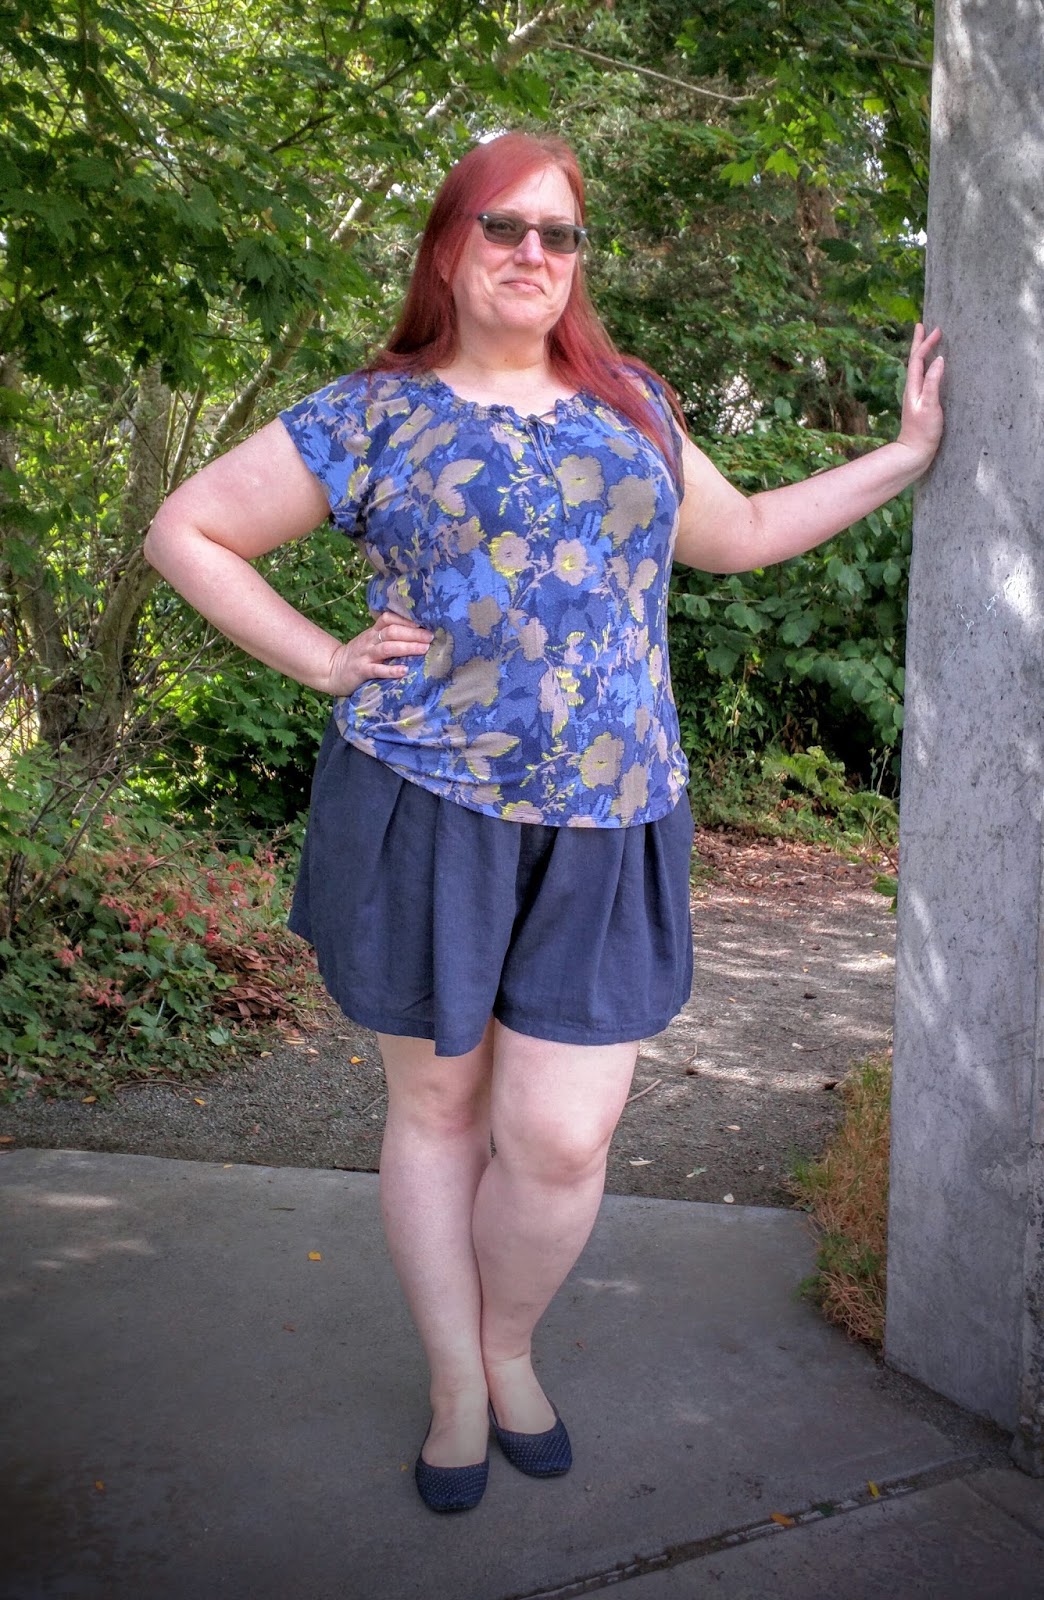
For my second pair, I used an inexpensive (since this pair was still in muslin territory) navy linen/rayon blend from Morex Fabrics to make view A. I did a full tummy adjustment as shown in this tutorial from Colette. I also lengthened them a bit, but I free handed how much I lengthened them based on the way they were on my cutting mat, so I’m not sure how much I lengthened them. I’d guess about an inch and a half or so.
I love how these turned out and I’ve already worn them a couple of times. The full tummy adjustment did wonders for how they fall in the front.
They really do look like a cute little skirt and when I’ve worn them, people have been surprised to find out they are actually shorts.
I didn’t get any good photos of the back of the blue pair. This one was the best and I had to mess with the color and brightness quite a bit to make it not look just like a dark blue blob. I definitely need more experience in photo editing!
I love this pattern and I think view A is more my style, so I’ll probably make a few more pairs in the next couple months. And I already have some ideas about some hacks to try. But I know at some point I’m going to just have to make view D — the palazzo pants version.
Here’s a photo I took myself in the hallway outside of my sewing room right after I finished them. I like the way they look from the side — I think they actually make me look thinner here!
And finally, here’s a bad work bathroom selfie from the day I wore them to work. You can see how much this fabric wrinkles from sitting at my desk all day.
Helen just released the Winslow Culottes today and the pattern is 20% off for the next 7 days! The released pattern has very few changes from the tester version and the changes are just in the instructions and notch placements in the waistband. Go rush out and pick up this lovely pattern while it’s on sale!!
*Disclaimer: I received this pattern for free in return for testing the pattern and giving fit and construction feedback. All opinions are completely my own.
My current favorite dress is one that I made out of slightly flawed camo fabric that I got in a bargain bundle from Girl Charlee. I wanted to try out the Seamwork Perry, but I wanted to use my inexpensive fabric that I didn’t care about, in case it didn’t turn out. It turns out that this dress is just darling and I love the fabric choice!
I don’t think I ever would have paid full price for camouflage fabric, but I just love the way it looks as a dress. And I’ve gotten several compliments on it the few times I’ve worn it so far.
The fabric is fairly on the thin side, so I lined the bodice with the same burnout knit I used to line my velour Skater Anna, just to give it some extra coverage so my bra doesn’t show through.
I love the sleeve detail. At first, I thought I might have made a mistake cutting out the band because the it was way shorter than the end of the sleeve, but I just stretched that band extra hard as I sewed it on and now the sleeve has this lovely little poof at the end that I think is just cute as can be.
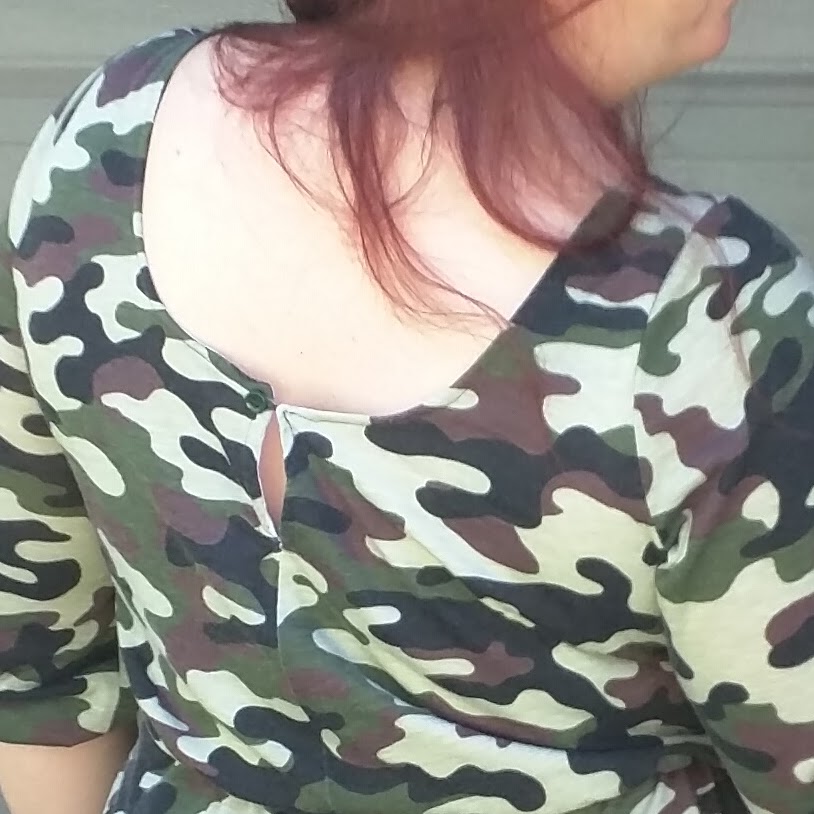
The back called for a hook and an eye to close the keyhole opening, but I thought it would be cute to use a button and a loop of elastic. As it turns out, the neckline is well big enough that I don’t ever have to undo the button, but it is functional just the same. I found a green button that matched perfectly in my stash and I used a bit of white elastic cord and used a black sharpie to make it match.
I then took the ends of the cut elastic cord and used my 3 step zigzag stitch and stitched them together side, but side, into a loop. Then I hand stitched that to the back opening, making sure to make the stitches on top of the (crooked) top stitching so they don’t show too much.
Here’s what it looks like closed up.
And here is how it actually looks on me.
The shoulders are cut a little narrow and the sleeve head comes way up onto my shoulder, so I widened the shoulders on my pattern a bit so that hopefully next time they will look a little better.
And here’s a photo of my Perry on my dress form.
This was a quick make, even though I didn’t quite take the 2 hours the pattern says it’ll take because I lined the bodice and fooled around adding the button and loop detail and also just because I’m a bit of a slow sewist. But I have already cut out my next one and plan to make a few more.
I made a straight 52 exactly as the pattern is drafted. After I made it up, the back bodice was pooling around my badonkadonk, so I shortened the middle of the back bodice about an inch and graded out to nothing at the side seams.
It’s hard to see, but this is where the waist piece sits when I pull the back down to where it is supposed to be.
Here is where it goes after I’ve moved around and the waist piece goes where it naturally wants to.
I’ll shorten the entire bodice a bit on the next version and lengthen the skirt to make up the difference.
I also took the side seams in quite a bit. I marked all these adjustments on the pattern so the next one I make should fit better right from the start.
For some crazy reason, I decided to play with my decorative stitches on my machine for the sleeve and skirt hems.
It is subtle but I think it adds a very awesome touch. I will likely be doing this for other dresses in the future.
I’ve been wearing it to run around and do errands and tool around the house. When I first made it, I thought it was too short for me to feel comfortable wearing, “for real,” but I really like it and I already know what fabric I’m using for the next one.


Recent Comments