It’s been a while since I’ve posted. I’ve not done much sewing lately because I’ve been moving and getting my new house put together and also getting my old house fixed up and ready to rent out. I’m still in the middle of both of those tasks, but when Helen from Helen’s Closet contacted me about testing out her new pattern, I jumped at the opportunity and made it work, even with my new sewing room still in boxes.
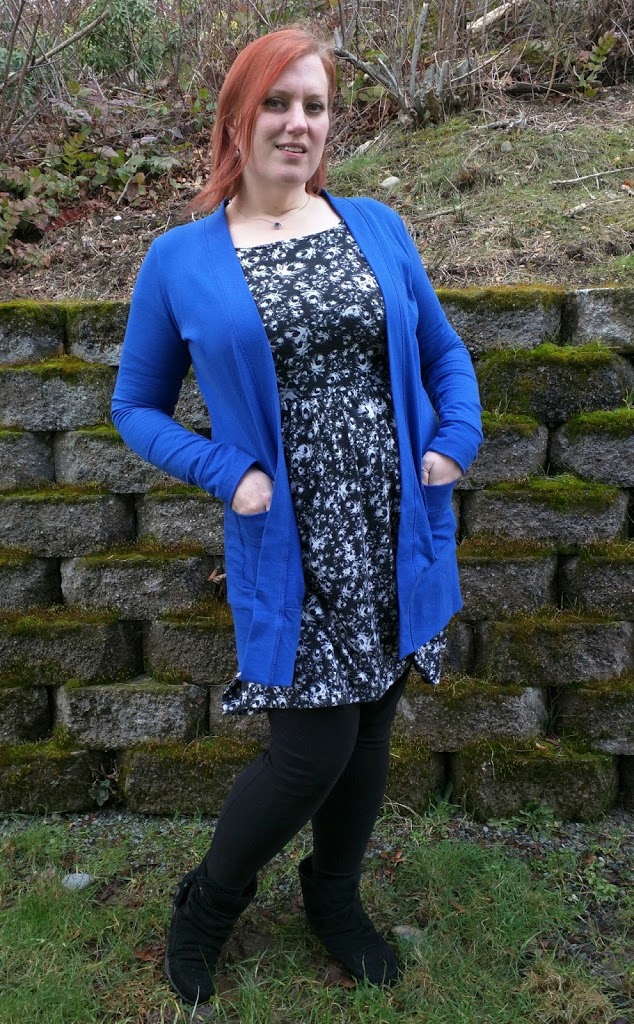
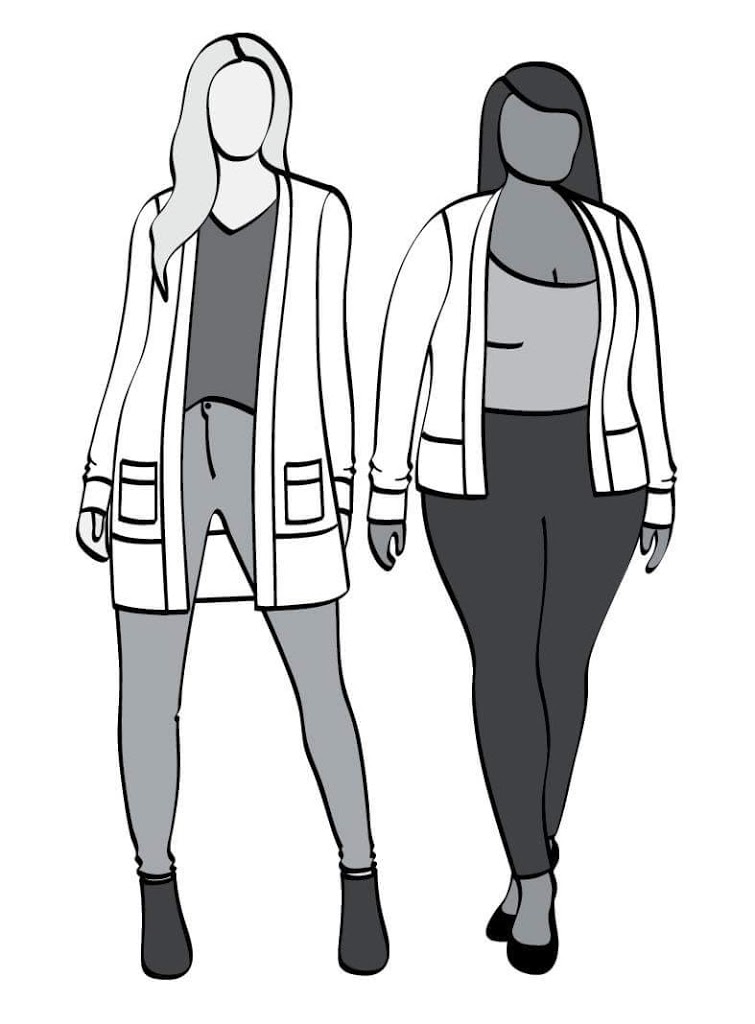
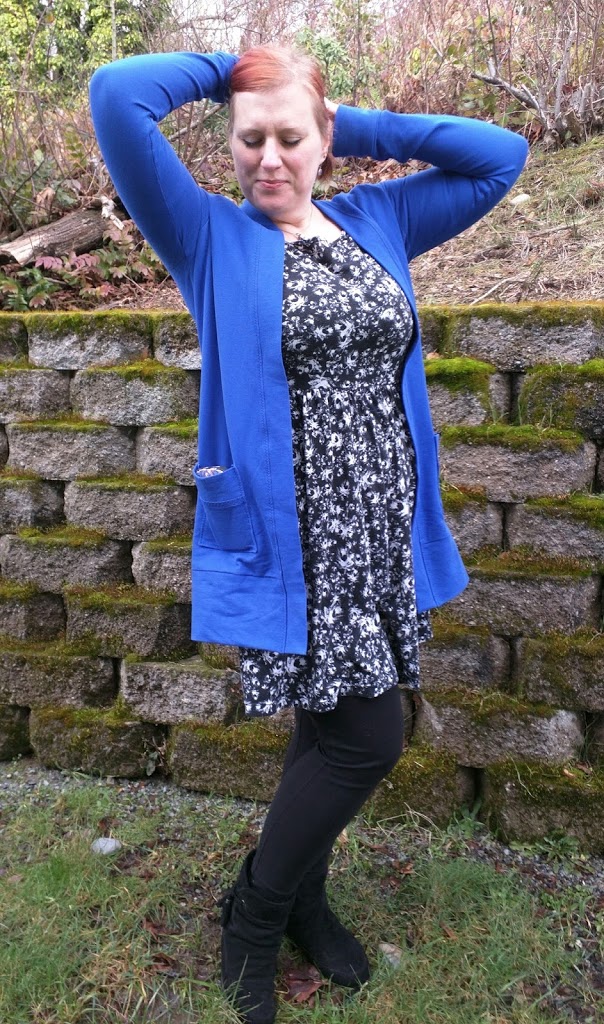
The Blackwood Cardigan is a close fitting sweater that is designed to be worn open in the front. View A extends to mid-thigh with patch pockets, while view B ends at the hips. The sleeves are designed to be long and end mid palm, not at the wrist, which I love.
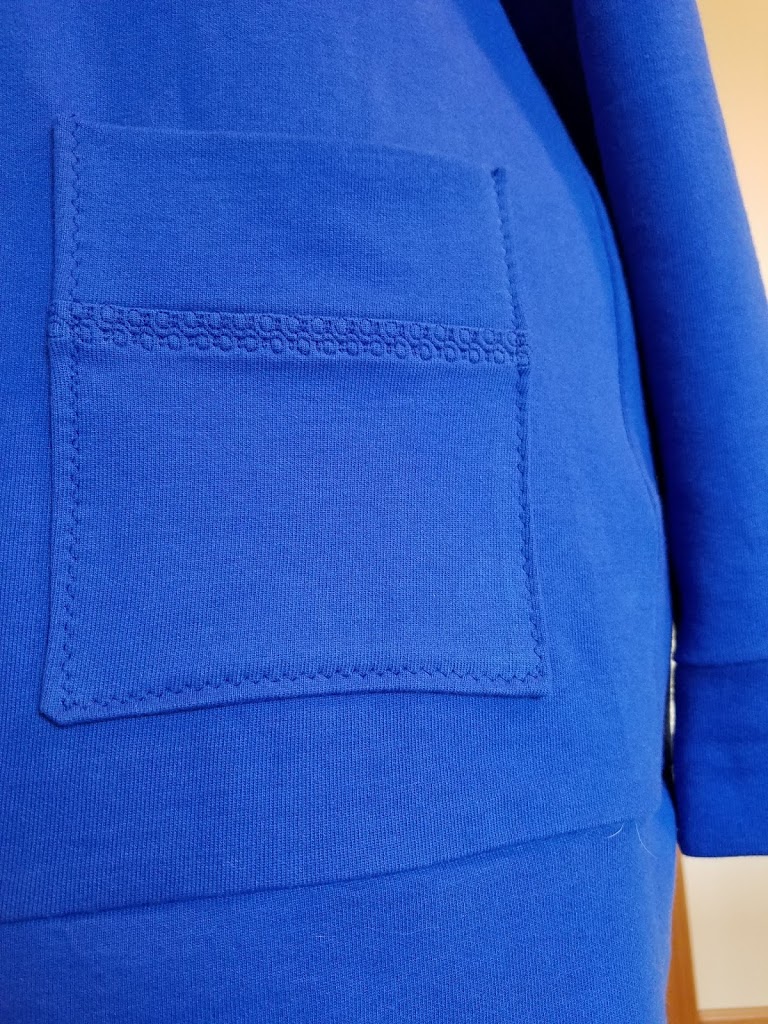
I made view A from a cotton sweatshirt fabric. When I made the pockets, I thought it would be fun to add a little decorative stitching detail.
The upper sleeves are slightly tight on me, but also, my fabric barely has the required 40% stretch, so another fabric would be better. However, for my next version I’ll be doing a full bicep adjustment.
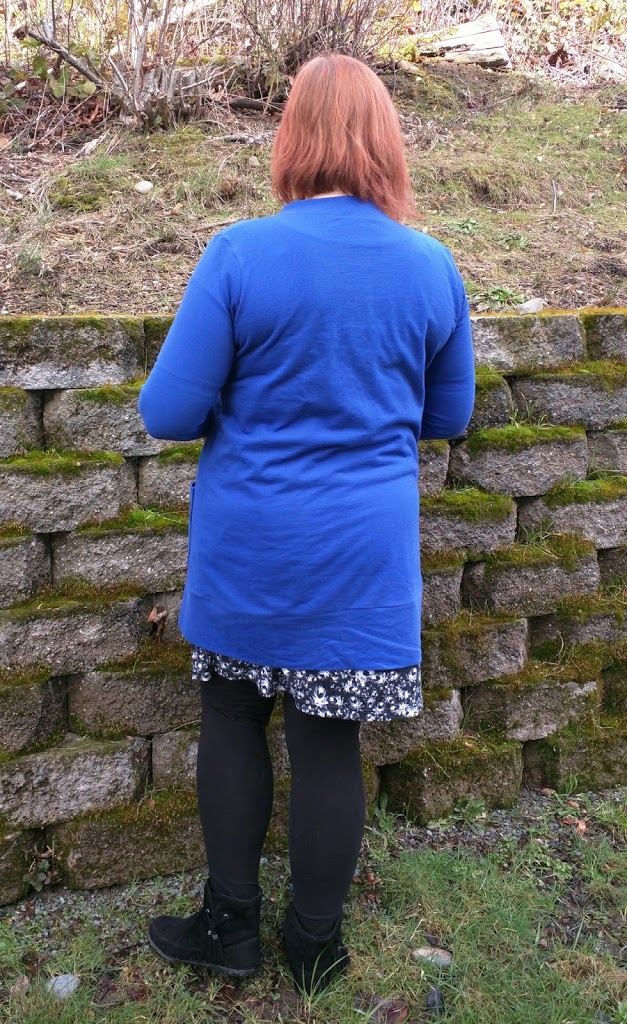
There are a few wrinkles at the lower back, even after trying to smooth it out, so I’m going to see about doing a sway back adjustment, although I’ve never attempted it on a pattern that doesn’t have a waist seam.
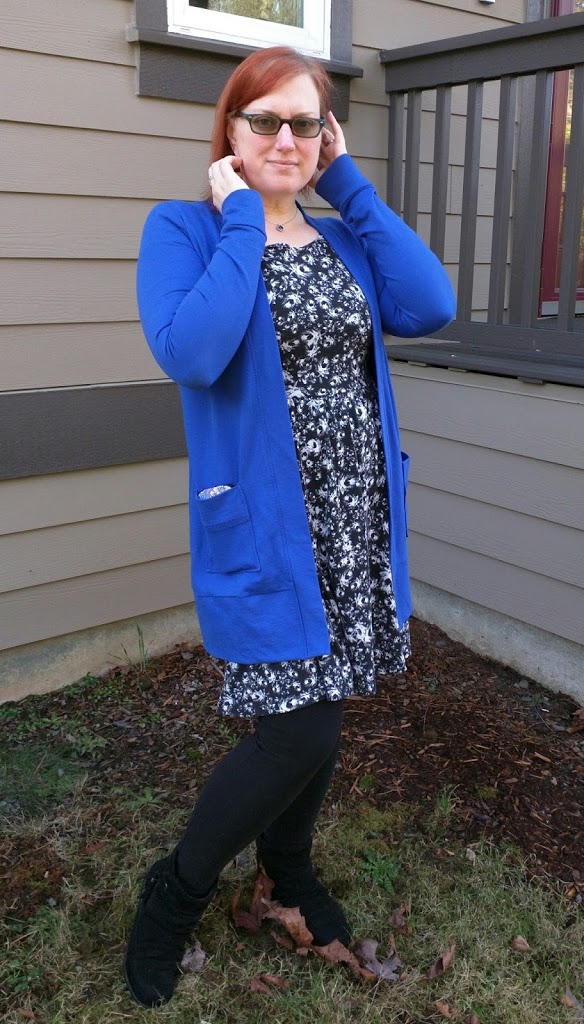
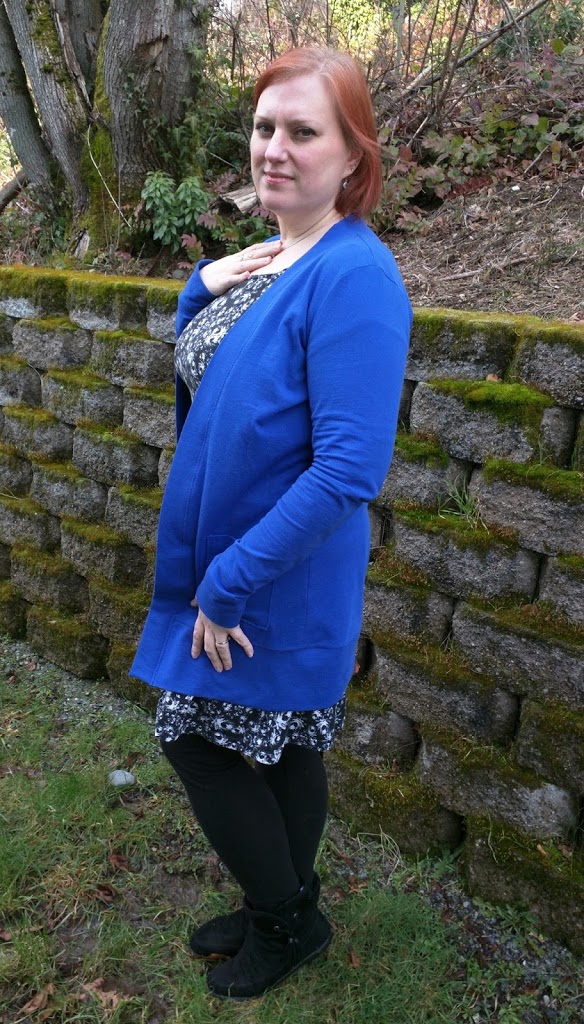
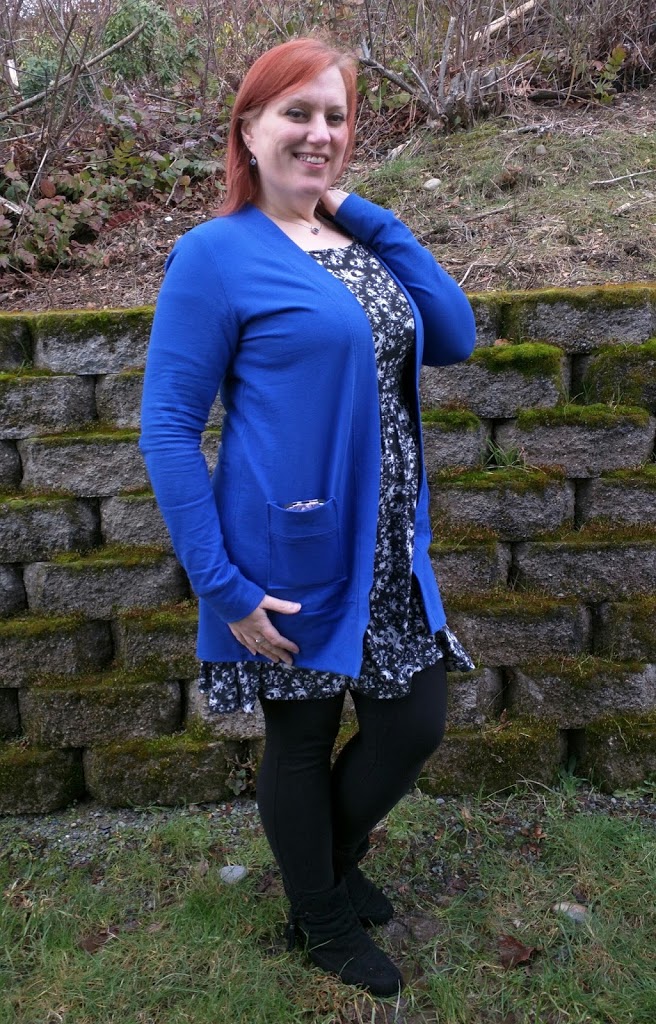
I love this sweater and I have worn it quite a bit. I really need to make a few more because I’m cold all the time at work now and other than this sweater, I only have hoodies to keep warm.
The Blackwood Cardigan pattern is 20% off for the first week, so go pick it up. But hurry, because the sale ends March 6th.
I decided to wait until 2016 was actually over before posting my Top 5 of 2016. But I’ve been compiling it for a while. So, with no further ado, here it is.
Top 5 Hits
Sweater dress from the Fabricista Fashion Challenge I love how this dress turned out. I’m a bit heartbroken that it won’t fit for much longer and because of the design, I don’t think taking it in will work very well.
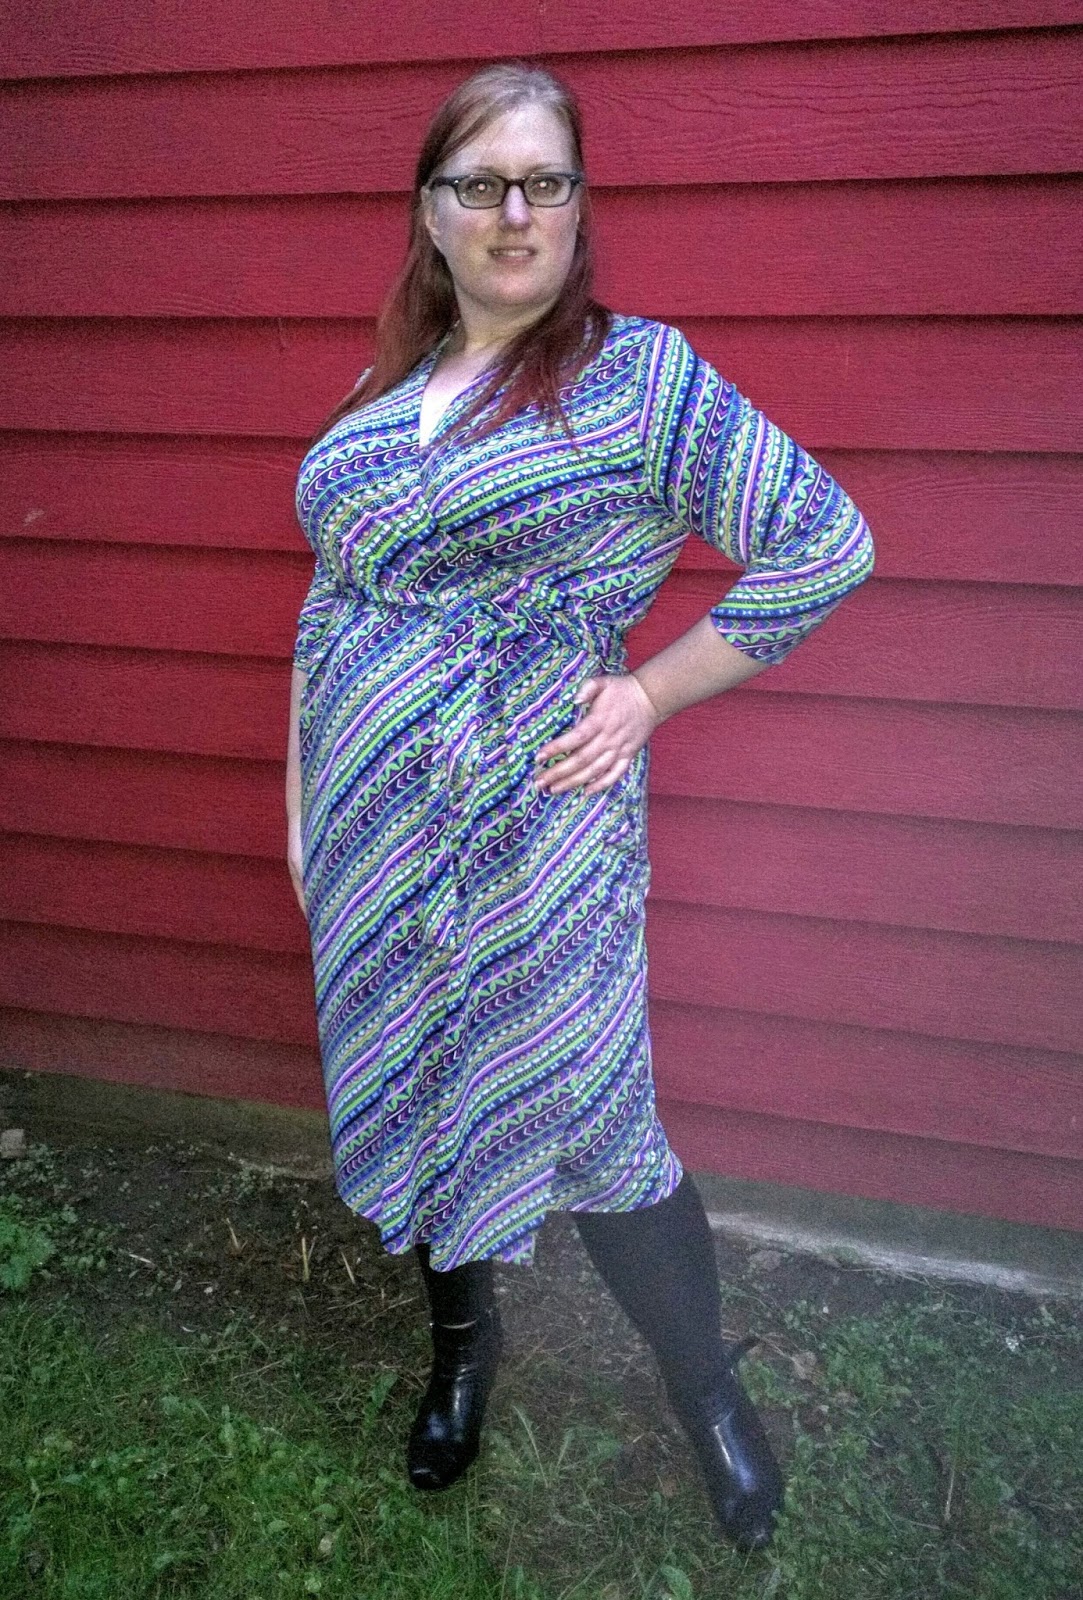
Named Olivia Jersey Wrap Dress I love wearing this dress! It’s pretty much my go-to dress for comfort and looking nice. What I love best about it is that even now that I’m 26 lbs lighter than when I made it, still looks great on me and not baggy like a lot of my other me-made clothes. I really need to make several more of these!
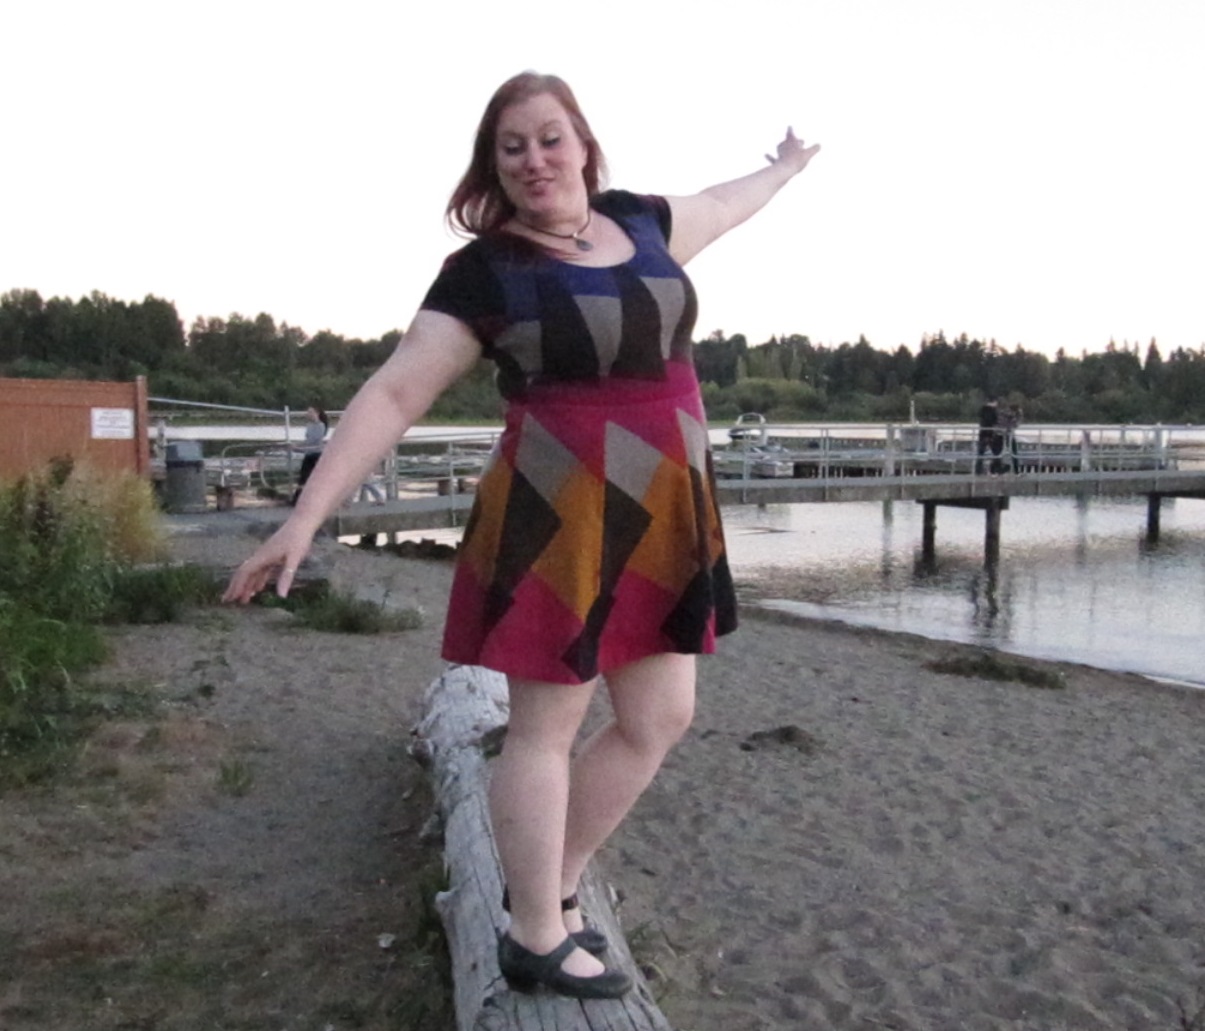
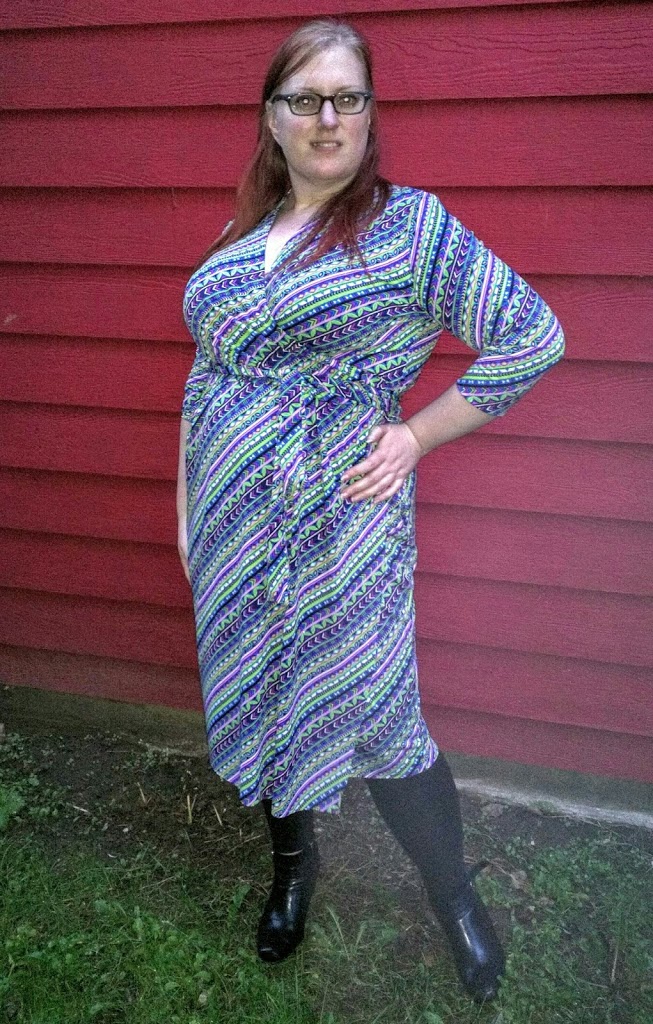
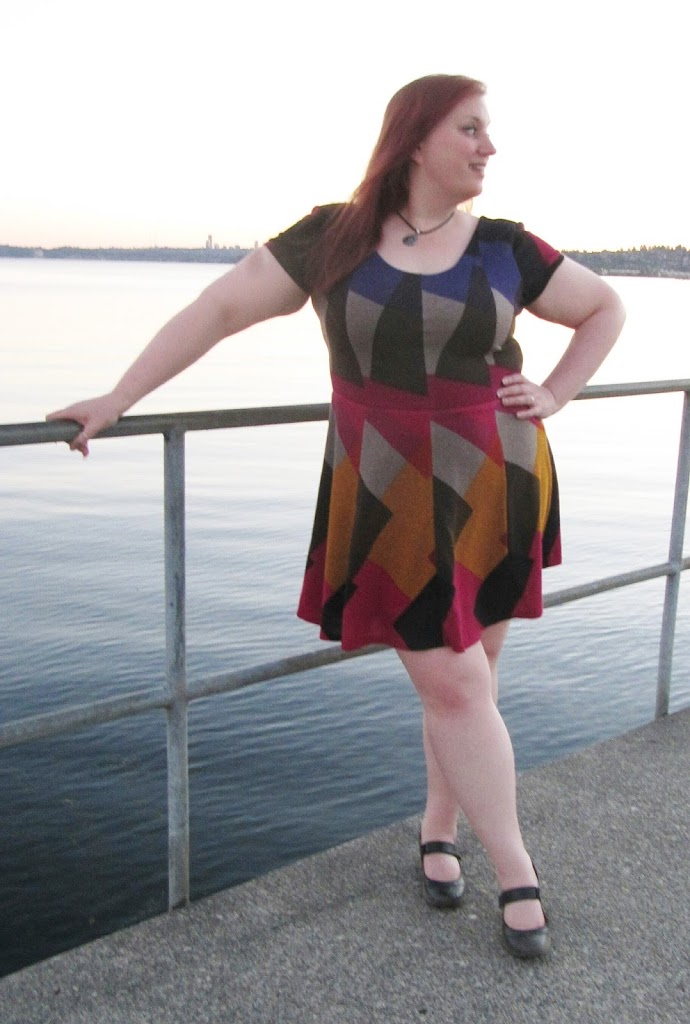
My purple Rhythm dress I’m quite happy with how easy this dress was to put together. Technically I didn’t make the actual dress, since I used a dress I purchased from a thrift store, but the dress was the same style that I’ll make when I use the Jalie Fit and Flare dress pattern and that won’t be much additional work than what I put into this one.
I love the movement of that fringe!
The Bohemian Maxi I just love the flowy movement of this dress. I feel so good when I wear it.
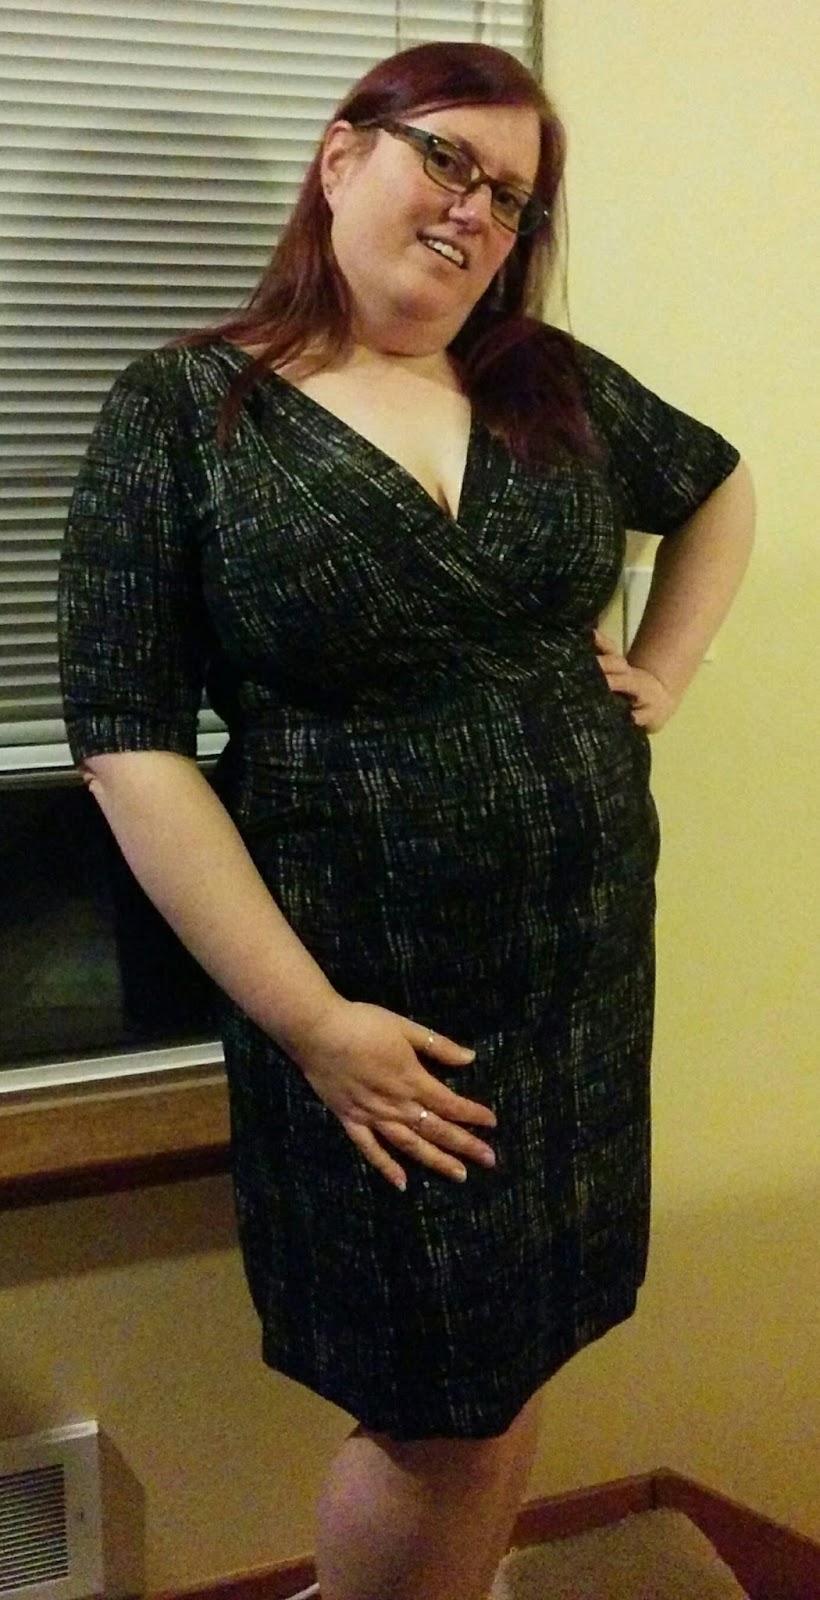
Colette Wren When I made this dress, I knew I was on my way to losing weight and most likely having weight loss surgery, so I intentionally made it a size smaller than I normally would. The fabric doesn’t have a great amount of stretch, so it was very hard to wiggle into when I took the initial photos, but now I love how it fits and looks. I love my Wren enough that I made another for my birthday dress with the gathered skirt (that I apparently never blogged…)
This blouse just didn’t turn out great and it photographed even worse!
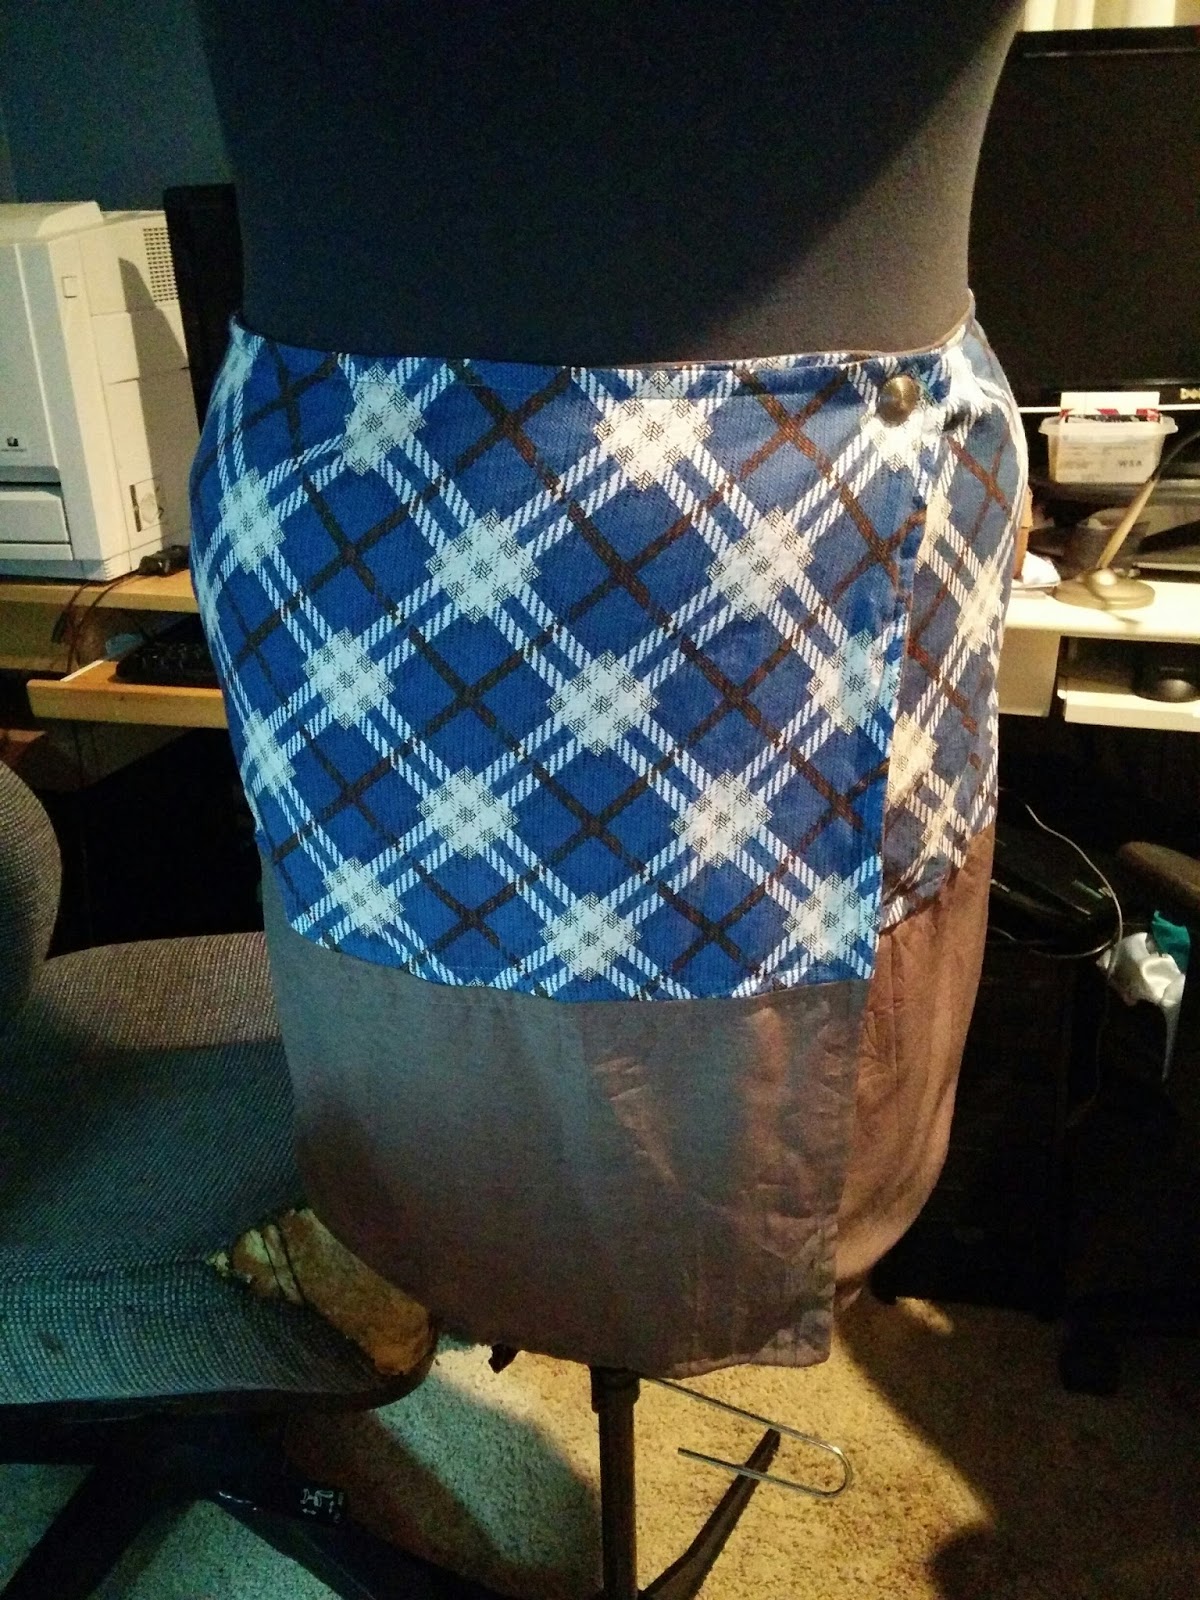
Seamwork Osaka The skirt isn’t terrible and I’d be willing make this pattern again. But the gray fabric was not suited for this garment and I just think it always looks messy. I haven’t worn it once. It’s a shame too, because that plaid was one of my favorites in my stash. Maybe I can salvage it somehow…
The gray fabric just looked terrible.
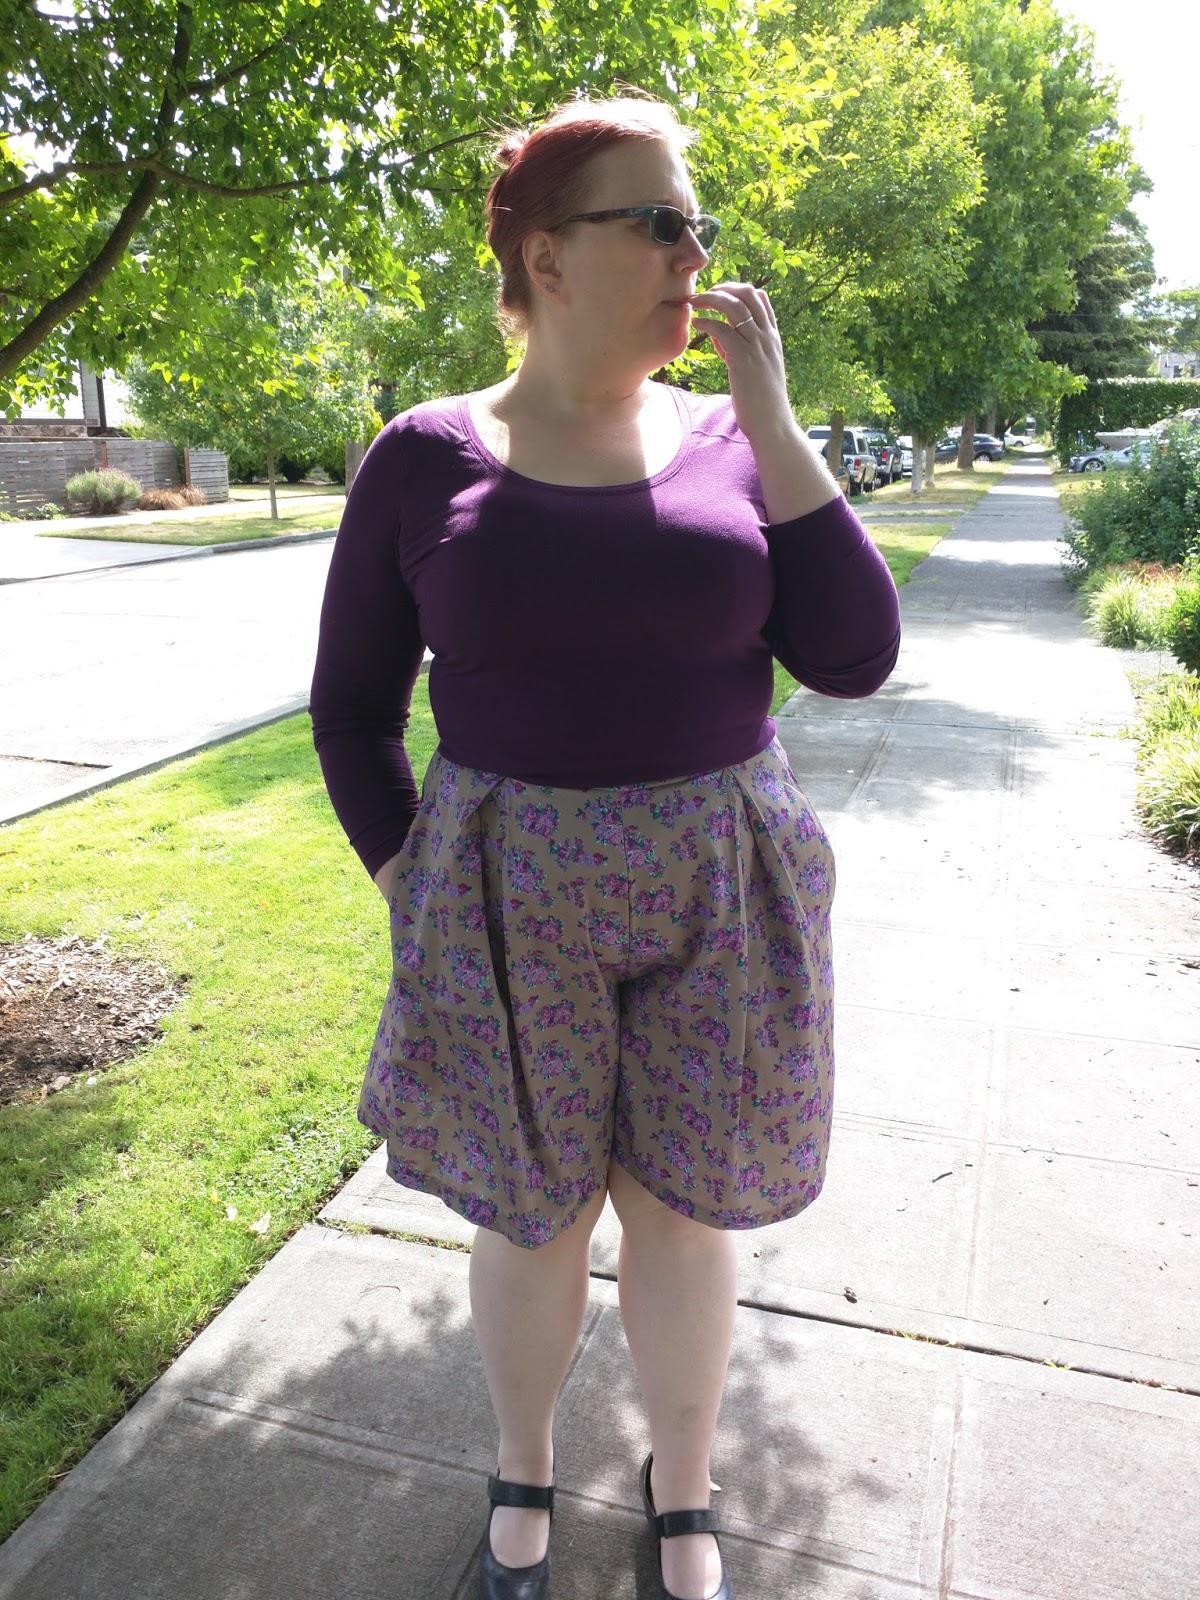
Floral Georgette Winslow Culottes Don’t get me wrong, I absolutely love this pattern from Helen’s Closet. And my second pair I made out of a linen/rayon blend that I did a full tummy adjustment on are perfect and I wore them a lot before the weather turned cold. But the combination of the fit across my big tummy and the lightweight, clingy fabric made that first pair just do a lot riding up in the crotch, which made me uncomfortable. So I never actually wore them other than for the photo shoot. I haven’t tried them on since I lost weight. My waist measurement hasn’t changed much, so they should still fit and maybe the fact that my tummy isn’t so large will make up for the lack of the FTA.
Terrible things are happening in the crotch area..
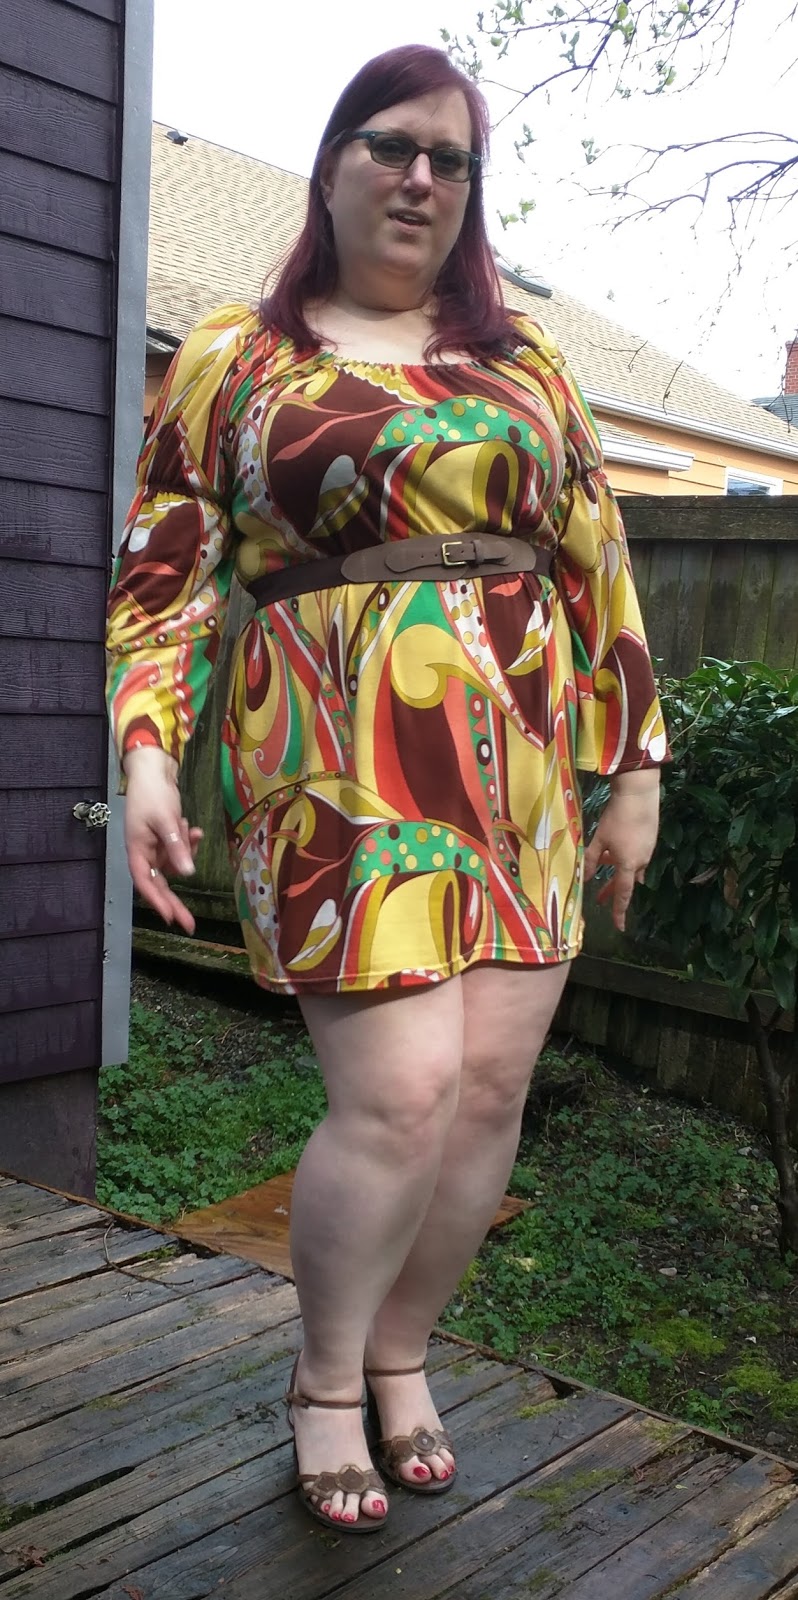
70s Style SisBoom Meghan This dress is cute, but it’s really too short for my comfort and the colors just aren’t me. And the sleeves don’t really behave right and they flip to the wrong side. I like the pattern and I will likely make a version of it again, but longer and doing the sleeves differently. I wish I’d used a facing for the sleeves so that you’d see something nice when seeing the inside and also to add a little weight to make them hang better.
McCall’s 6801 I made a couple dresses that were more body con and I just didn’t have the body confidence to rock them. I think I might have worn this dress once, but I can’t even remember for sure at this point. This is yet another one that I should try on now that I’m quite a bit lighter. I’ve lost several inches in my bust and my hips/butt/tummy area, but none in my waist at all, so I’ve been trying things on to see how they fit differently, but I ended up packing up a lot of me-made clothes without trying them on and this was one of them.
Top 5 Non-Sewing Highlights
My weight loss journey. In December of 2015, I was almost back up to my highest weight ever after losing over 100 lbs TWICE then gaining it back. So I made the decision to go to an informational session with a local bariatric clinic to find out about weight loss surgery. I was uncertain if it was something I should do, but after speaking to the surgeon after his presentation and asking a zillion questions and then doing more research and thinking on it for about another month, I decided to start the process. My first appointment with the clinic was at the end of January. My insurance required me to do 6 months of medically monitored weight loss, so I started that on Feb. 1. I hit a stumbling block right before I was scheduled for surgery when my insurance wouldn’t preapprove my surgery because they required it to be done with one of a couple particular clinics. But after I pouted and pleaded to no avail for about a month, I decided to just suck it up and go to another clinic. I ultimately had my vertical sleeve gastrectomy on Nov. 2, 2016 and I was back on my feet in only a few days and I feel better than I have every felt in my entire life. The number one thing I’m most surprised about is that I have SO MUCH ENERGY. I literally bounce around and drive my family crazy, especially when we are out doing things together. As of today, I’m down 77 lbs from my highest weight ever, 61 lbs from that first appointment last January and 26 lbs since my surgery. And the best thing is that I’m off my blood pressure meds that I’ve been on since my twenties! Going through the process leading up to my weight loss surgery was a highly emotional experience, and I recommend if you or anyone you know is considering it, to be sure to have a very supportive group of friends and family to lean on. I have to admit that a part of me is sad that I will no longer be a “curvy chick” right after I finally got to the point of body acceptance after all these years of hating the size of my body. But I have no doubt in my mind that this was the best choice for me.
Dec. 31, 2015
Jan. 5, 2017
I finally participated in The Big Climb. This has been one of those events I’ve known about forever and was interested in participating in, but never seemed to get my act together to sign up before it sold out. My Weight Watchers at Work leader runs a team for the event and she asked in our meeting if anyone wanted to participate and I jumped on the chance. I was very worried about it, because even though I signed on for it 5 months ahead of time, I didn’t really do any kind of training and 69 flights of stairs is A LOT OF STAIRS! But I went slow and rested a bit on the landings every few floors when I got winded or weak legged and I finished just fine in 38:20, which is an average of 34 seconds per flight. I’m signed up again for this year, so I have a baseline time to beat! If you are so inclined to donate money to a worthy cause and would like to support me in my fundraising efforts, you can visit my fundraising page for The Big Climb 31.
View from the top of the Columbia Tower after walking up 69 flights of stairs!
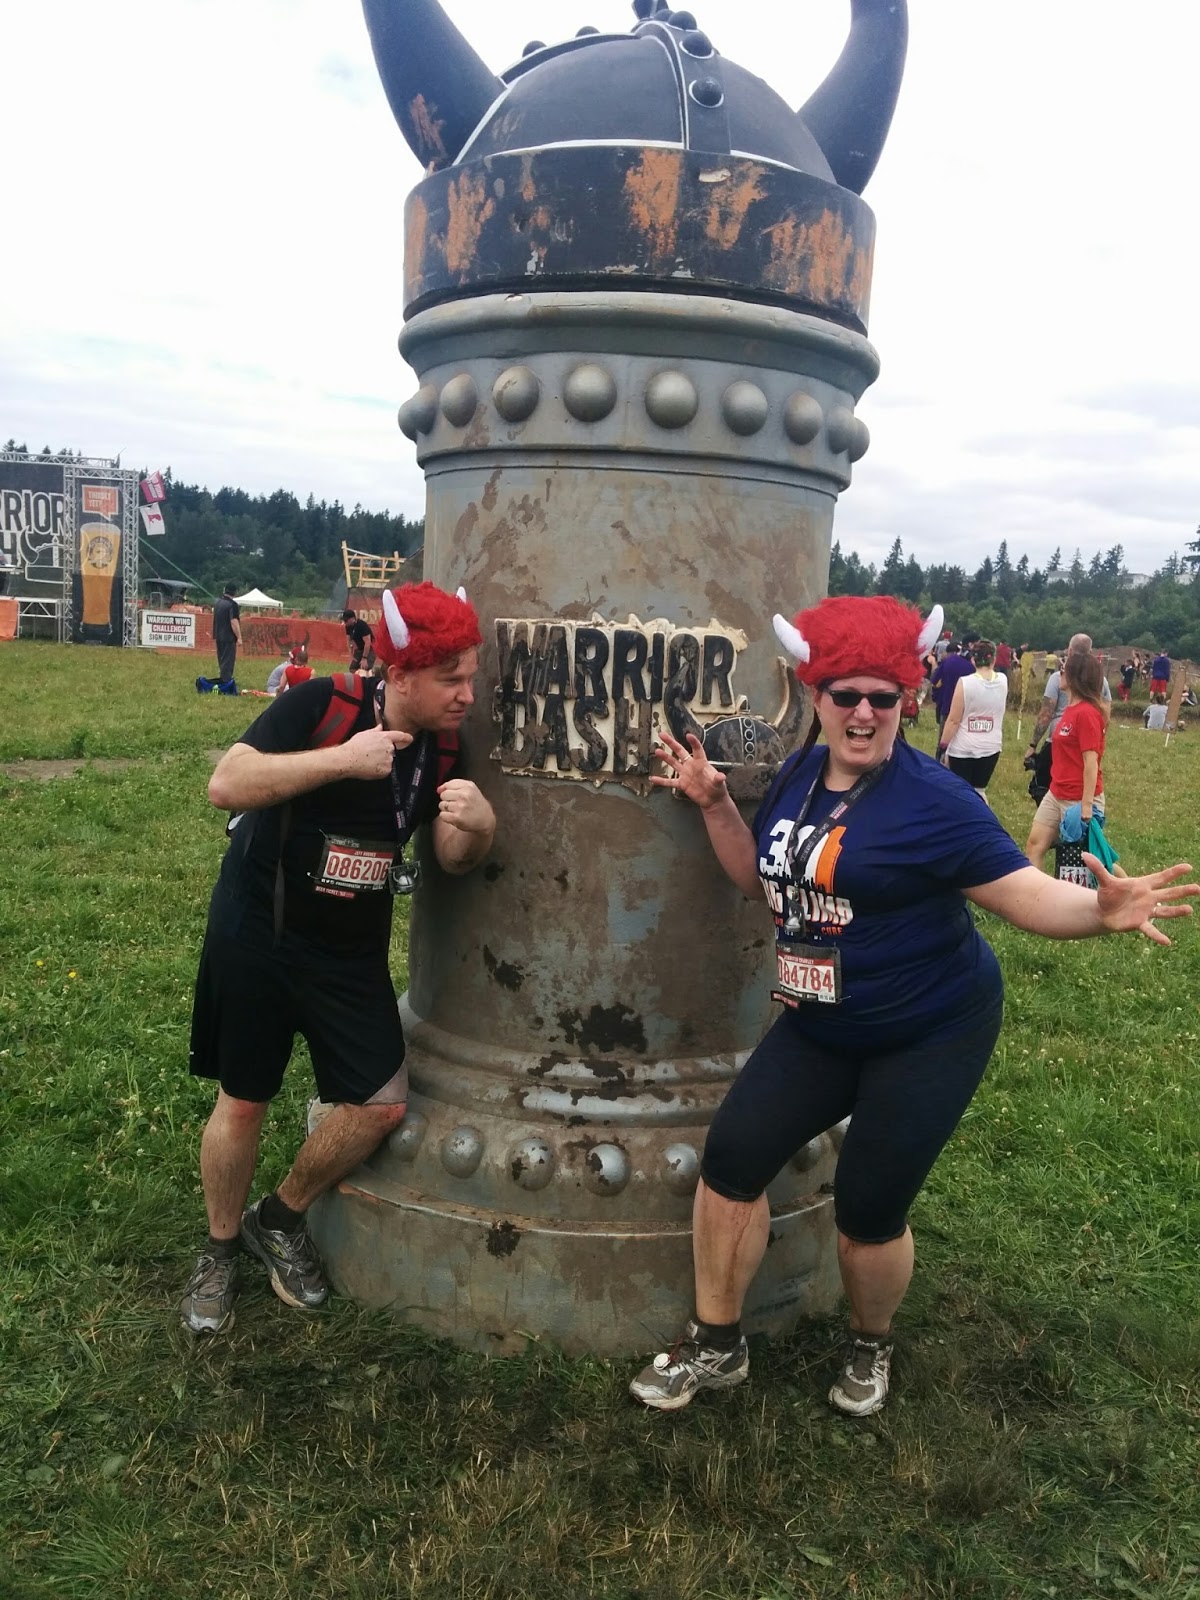
I conquered the Warrior Dash without skipping a single obstacle! Though I really struggled with a couple, having to retry one of them about a dozen times before success. This event was my husband’s idea because some of his co-workers were doing it. I was really afraid of it and I ended up hurting myself enough when I sorta fell off one of the obstacles that I was starting to wonder if I’d cracked a rib a few days later. But the feeling of accomplishment after I’d finished was amazing! And we’ve already signed up in time to get the early bird registration discount for this year!
Jumping over fire!
A nice, relaxing swim through very thick mud.
My husband and I straight out of the mud pit.
My husband and I after we cleaned up a bit with our cool souvenir hats on.
New House! After months of searching, we found a new house and it’s better than I could have even imagined! We won’t close on it until mid January, but the search is over and I’m very excited to get to have my very own sewing space!!! The new house is well over twice the size of our current house, but one of my daughter’s friends will be moving in with us and has been at our current house pretty often, so 4 adults were a little cramped in the small space. And because our current house is in a very hot Seattle location and the new one isn’t, the much bigger house on a WAAAY bigger piece of land is actually valued less than our current house. Location, location, location! But we do still have an actual Seattle address, so I don’t mind.
Our New house! (not purple yet…)
My future sewing room!
Birthday Haircut. I chopped off all of my hair! I’ve had long hair pretty much my entire life, except for a bad couple of years when I decided to rebel in middle school. But with the knowledge of (and past experience with) rapid weight loss causing hair loss, I decided to do what I can to make my already thin hair look as thick as possible. So, I went to the magician who does my hair for my dance competitions and gave her some photos of asymmetrical bobs and then let her have her way with me. I love it so much. It’s the shortest it’s been in the back for as long as I can ever remember, but the front is still long enough and the same style that I still look like myself when I look in the mirror.
Top 5 Reflections
I’ve discovered the fun and joy (and stress) of sewing competition and I want more! I’m making a goal to enter a couple contests this year. Of course, I’ll have to wait until I’ve gotten all moved and settled into the new house since everything is such a huge disarray right now.
I’ve learned that sewing deadlines help get me motivated and started, but I have a hard time actually meeting those deadlines.
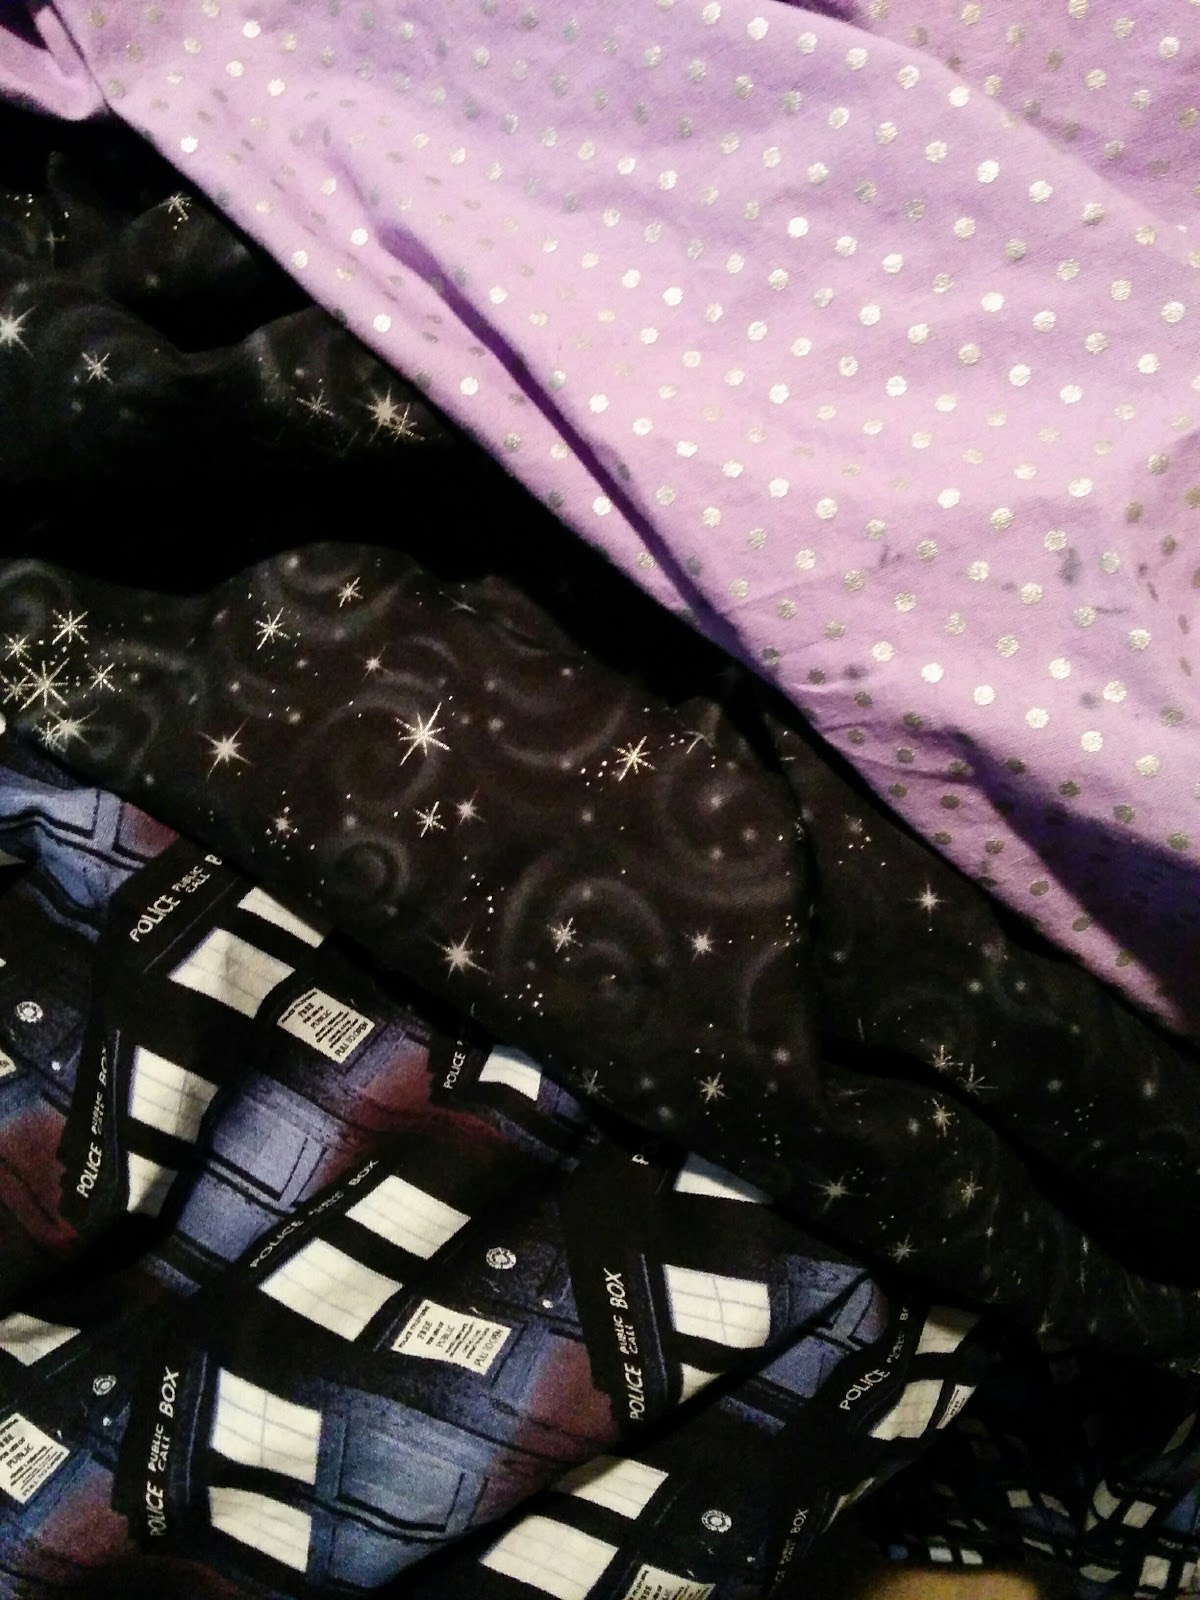
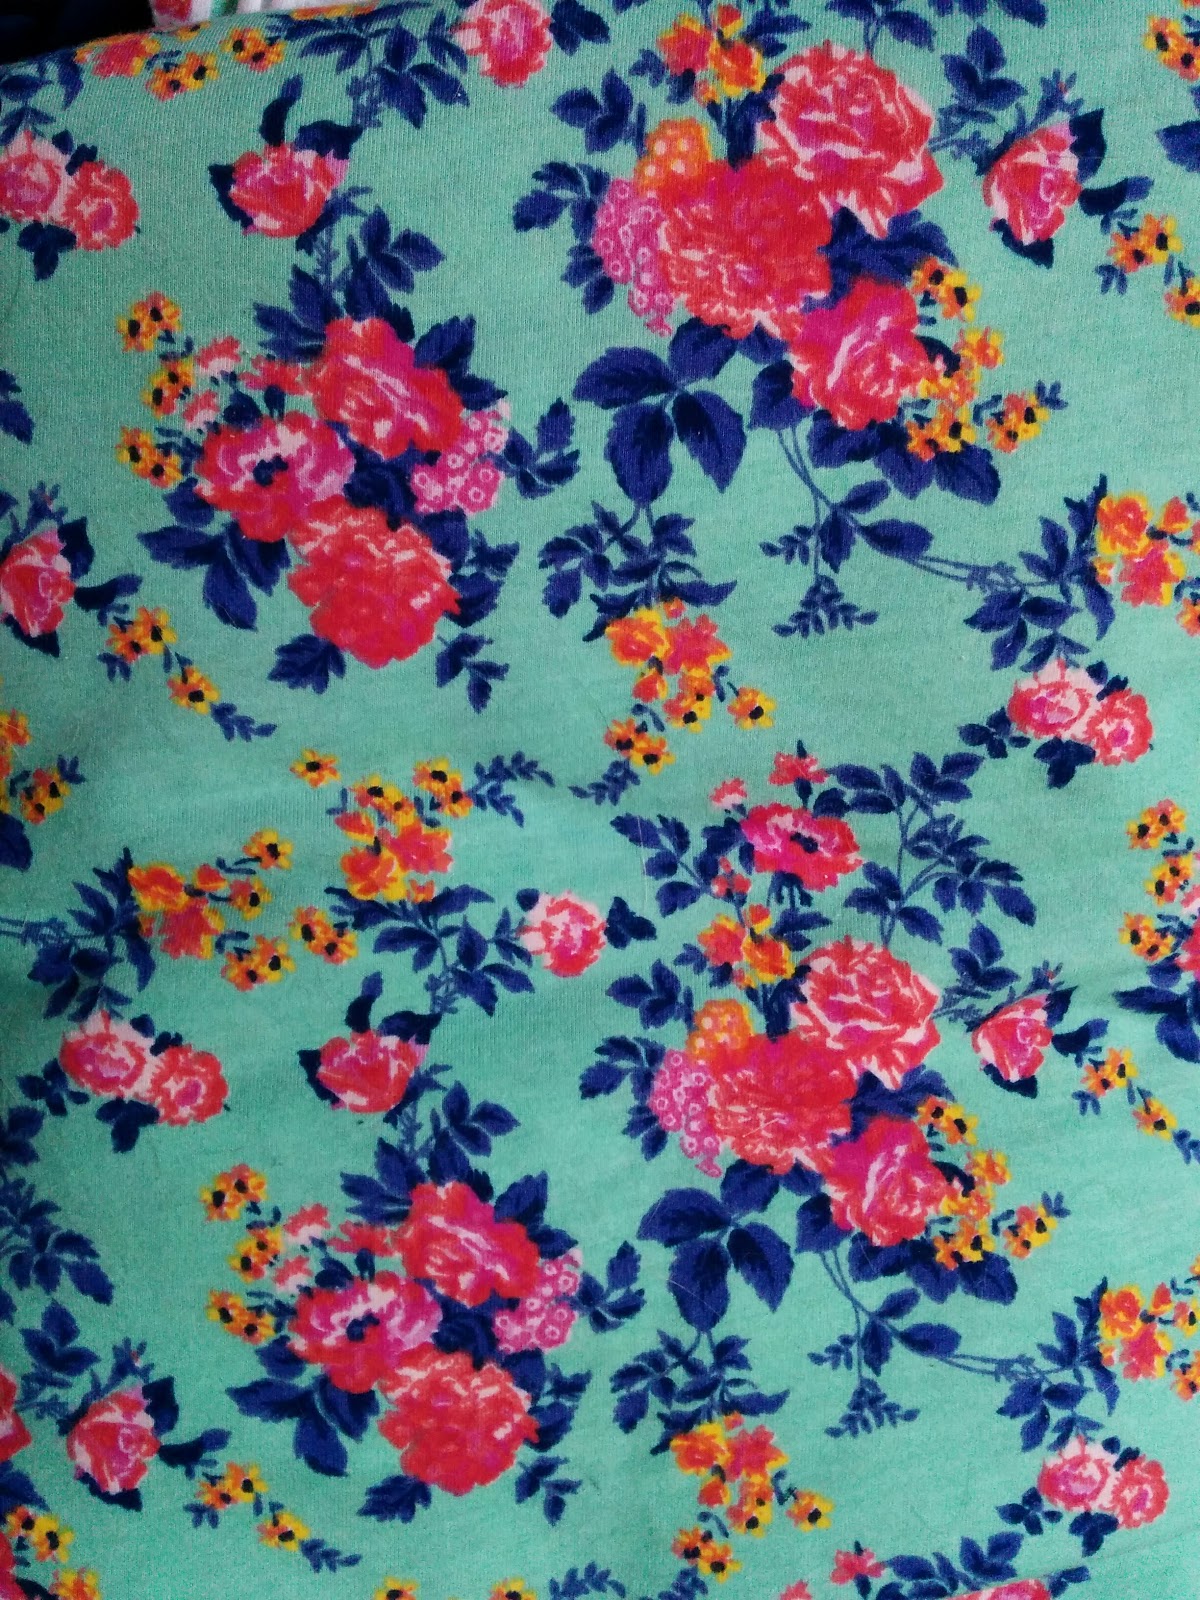
I own WAAAAY too much fabric. I already knew this, but this move we’re packing for right now has put into perspective exactly how much I had squirreled away. So, I’m going to avoid looking at all my favorite online fabric stores, which is where I do 98% of my fabric shopping from. I expect I might end up buying a couple cuts from the Sewing and Stitchery Expo this year, because when I actually see pretty fabric, it’s hard to resist. But I already don’t really go into physical fabric stores unless I’m traveling.
I want to sew all the things, but I don’t have the time. I have some projects that I’ve been planning to do for well over a year. I even already have sketches and fabric pre-washed and PDF patterns assembled, but I just haven’t had the time to finish items that are already cut and on my sewing table. I think the move will help a lot with this for a couple reasons. Not only will my commute be reduced from 45 mins to 9, giving me over an hour extra on each day I don’t have a dance lesson, but I’ll also have a dedicated cutting table in my new sewing room, so it’ll be easier to get things cut and ready to sew.
Sometimes I just don’t want to sew because I feel lonely. I usually stream some TV show (currently working through Grey’s Anatomy) on my tablet while I sew. But because of the noise of my machine, I couldn’t sew and watch TV with my husband, even if I had a nice television in my sewing room. So sometimes I just don’t sew because I’d rather be spending time with him. That’s ok, but I need to find the right balance that works best for me.
Top 5 Goals (What would you like to sew in 2017, or what skills/attitudes would you like to learn?)
For this one, I went back and looked at my Top 5 for 2016 post to see what I put for my goals for 2016 and found that there were a couple of things I didn’t accomplish, so those go first on the list for 2017.
Pants. I now own the Closet Case Files Ginger Skinny Jeans in a paper pattern because of my week 1 win in the Fabricista Fashion Challenge. So I absolutely have no excuse not to try to make them this year! I already own a couple cuts of denim that will work for these jeans. I even took a pants fitting class at the Sewing and Stitchery Expo last year to prepare myself, but I still didn’t even attempt this goal.
Sew more new-to-me patterns. I think last year’s goal was way too ambitious. But I would like to try to make at least 1 new to me pattern each month in 2017. I’m not sure if I’ll be able to start with January since we are currently in the middle of packing up the house we’ve lived in for 12 years and will be unpacking into the new house starting on Jan. 17th, but I’d like to try to squeeze out one quick Seamwork pattern before the month ends. I’ve been wanting to make Winona, Arden, Lynn, Elmira, Kenedy (with the flutter sleeves add-on,) Camden, Wembly and Oslo since I first laid eyes on them and just haven’t done so yet. I even have all of them printed and a couple of them assembled.
Be a better blogger. This one will probably always be on my new year goals. I think I was better in 2016 than I was in 2015, but I still was pretty slow in getting posts written and up and I could learn to do more photo editing. Although once I start editing a photo, I’m not sure I know when to stop, so maybe it’s best to give them to you as unaltered as possible. 🙂
Sew sweaters and jackets! I find that I’m cold all the time these days. I’ve been wearing hoodies because I have a ton that I’ve gotten free from work or my husband brings me from his work or as a gift. That helps me stay warm, but I don’t look as pulled together as I would if I had something that fit better and was more coordinated with my outfit. So that’s something I’d like to focus on this year.
Enter at least 2 contests/competitions this year. I really enjoyed the challenge of both the Fabric Mart Pinterest Contest and the Fabric Mart Fabricista Fashion Challenge that I participated in last year. I would like to do more. I don’t follow Pattern Review as much as I should, but they run some contests and I need to be better about keeping an eye out for them. It might also be fun to enter something at The Washington State Fair this year.
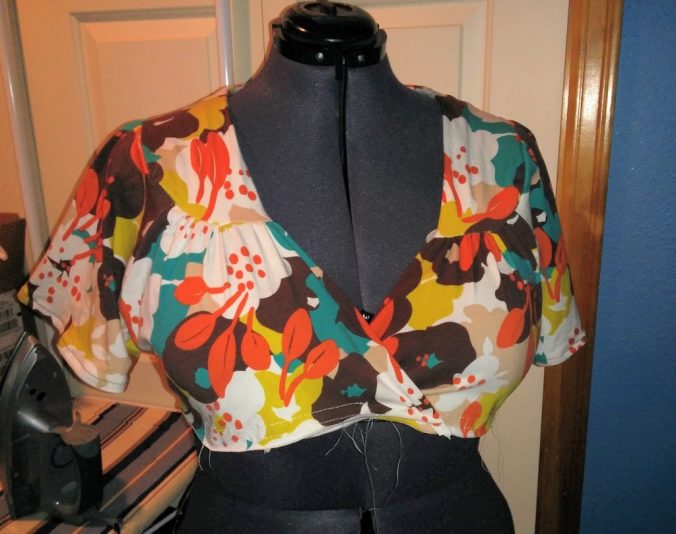
I cut this lovely dress out over a year ago, and I had finally started sewing it in August, but I had to put it on hold because I was missing a couple pieces and then I was chosen to participate in the Fabricista Fashion Challenge 4. This is as far as I got before I put it on the back burner.
The pattern is (OOP) Butterick 5243 and I picked view A with the lovely flutter sleeves.
The fabric is a Mustard/Brown/Teal/Multi Abstract Floral Jersey Knit that I bought from Fabric Mart in May of 2015. The back of the fabric is soft and flannel like and I just love the way it feels, as well as how it looks.
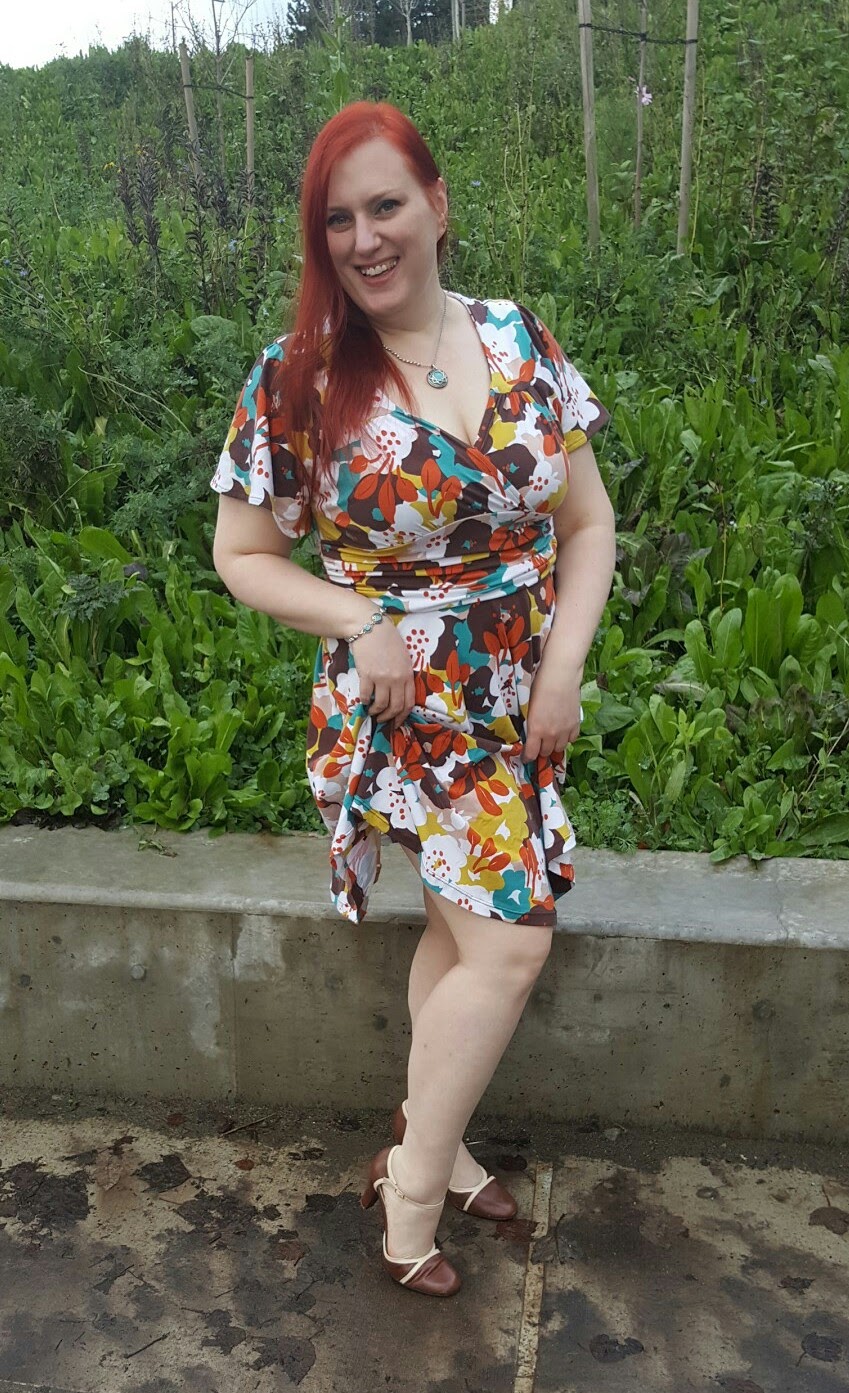
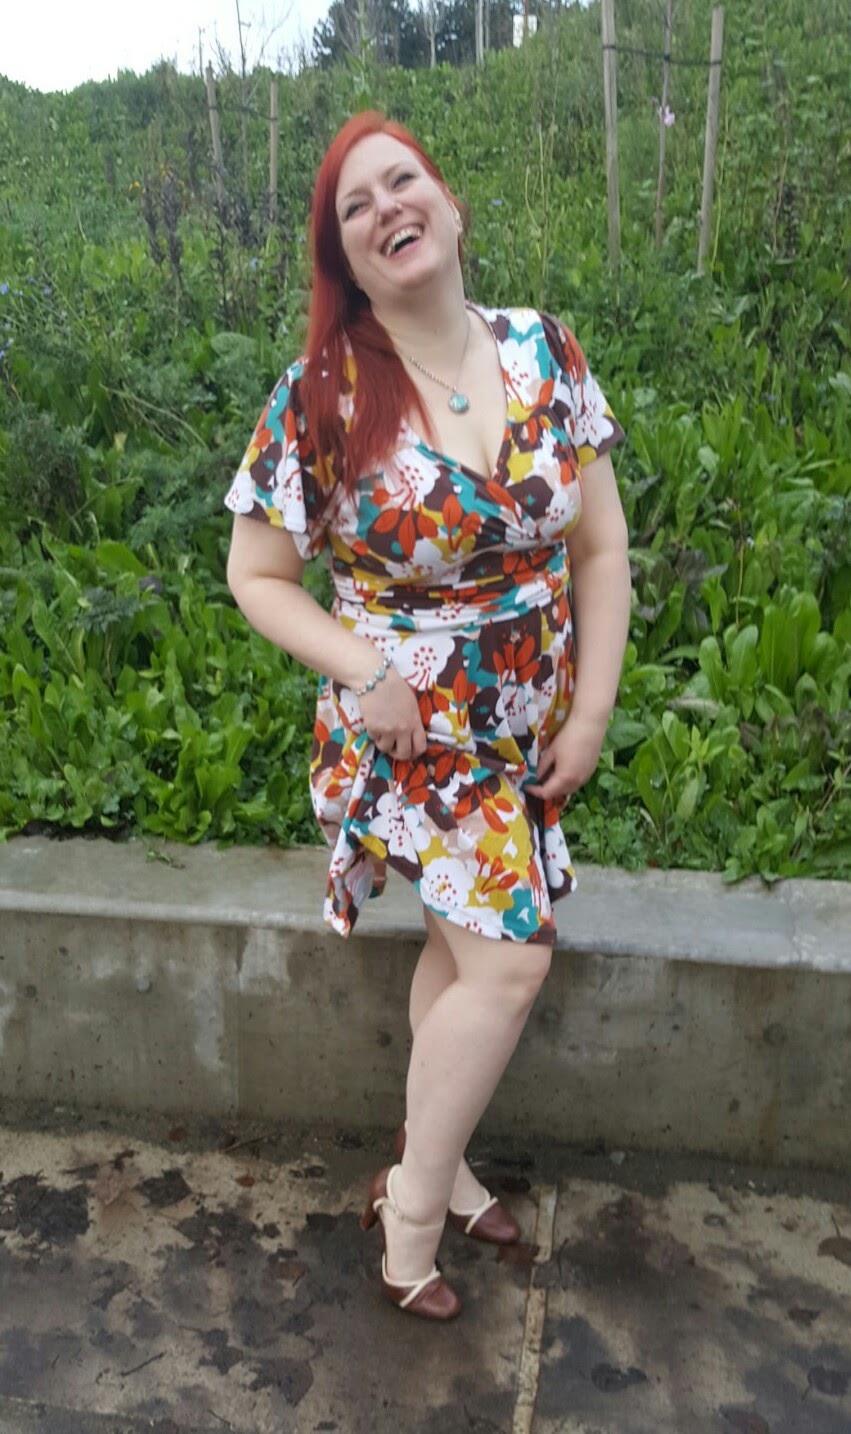
We went to the Fremont Troll to take these photos because I thought it would be fun to start adding a little bit more of the Seattle experience to my blog. Plus, we were headed to Fremont to go to our favorite conveyor belt sushi place for lunch anyway, so it was only a couple blocks out of our way. Well, I forgot how popular the Troll is, so we took most of our photos in the area next to the troll since it was people free and there was a lovely green background. We got some with the Troll in the background too, but it was near impossible to not have other people in the photos, so not many of those came out very well. Oh well, interesting idea, but it didn’t pan out like I’d hoped.
The photo above led to my favorite photo. My daughter was my photographer and I was playing up the pinup girl feeling I have wearing this dress by lifting my skirt to show a little more leg and my daughter said “Oh, those gams!” and that made me laugh, which she captured so well.
I didn’t make any alterations to the pattern, but I made one small change to the construction process. When I went to add the waistband to the bodice, the front cross over was still all open. So, instead of properly matching the notches to make the crossover, I wanted to make sure the bodice wasn’t dangerously low and I could wear it without worry. So, I tried it on and got the crossover the way I wanted it and basted that together. Then, as I was attaching the waistband, I just gathered it at the underbust to make it fit. So, I think I don’t have quite as much gathered as the example photos because my front pieces overlap more than they are supposed to, but it fits perfect right now and shows just the right amount of cleavage.
I also hand sewed the neckline facing to the seam allowance of the yoke. I used to hate hand sewing, but I totally didn’t mind doing it the last couple times and I think it made the neckline turn out much nicer than if I’d tried to sew it down by machine.
Overall, I really am very pleased with how this dress turned out. I do wish I’d gone with the long sleeve version, simply because both times I wore it, I was chilly and ended up wearing a jacket over it, so a lot of the nice details were hidden.
My daughter liked this photo because she said I was making the same face as the Troll. It was not intentional on my part at all, but I can’t help but agree with her!
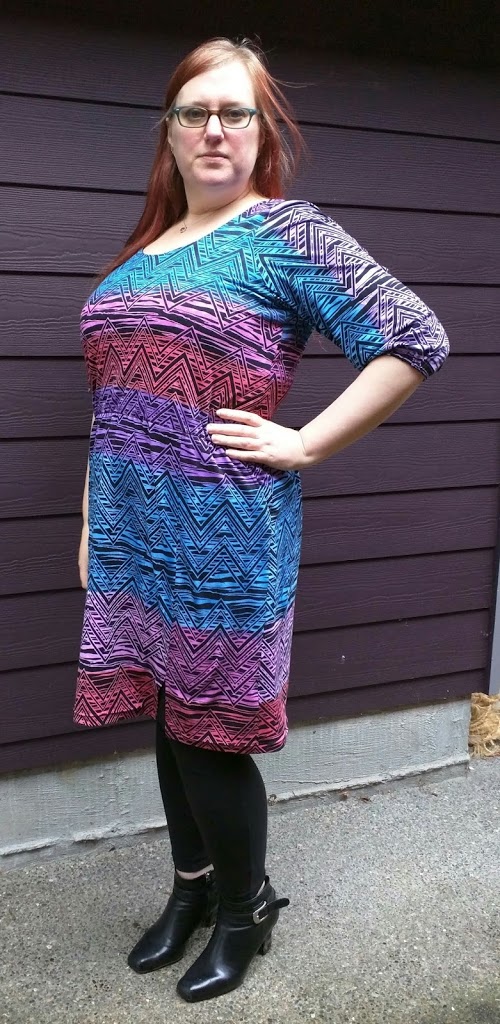
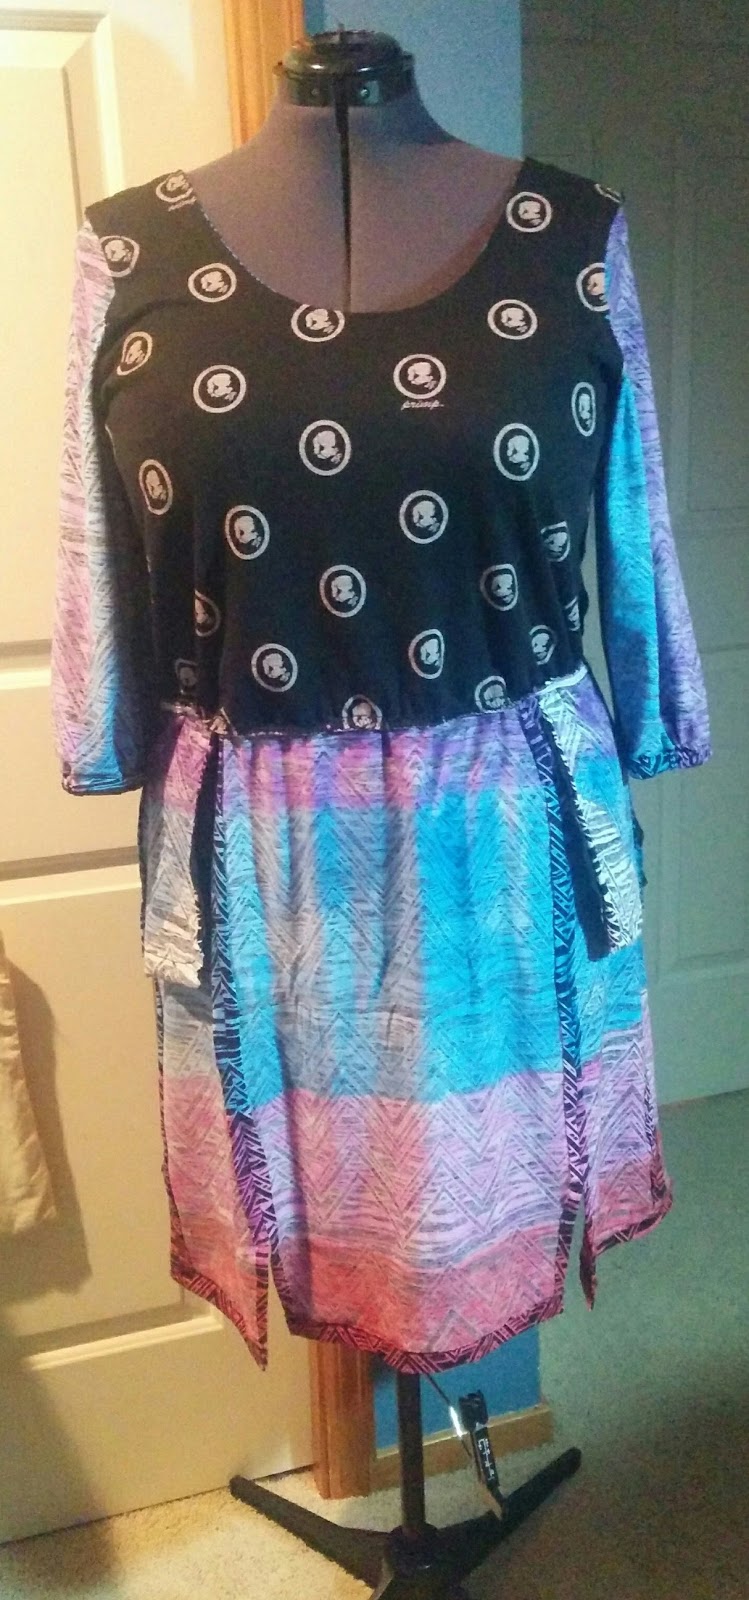
When I made my camouflage Seamwork Perry, I liked it so much that I immediately cut out another one from a cotton Spandex knit from a previous Girl Charlee* knitfix fabric.
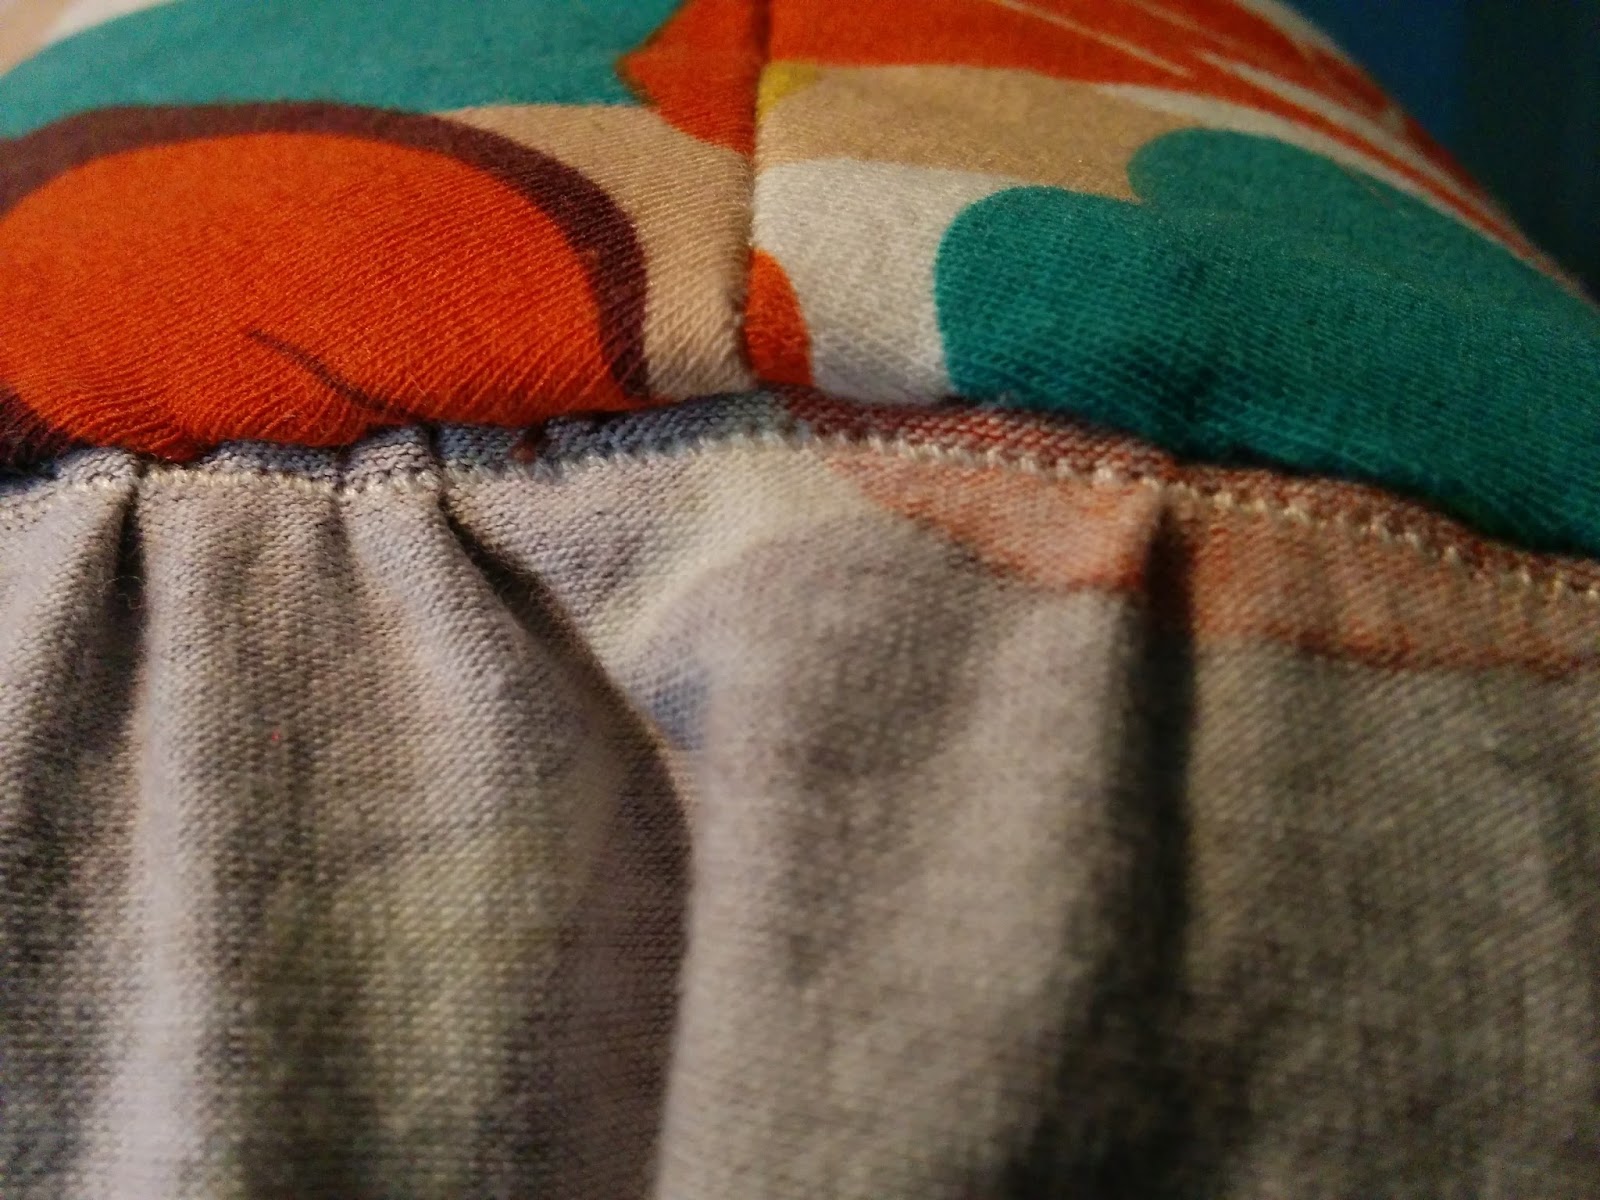
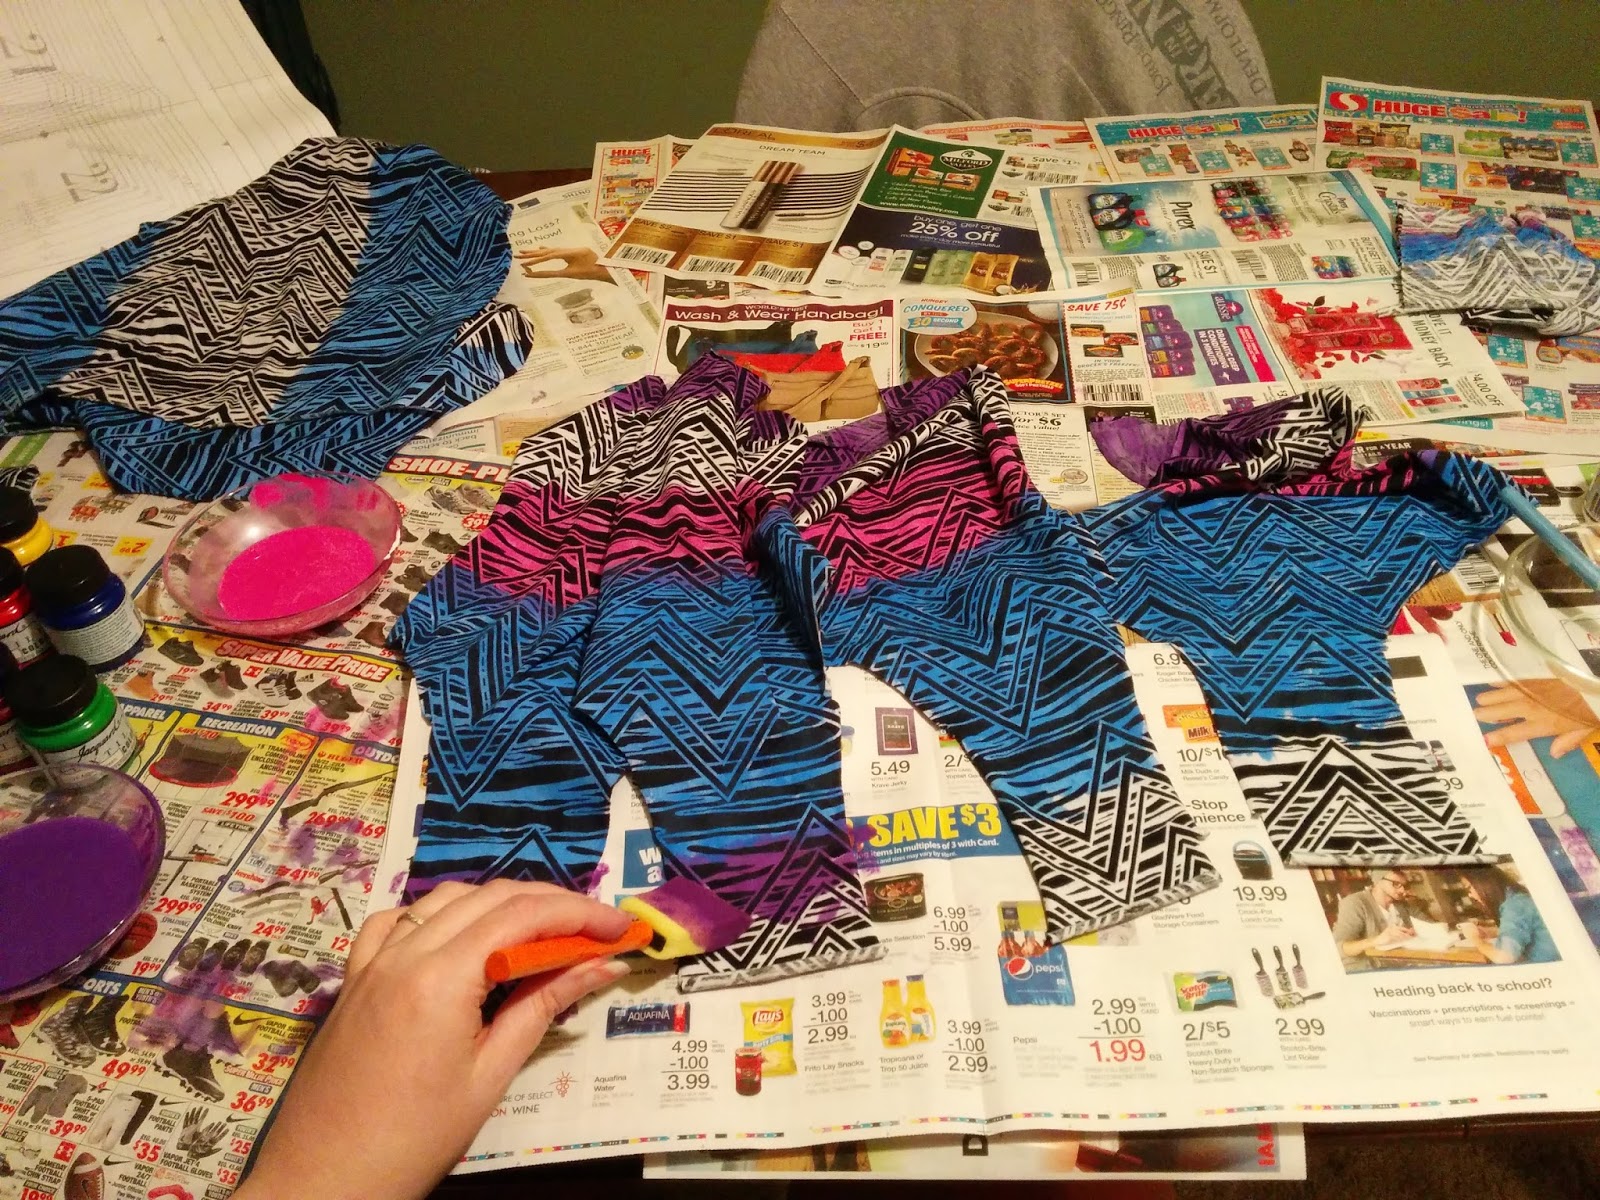
I couldn’t do pattern matching when cutting the dress out, so I decided to just cut it out however I could then I used some Jacquard Textile Color* to paint colored stripes onto the fabric to try to mask the pattern mismatch.
I started painting the pieces way back in May. I did some additional painting some time after that, but then I finally just finished it a couple days ago. After it was all dried, I heat set it with the iron following the directions.
I cut bodice lining pieces from the same black cameo thermal knit fabric I used to line my Fabricista sweater dress.
I liked the elastic loop and button I used for the camo Perry, so I decided to do that again. Since I planned this before sewing the dress together, I basted a loop of elastic that I’d colored with a blue Sharpie to the back bodice piece before sewing the shell and lining together at the neckline so that the raw ends are enclosed. Then sewed on a blue button the finish the closure.
Also I couldn’t find a couple pieces – the front pocket piece and the sleeve cuffs. I swear I cut them out, but it’s been so long and they aren’t with the other pieces, so either I’m remembering wrong or they got lost. So, I cut the missing pocket piece from that same black cameo knit and instead of replacing the sleeve cuff with a different fabric, I just hemmed the sleeve 1″ to create a channel then cut pieces of 1/2″ elastic and fed it through the channel.
I also sewed all of the vertical seams with 5/8″ seam allowance instead of 3/8″ to try to size the dress down a bit.
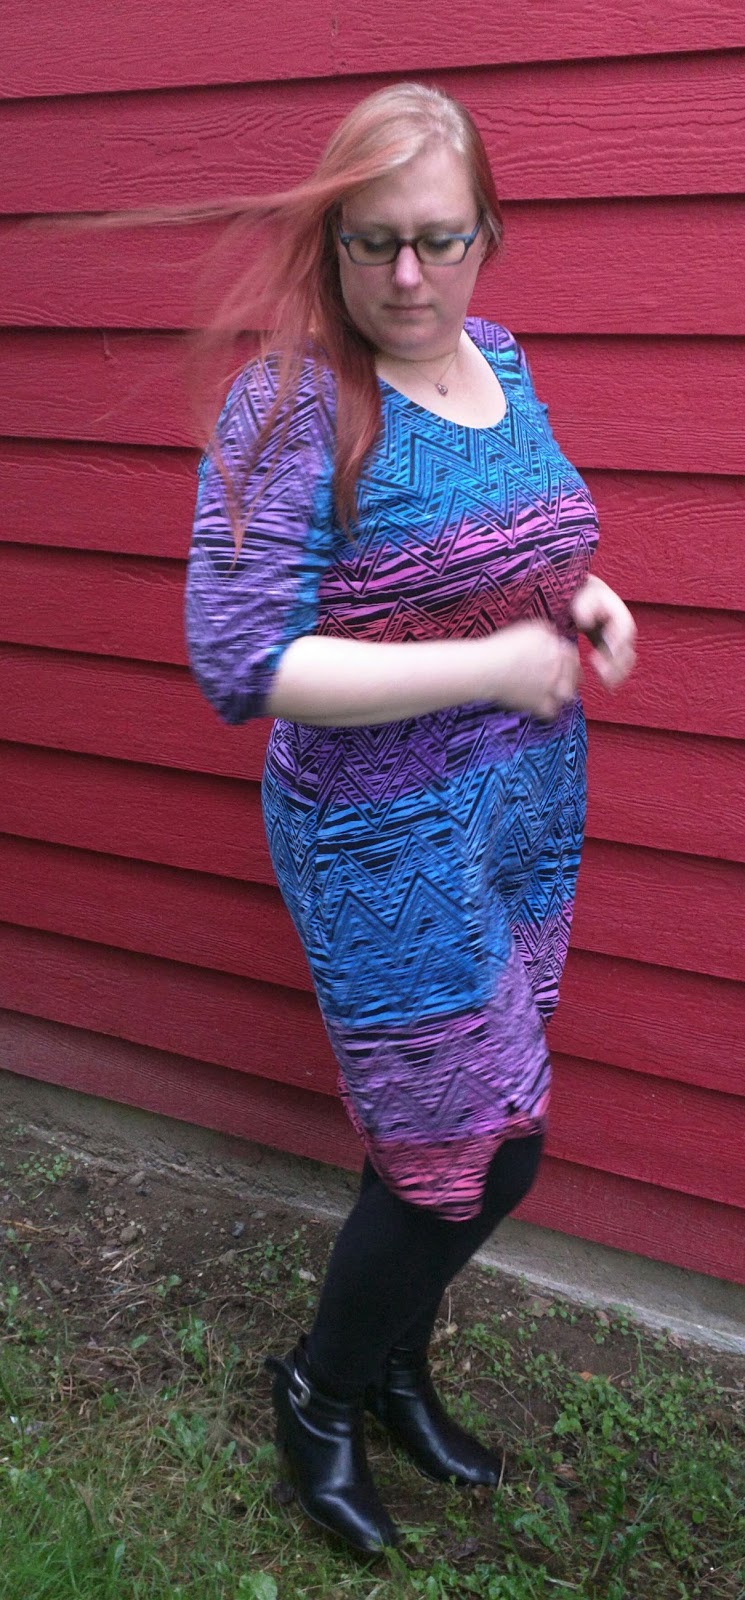
I’m not super happy with the fit of the waist elastic. I followed the instructions and cut the elastic to my waist measurement minus 2″. But I must have stretched it out while installing it, because the waist doesn’t have as much definition as my camo one.
There are a few spots where I missed fully applying the color. When I started with the blue, I was trying to go for a hand painted look, so the missed spots were a feature. But now that it’s all put together, those spots are a little distracting to me. Also, some of the coloring between the pieces don’t quite match shades, or the color lines across the seams aren’t exact. So I may end up doing another pass of the painting. Although, I am pretty happy with how it looks as is.
*affiliate link – I gotta try to help support my sewing habit somehow.
For the last 10 months I have been going to a bariatric clinic and lost 40 lbs with the intention of having weight loss surgery to help get the rest off. I hit a small speed bump due to some rules of my insurance policy and I had to change clinics, which was a huge disappointment to me, but I did end up having a sleeve gastrectomy performed on Nov. 2.
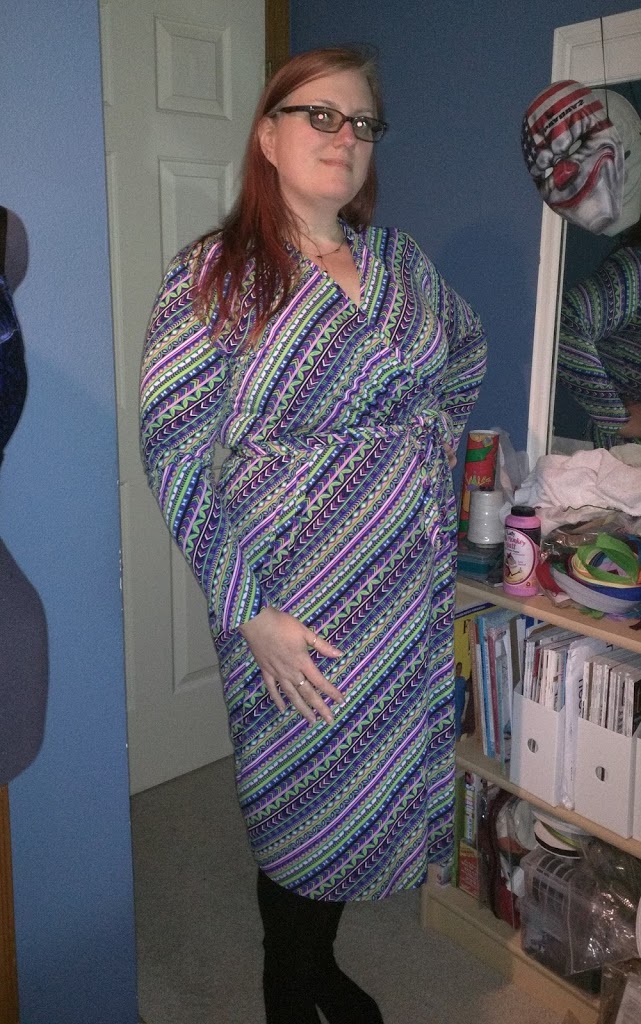
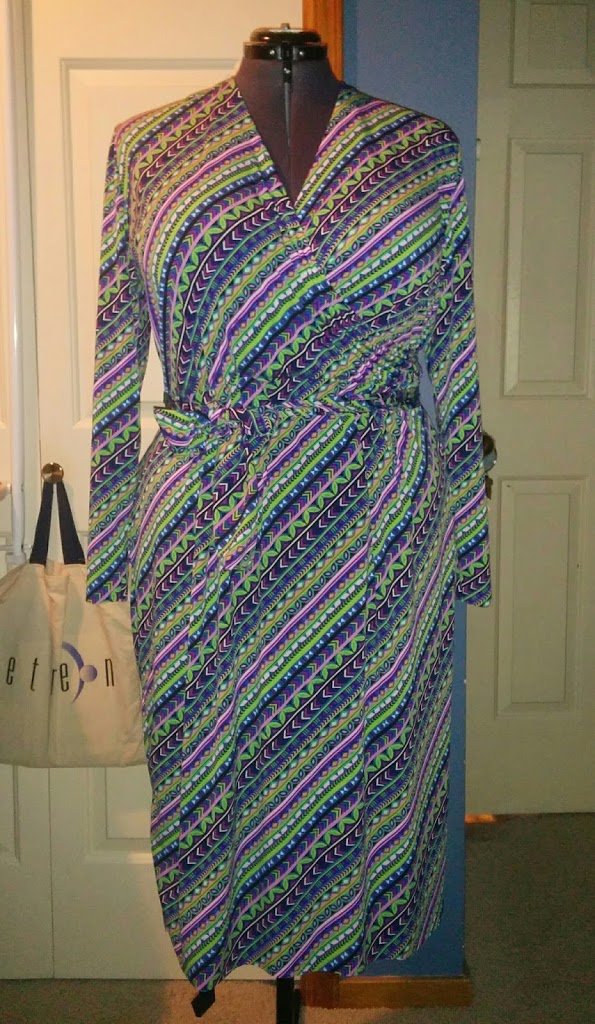
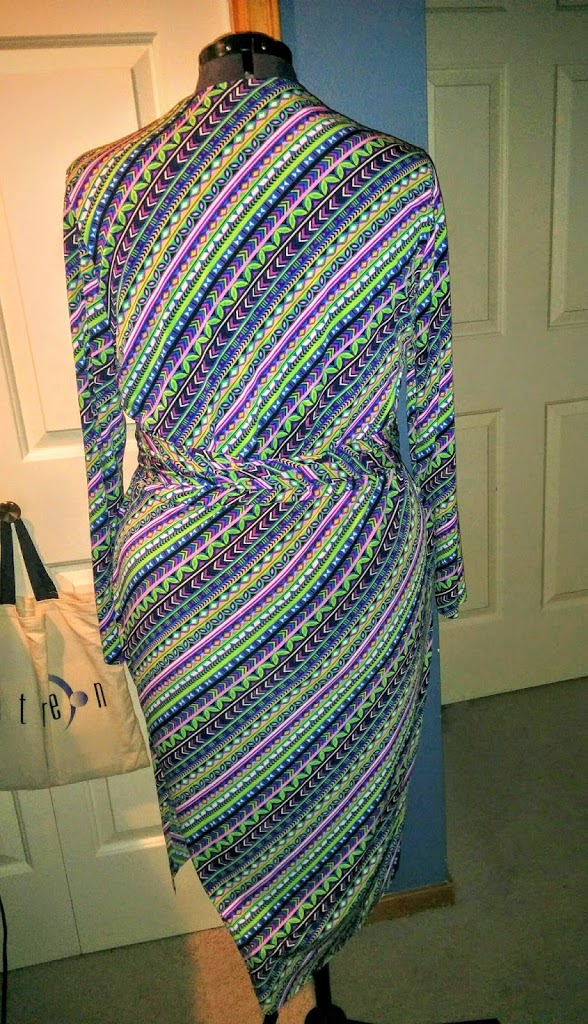
Leading up to the surgery, I knew I wanted to make something to wear home from the hospital. I have been wanting to try the Olivia Jersey Wrap Dress from Named Clothing since I acquired it as part of the Monthly Stitch‘s Chill Out IPM pattern bundle. And I knew I was going to be sore, so I figured a wrap dress would be easy to put on, would be comfortable and still look stylish.
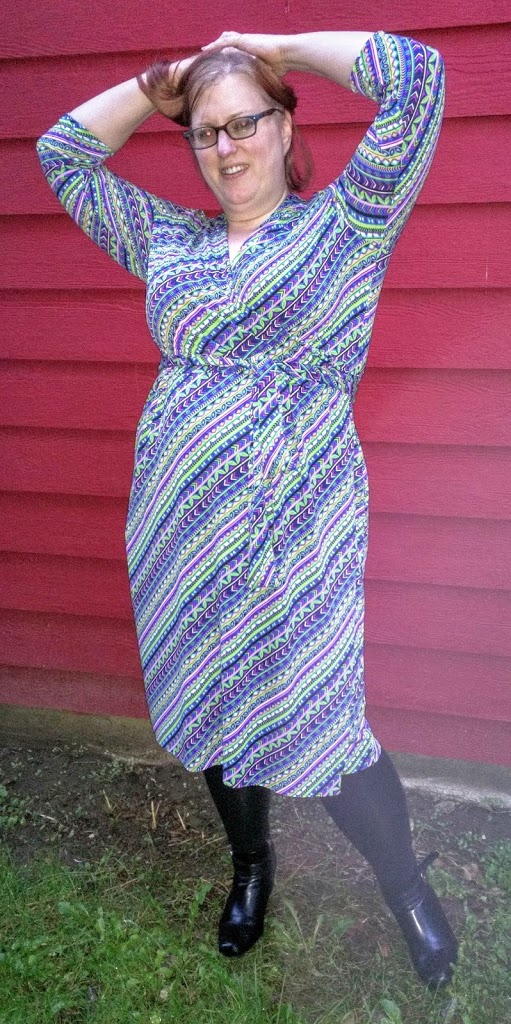
Looking at the measurements, my waist and hips fall into the size 20, but the bust measurement is 3 1/4″ smaller than my bust size. However, after cutting out the size 20 pieces and comparing the bodice to some of my other knit dresses that I know fit, I decided to not do an FBA. Well, lo and behold, the dress fits perfect exactly the way it’s drafted.
Well, did I say perfect? It could actually use a sway back adjustment. But that’s about the only change I would consider doing.
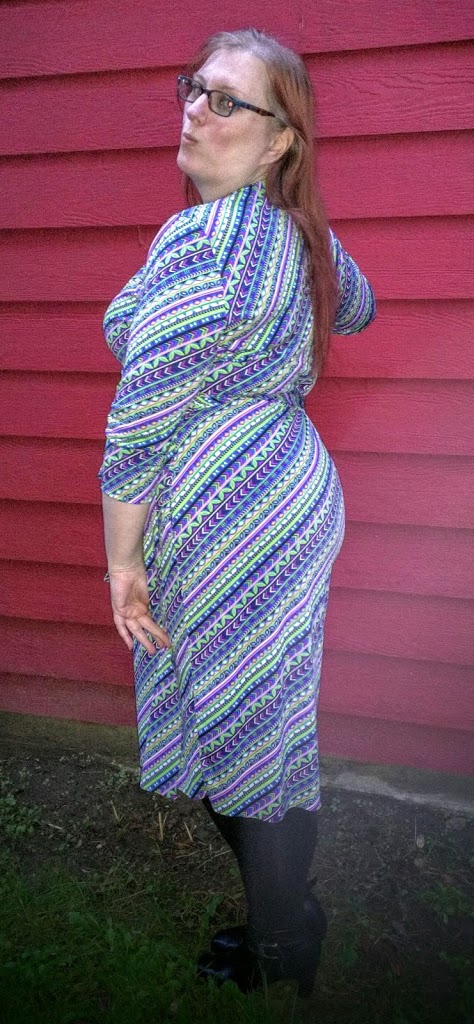
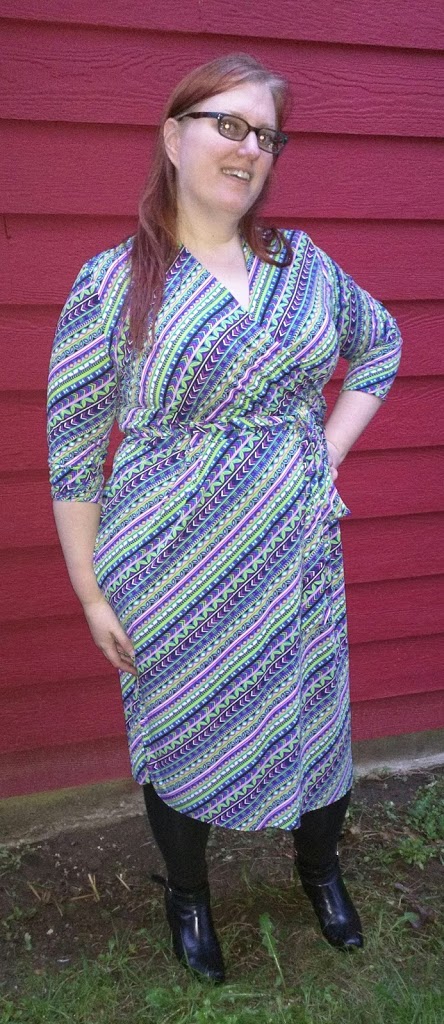
It covers quite nicely. I was assuming since I didn’t do an FBA that I would be showing off a ton of cleavage, but nope. The neckline doesn’t gape at all and there is a large enough overlap that there is no chance of flashing. I definitely will be making more of these dresses, but I might not make the next one in this size.
The outside photos were taken today and the indoor photos were taken after I got it to a wearable state, the night before my surgery. I hadn’t sewn the facing down yet, so that’s a little sloppy looking, but I did that today. I wore my new dress home from the hospital yesterday and I got several compliments from the nurses at the hospital. I was going to just say thanks and let it go, but my husband made a point of telling them that I made it. Lol.
Oh, and the surgery went well and I’m feeling pretty good, although it hurts a lot to cough or get up from sitting or laying down, but a lot less after I’ve taken my lovely pain medication. I took two weeks off work to recover and I have a few things I cut out some time ago that I plan on getting sewn up so I can wear them a bit before they are too large.
For those of you who weren’t following along with the challenge on the Fabric Mart blog, I was eliminated in week 3. I was bummed, of course, but my black peplum top was not my best work and it just photographed horribly. I don’t have any quibbles with the judges’ comments, which I thought I would share:
The tank and cardigan coordinate well with the skirt, fit and drape beautifully, and look very comfortable and wearable. They’re simple pieces, but well done, and they look great on you. It looks like the hems could have been a bit better stabilized to prevent tunneling, or the machine settings adjusted.
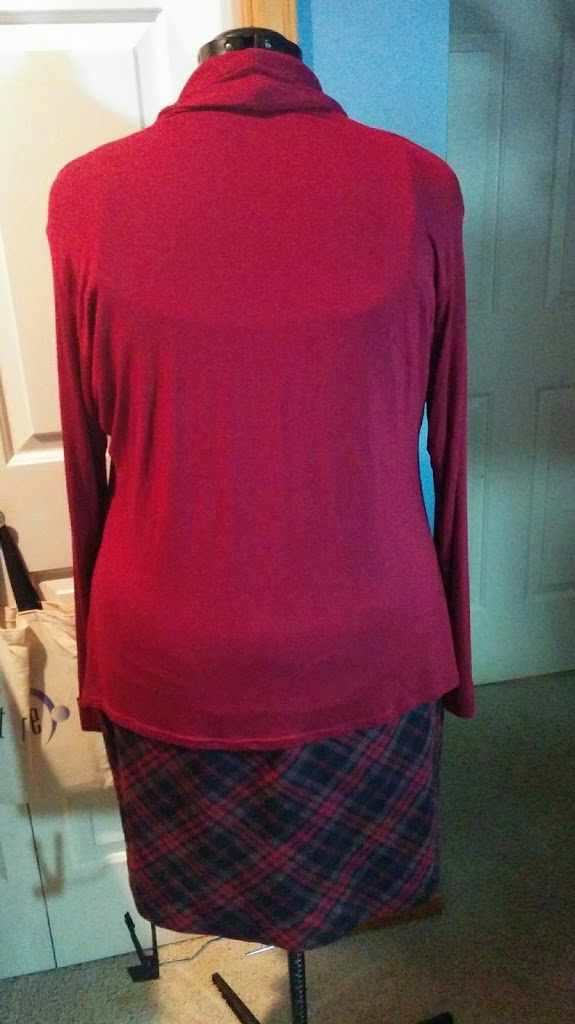
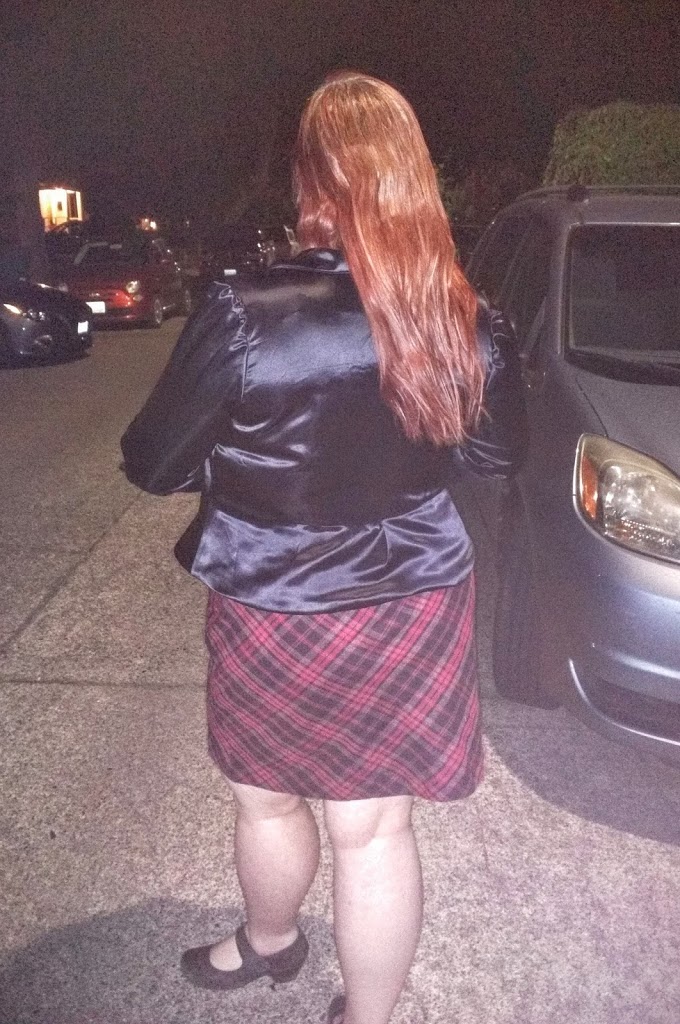
Brave of you to work with such a tricky fabric for the other top! The fit looks pretty good, perhaps a bit snug across the shoulders in back. I’m not sure the satin fabric is the best choice for those gathers on the shoulders and sleeves – the stiffness makes them look a little messy, though the lighting is also extremely unforgiving. The lapels look like they need a little more pressing to make sure the edge is crisp and the seam rolls nicely to the underside, or maybe edgestitching if the fabric doesn’t hold a crease well.
It was hard to see the details without some close-up photos…It seems like the colors probably match quite well to the plaid in the skirt.
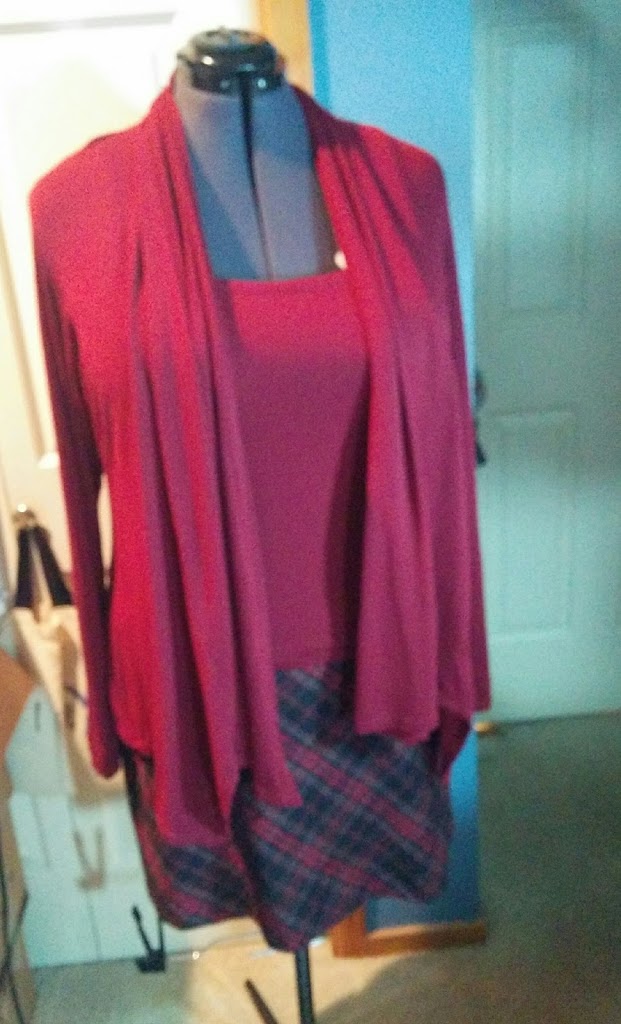
Cardigan and Tank Top: One of these without the other would not have presented a finished look, so I am glad you made both! The swing jacket looks great on you. You should make this a staple in your wardrobe, in assorted colors. Quite polished. Satin
Jacket-top: The satin seems soft and can be tough for even the most experience Seventh Avenue seamstress – without adding interlinings, etc..to get at least some crispness at the hems.
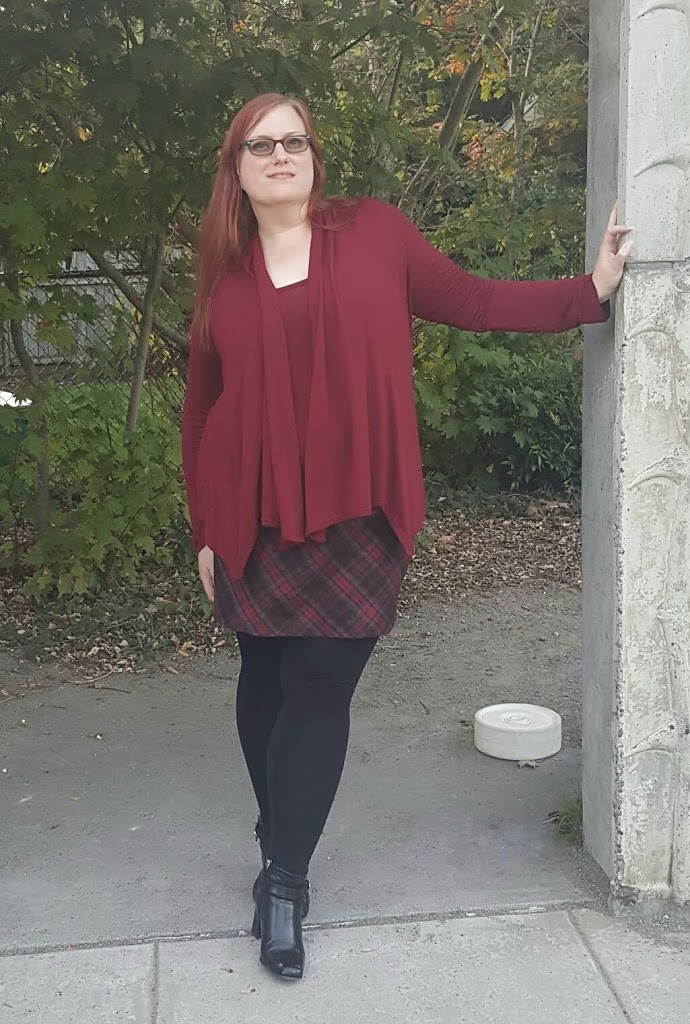
The cardigan and tank set look great. The fit is nicely done and drapes well too. I could see them worn together or separate and with the skirt or with other things you may have in your closet. Burgundy is so in right now, and you’re all set! It’s a bummer the lace top didn’t work out. I would have loved to see it. The blazer was a good idea, but I don’t think it turned out as well as it could have. I think some facings, interfacing, etc would have helped it, but the fabric was a tricky one. I think a different fabric would have worked a little better. It would be nice to see it in natural light since the shine in the photos brings more attention to the wrinkles.
All in all, it was a really great (and stressful!) experience to be a participant in this challenge. I definitely have a whole new respect for the designers on Project Runway who do so much more in much less time that I had. And I was happy to actually get some sleep the weekend after my elimination.
I do plan to go back and revisit my trench coat. I had to leave off the epaulettes and the cuff straps due to time restraints and I didn’t top stitch the lapels at all and had to stop top stitching the belt because I ran out of the thread color I was using, which I have since re-aquired. I also will add some frog closures and I’ve decided I would like to add a hem band of the blue sateen at the bottom to add a little length and balance out the blue at the collar/lapels. I just have a few other projects that have higher priority at the moment.
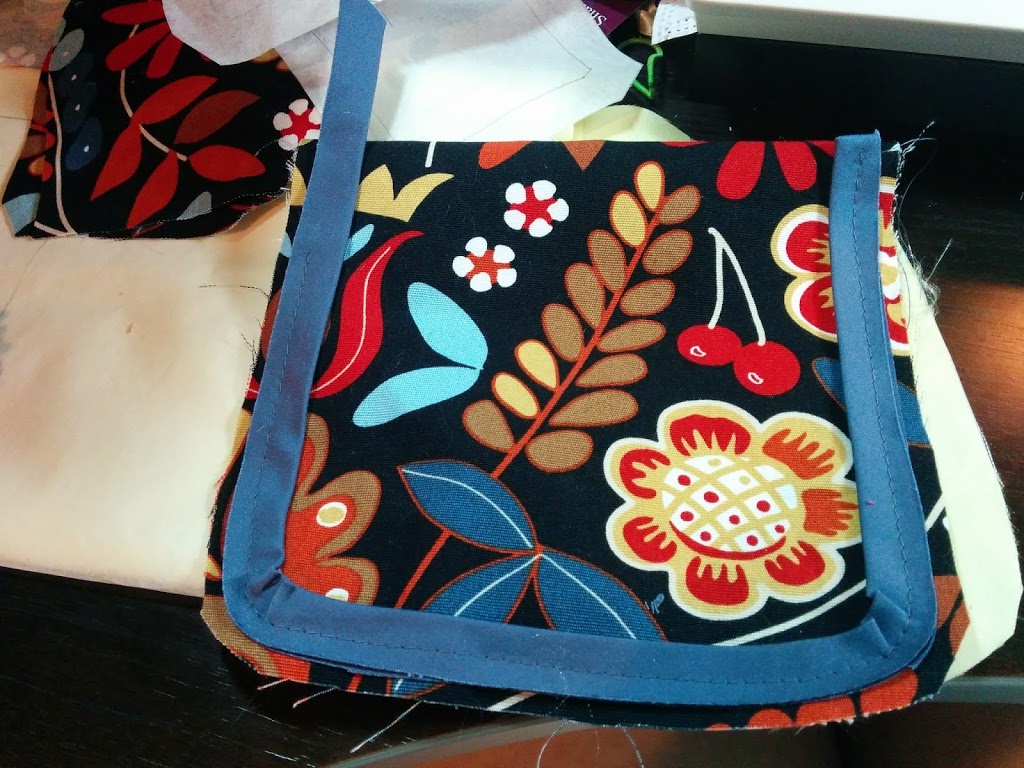
I have barely been at my sewing machine since my elimination — the only project I worked on was a Good-To-Go Messenger Bag from Two Pretty Poppets with my 8 year old neice, who was in town last weekend with her family visiting us. Of course, I didn’t even think to take photos, but we made the small version out of these fabrics she picked out at JoAnn.
I love her fabric selection and I love how the bag turned out. It was a quick make, even spending a lot of extra time showing an 8 year old how to use a sewing machine.
My current project that I’ve only barely started is my Halloween costume. I can’t share my plans yet. We have a themed decorating contest between the floors in our building and it’s a carefully guarded secret what our theme is and I know at least one person from another floor who very well might read this blog. But I shared this photo on Instagram.
Hopefully I’ll get my costume completed in time for our contest on Friday and I’ll be able to post about it next weekend. *Disclaimer on Girl Charlee’s “slightly flawed” lots — I’ve purchased many of them because they are inexpensive fabrics that are often very pretty and only have slight flaws along the selvege or small things that can be cut around, so they are great for wearable muslins. But I’ve had terrible luck with the woven bargain fabrics I’ve purchased and I’ve gotten a couple things that are completely unusable and all sales are final.
The details of the 3rd challenge can be found here, along with the results of the second challenge (spoiler: I was safe.) But basically we needed to pick something from our closet, home made or store bought, that doesn’t get much wear and create two items to go with the chosen item.
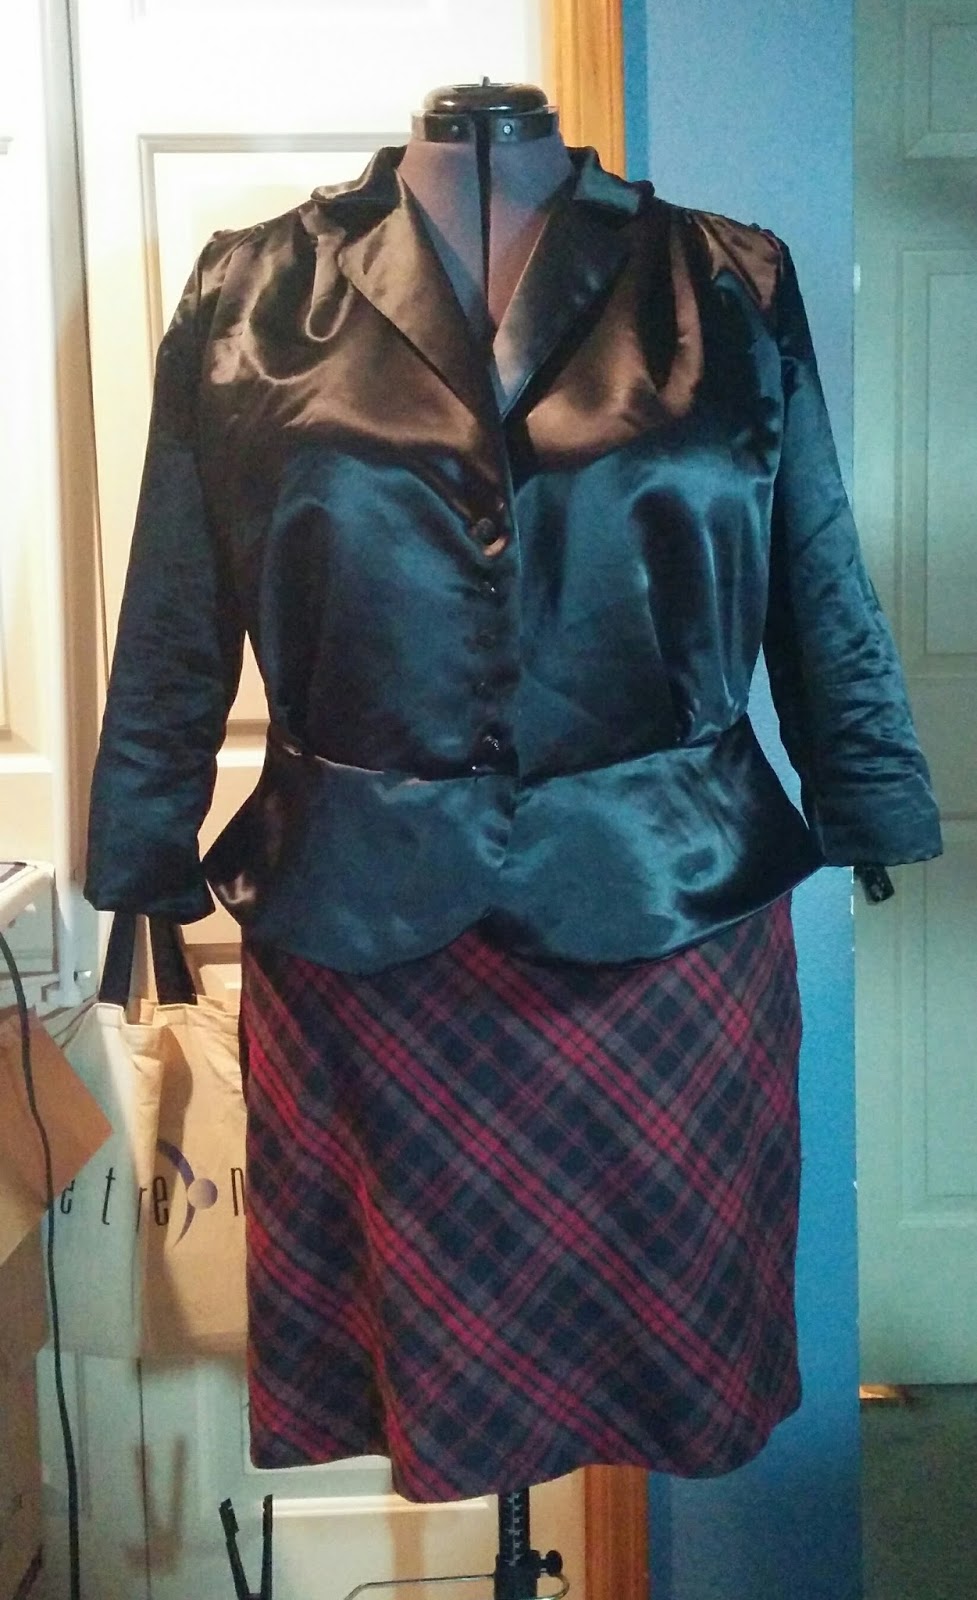
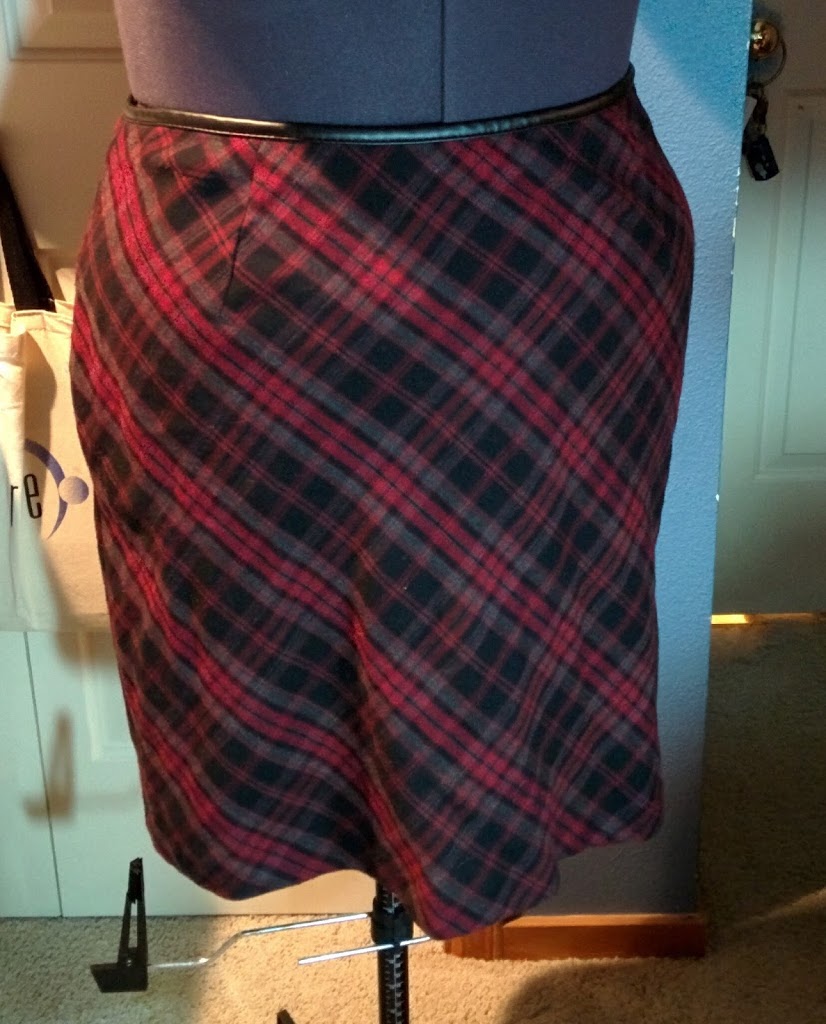
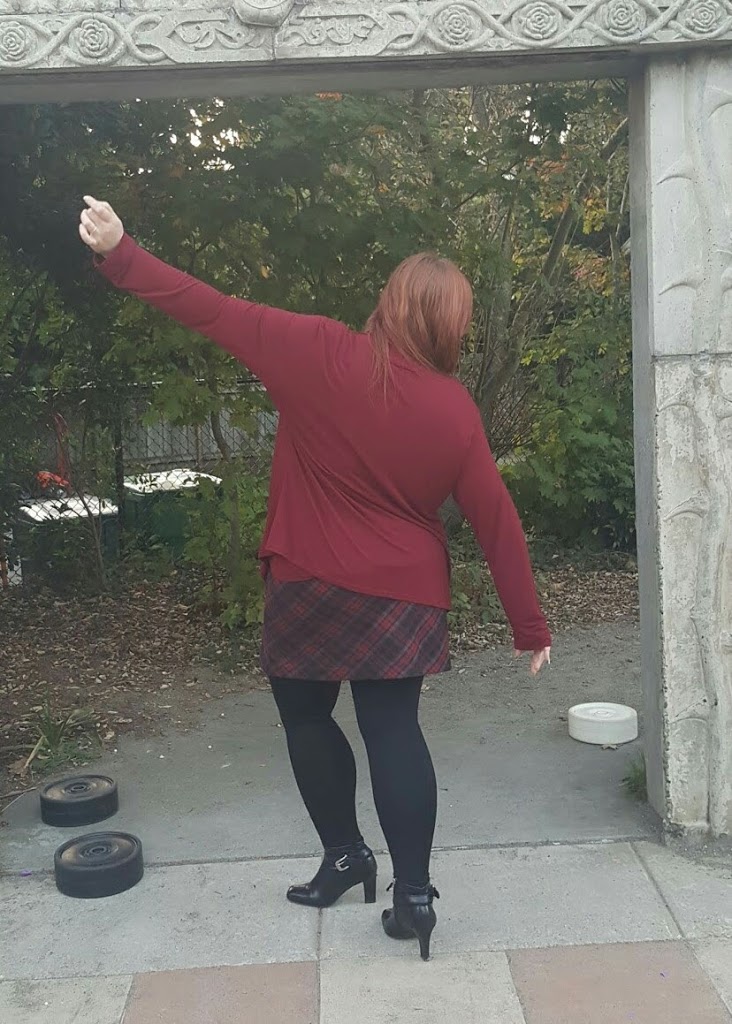
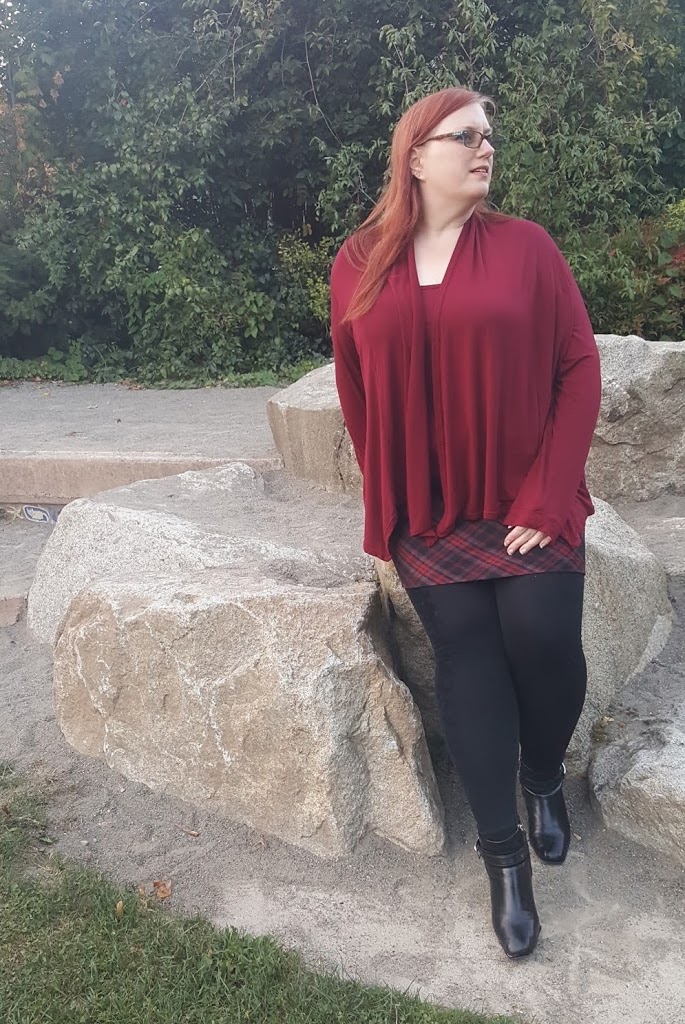
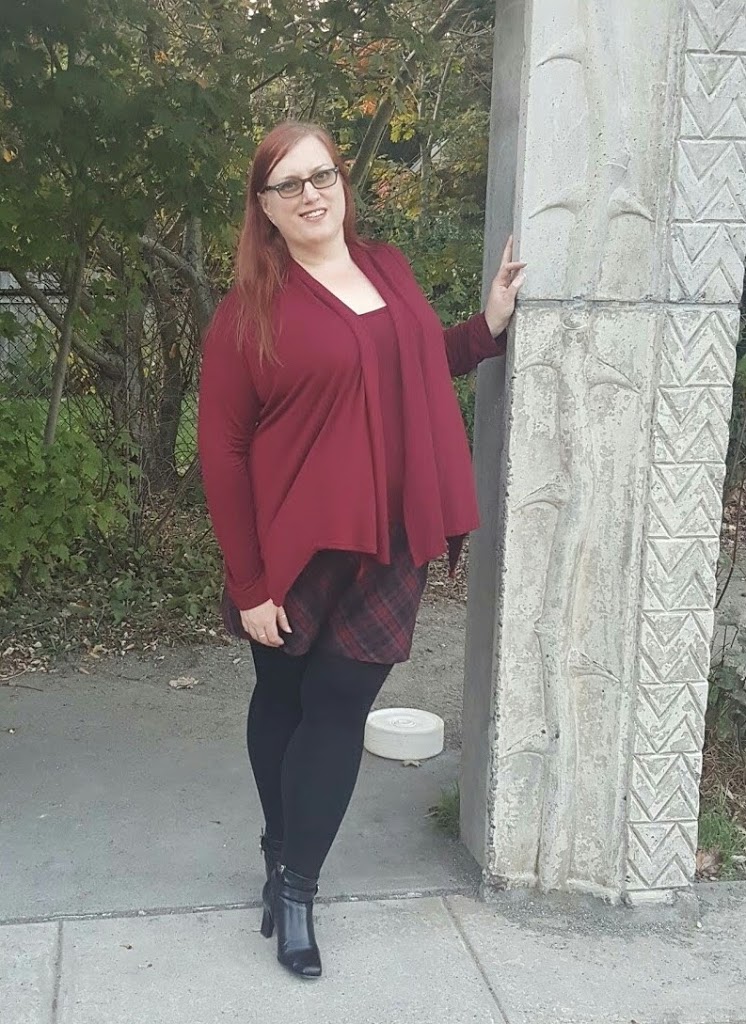
I was very excited about this challenge. I had a couple options for my garment to use, but I chose a red and black plaid pencil skirt that I bought a couple years ago at a thrift shop and have never worn.
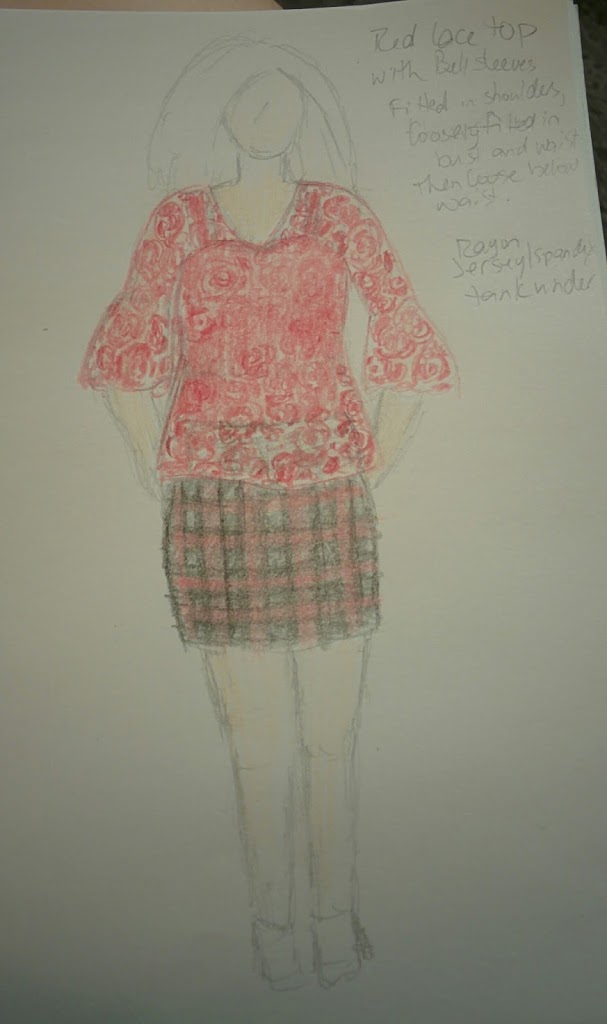
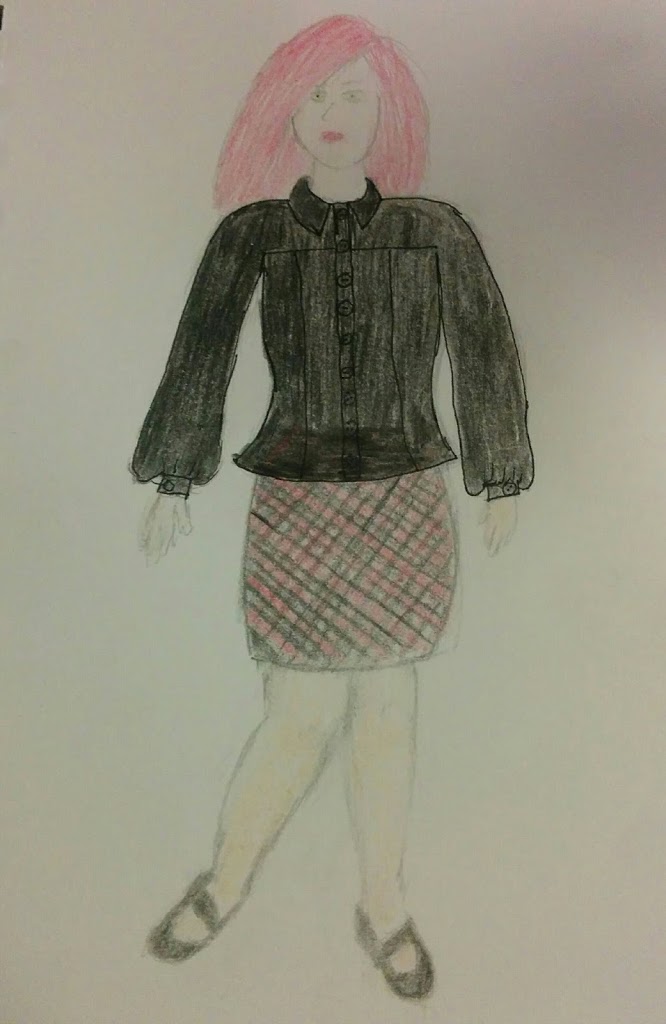
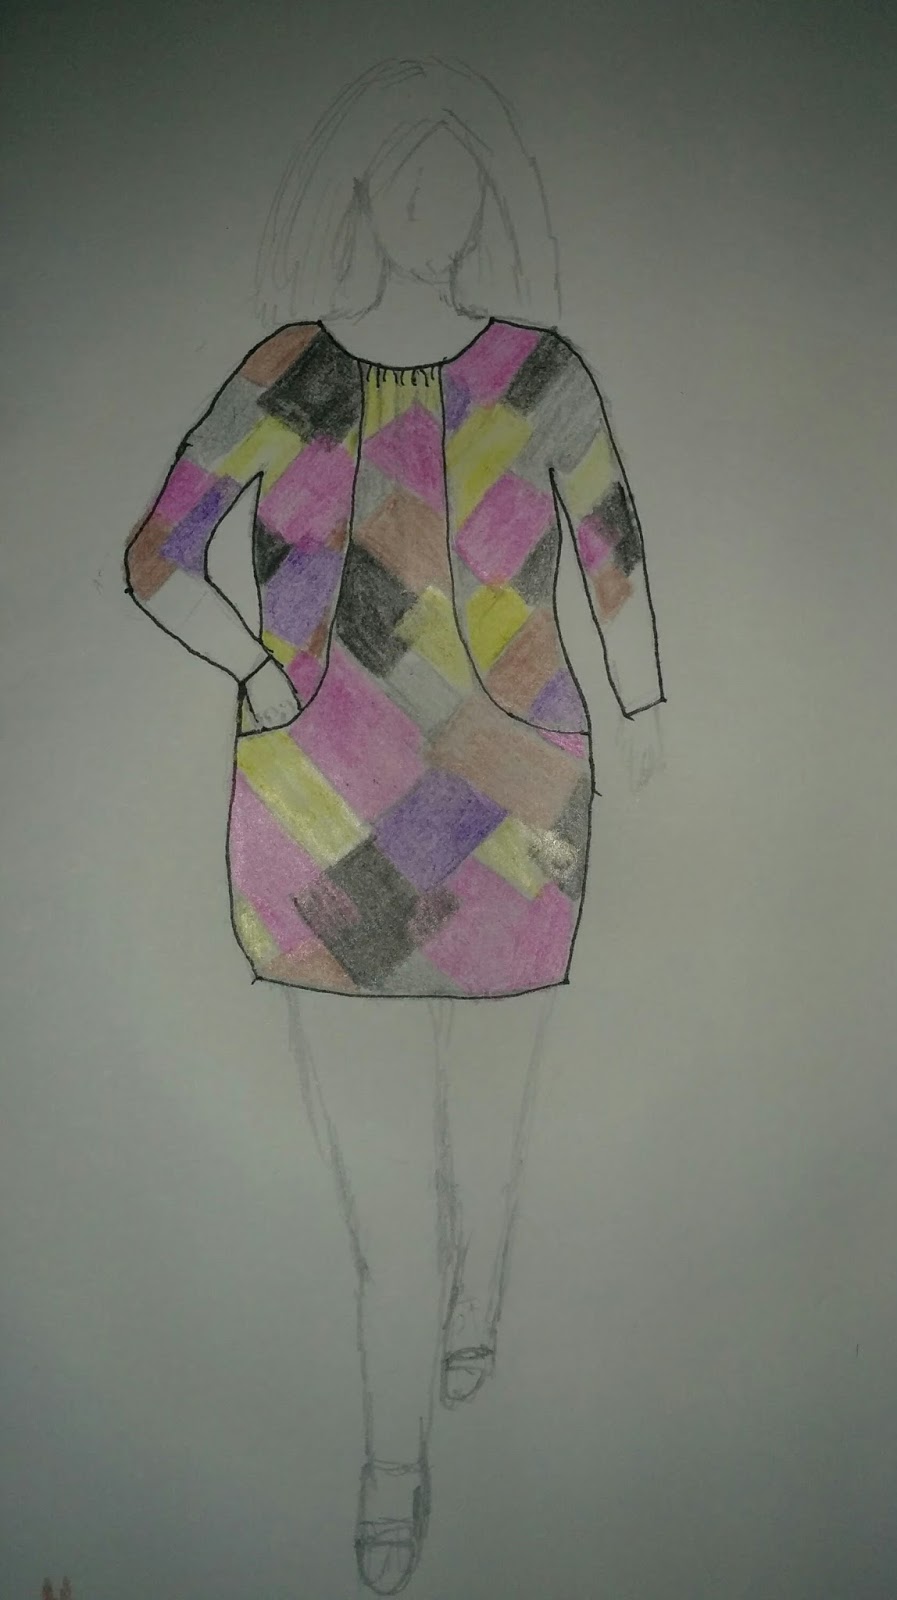
I knew right away that I wanted to do one red top and one black top to go with it. My original plan for the red was a red lace top and a matching red tank to wear under it. And I wanted the black top to be something a bit more structured with a fit and flare shape to it. With that in mind, I drew up these sketches. The body proportions in my sketches are still fairly off, but I am choosing to do full sketches instead of using croquis because I am actively trying to improve my skills.
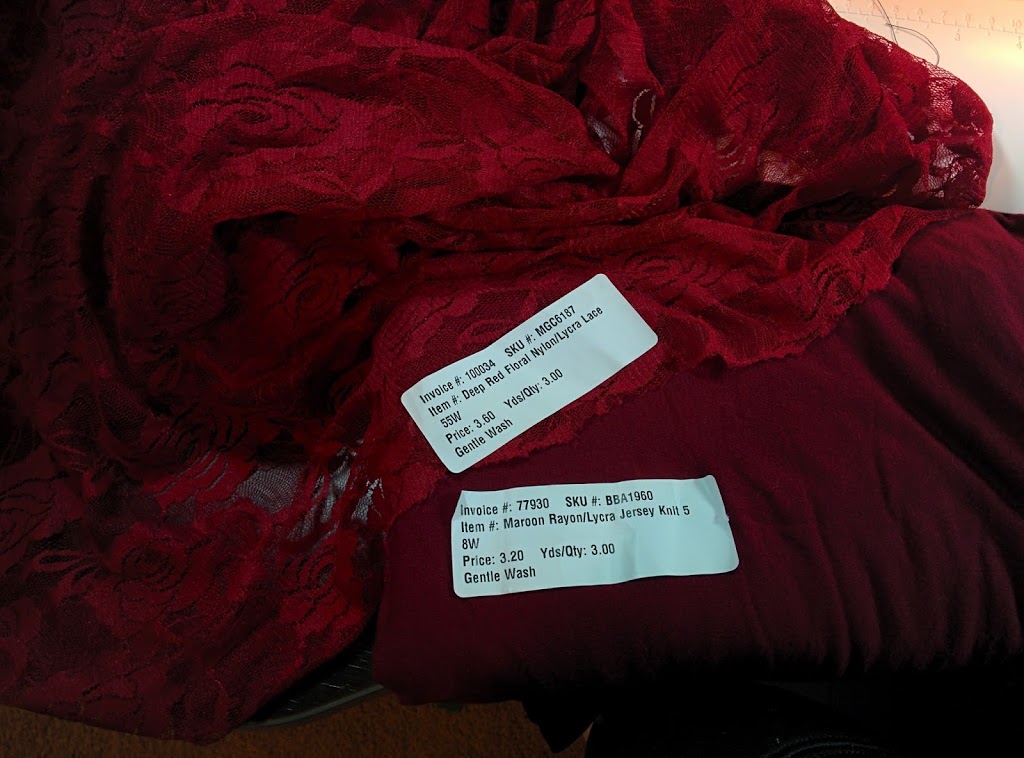
For the red, I was planning on using two fabrics in my stash that were both purchased from Fabric Mart and still had the stickers on them.
I made the red tank top using the Love Notions Luna Loungewear pattern. I don’t typically do a real FBA on knit paterns, so I simply used the XXXL at the bust and blended down to the XL at the waist and hips. It came together very nicely and pretty quickly and I love the fit. I wear a lot of tanks around the house and under clothes, so this pattern is definitely a keeper.
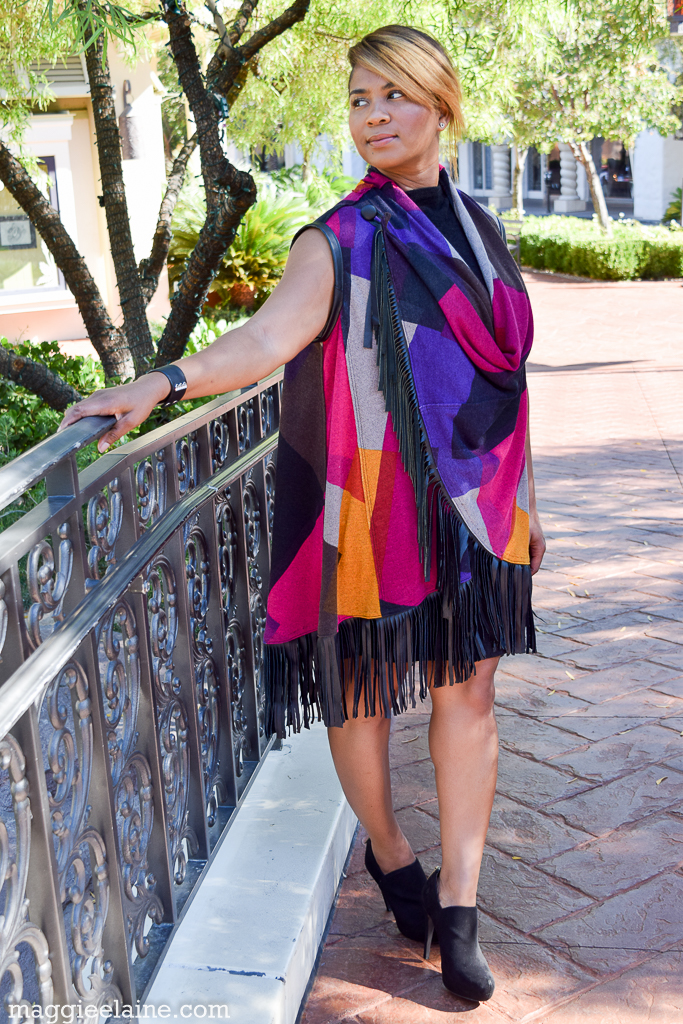
For the lace top, I used the Seamwork Aberdeen, with the cut-on sleeves lengthened and then drafted my own bell cuff to the sleeve. I don’t have any photos of it, but I hated the way it looked. I had such high hopes for the look because of my sketch, but my execution just didn’t look good. I loved the color of that tank top with the plaid skirt so I decided to scrap the lace and use the remaining yardage of the maroon knit for a Swoon Scarf neck cardigan.
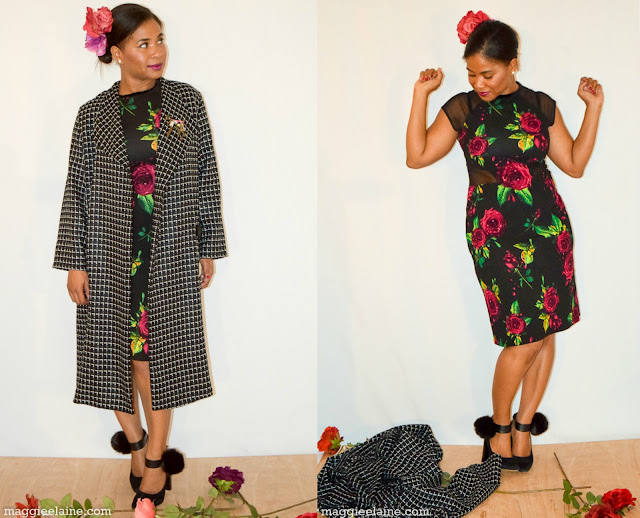
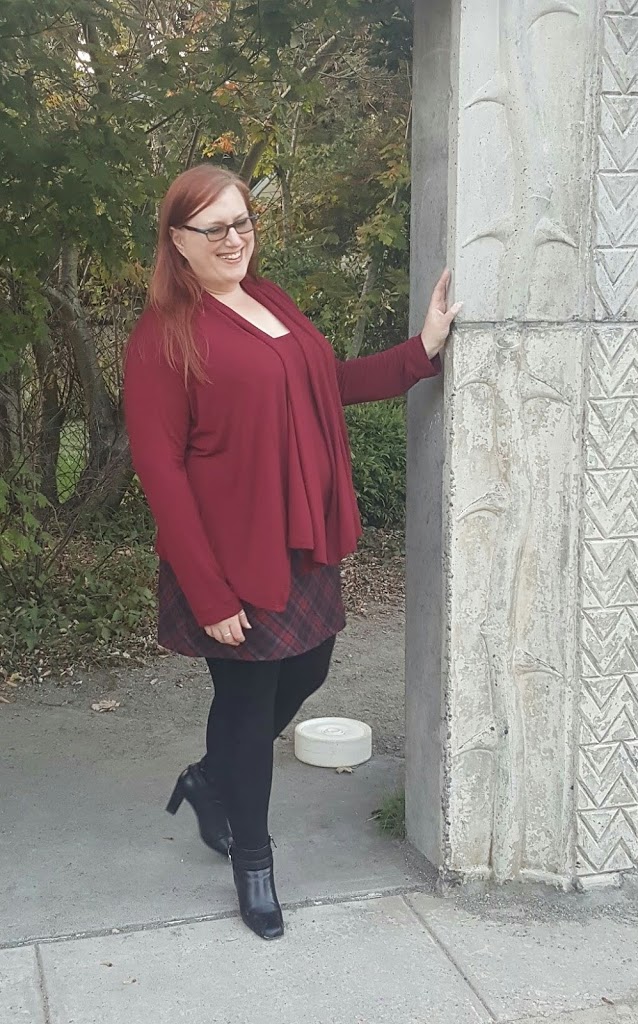
I love, love, love this duo! My daughter and I went down to the corner to the park for a photo shoot and I’m so pleased with how these photos turned out.
Technically, this is two items I made to go with my skirt, however, I will never wear either by itself, so I think of it as one as far as this challenge goes.
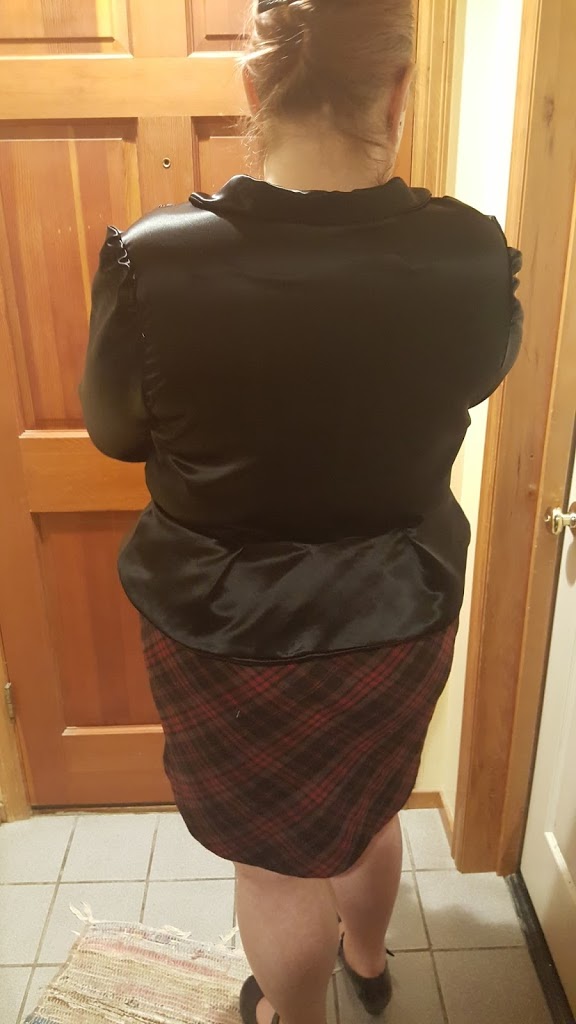
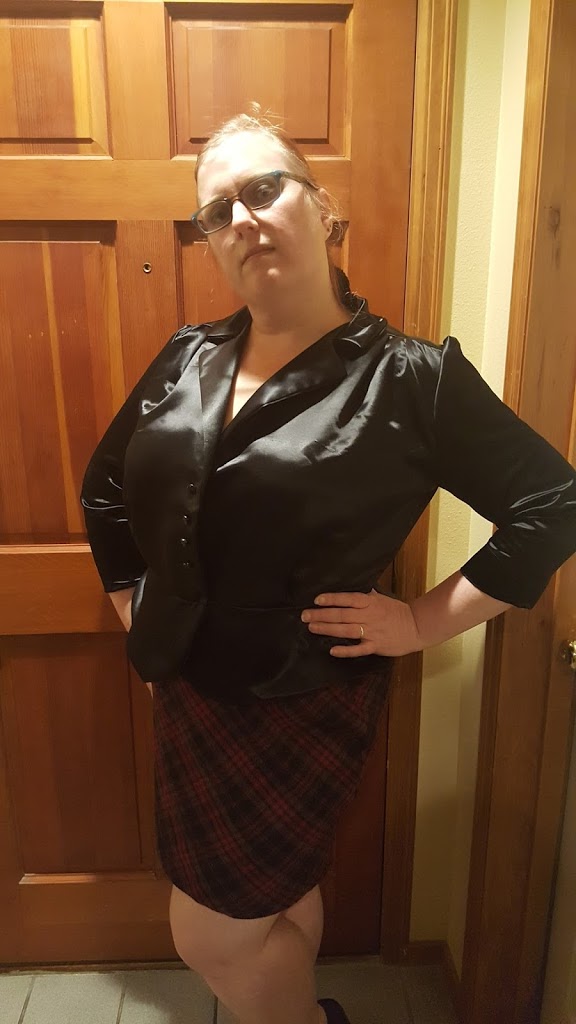
For the second item, I had a hard time finding a pattern that met the image I had in my head. I considered drafting/draping something myself, but I have very little experience doing that and I was concerned that I wouldn’t have enough time to work everything out and still get something completed by the deadline. So I chose to modify the Sew Over It Vintage Shirt Dress to be a peplum blouse. I chose a black satin that is a little heavier because I thought it would lend a little extra structure to the top.
I had to do a 4″ FBA on the largest size, size 20. Other than that, I used the bodice as is and cut the skirt 6″ long and shaped the front to be curved. The back had two small pleats on the sides, but after we started trying to photograph this top, every little fold, pleat, ripple, etc. showed up magnified by 1000 and the back just looked extra messy in the photos, so I quickly re-did it to have a single pleat in the middle.
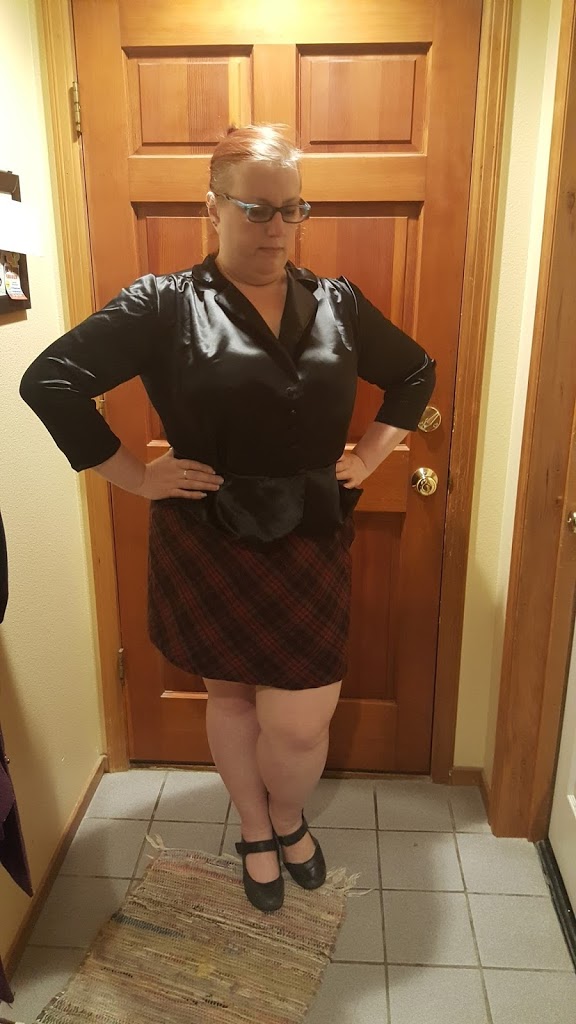
The after photo looks like there are folds radiating out from the pleat, but it really doesn’t look like that in person. In fact, here’s a photo where I’m in the same pose and just had my hand on my hip and you can see how drastically different the back peplum looks.
We were all amazed at how different this top looked in the photographs vs. how it looks in person. If anyone has any tips on what we could have done differently, I’d LOVE to hear them. Other than taking photos during the daylight, of course, which wasn’t an option this time.
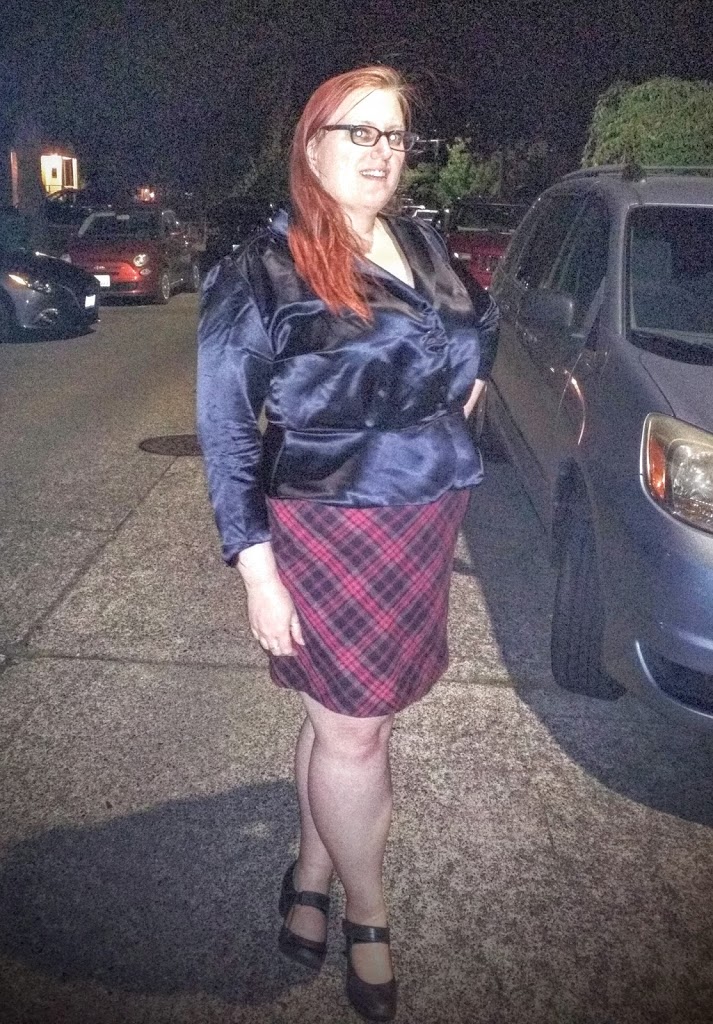
We took dozens and dozens of photos in various spots inside my house and even went outside to try by streetlight. The street light photos turned out fairly interesting, but unfortunately it was still hard to see the top very well. And I have some nice, glowing eyes that I don’t know how to fix. I guess I should really work on my photo editing skills!
I have some seriously stiff competition this week, so I’d really appreciate any and all votes so I can make it to the final round next week! Go to this post on the Fabric Mart blog to see all the entries and use the “VOTE NOW!!” link at the bottom of the post, right above the comments, to choose your favorite.
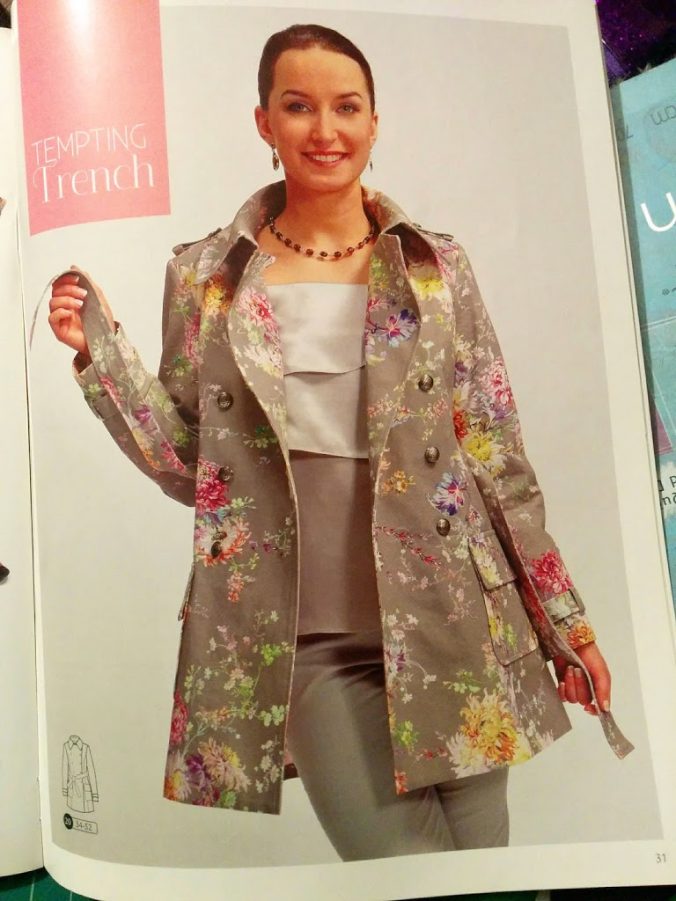
When I read this week’s challenge, I had mixed emotions. I was scared and worried because making a trench coat seemed like a massive amount of work in a very short amount of time. But I was also excited because at the beginning of the year I set a goal to make outerwear before the year was over, and this was going to force me into actually accomplishing that goal. And I had already identified a trench coat from the 2/2014 issue of Ottobre Design magazine as one of my options. So it was destined to be this coat.
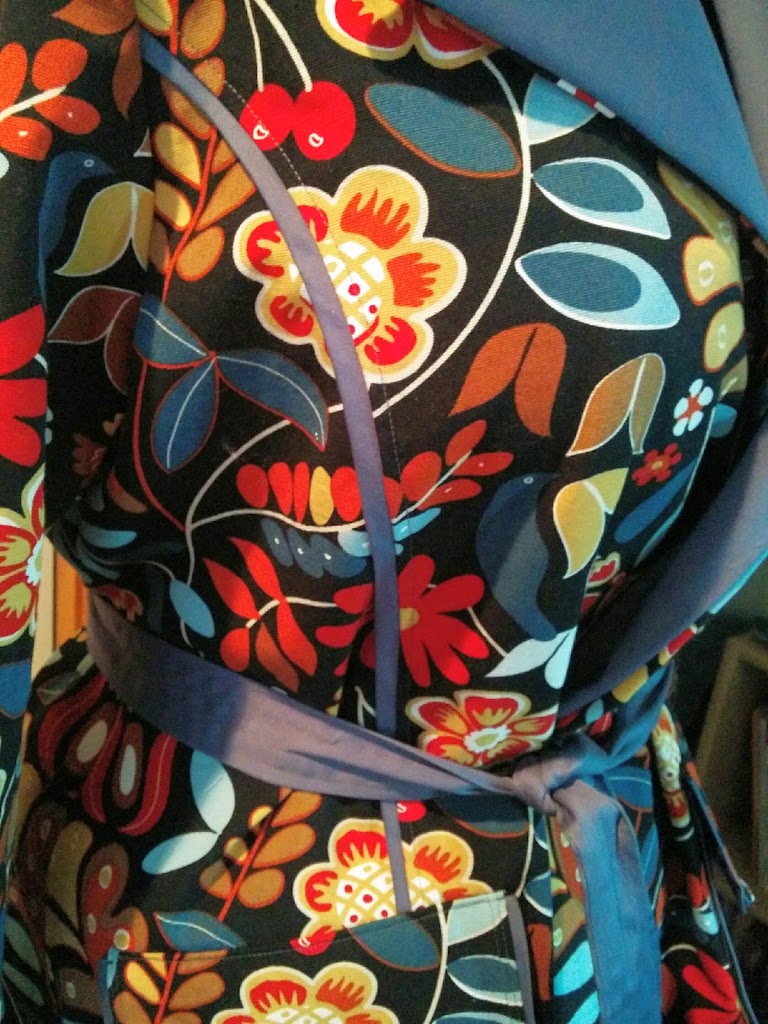
I looked through my stash and I have several fabrics that would work well as a trench coat — even a couple water resistant fabrics that would work well with living in Seattle. But none of them seemed to fit the bill of expressing my personality. So, I decided to take a quick trip over to Ikea on my lunch break last week (note to self, a trip to Ikea is NEVER quick!) because when my daughter and I were there a few weeks ago I remembered seeing a couple fabrics that I really liked, but didn’t have any use in mind, so I didn’t buy anything. I picked up 4 yards of this colorful, very busy, heavy 100% cotton floral fabric.
I thought this fabric expressed my personality because it was fun and colorful and a little loud. I work in tech and I am an introvert, but once I get to feel comfortable with people, I tend to talk a lot and have been told I get loud. I also really love experiencing life. I’m not an adrenaline junkie or anything, but I do enjoy trying new things and putting myself out there as much as possible because life is all about making great memories and never having regrets.
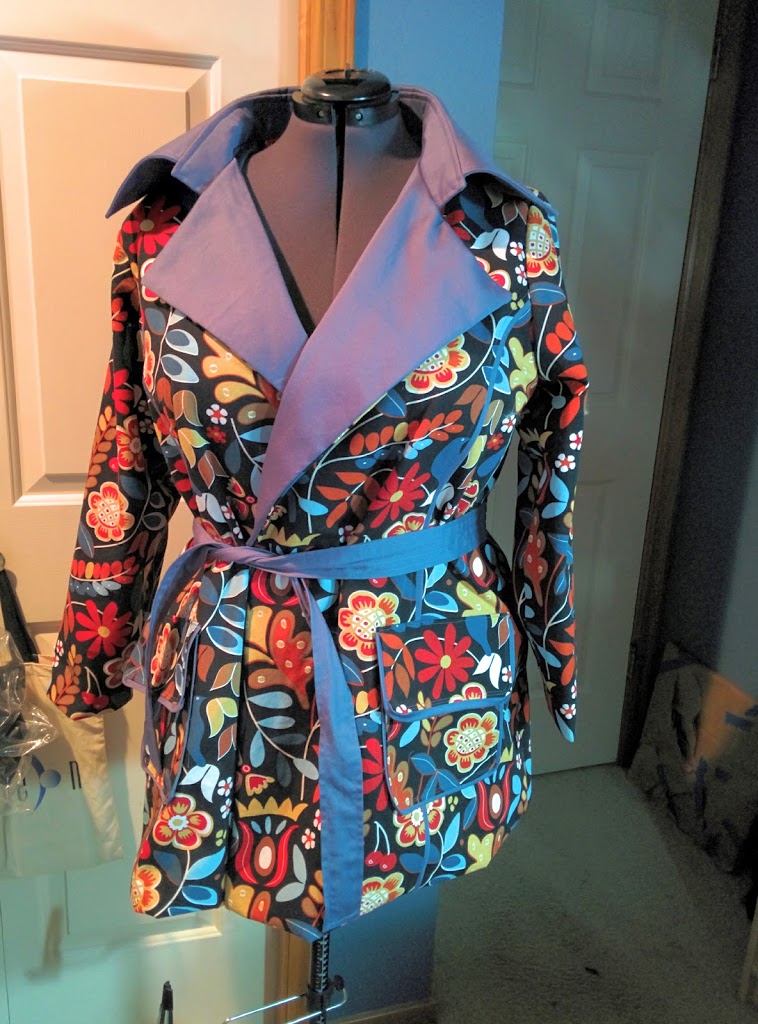
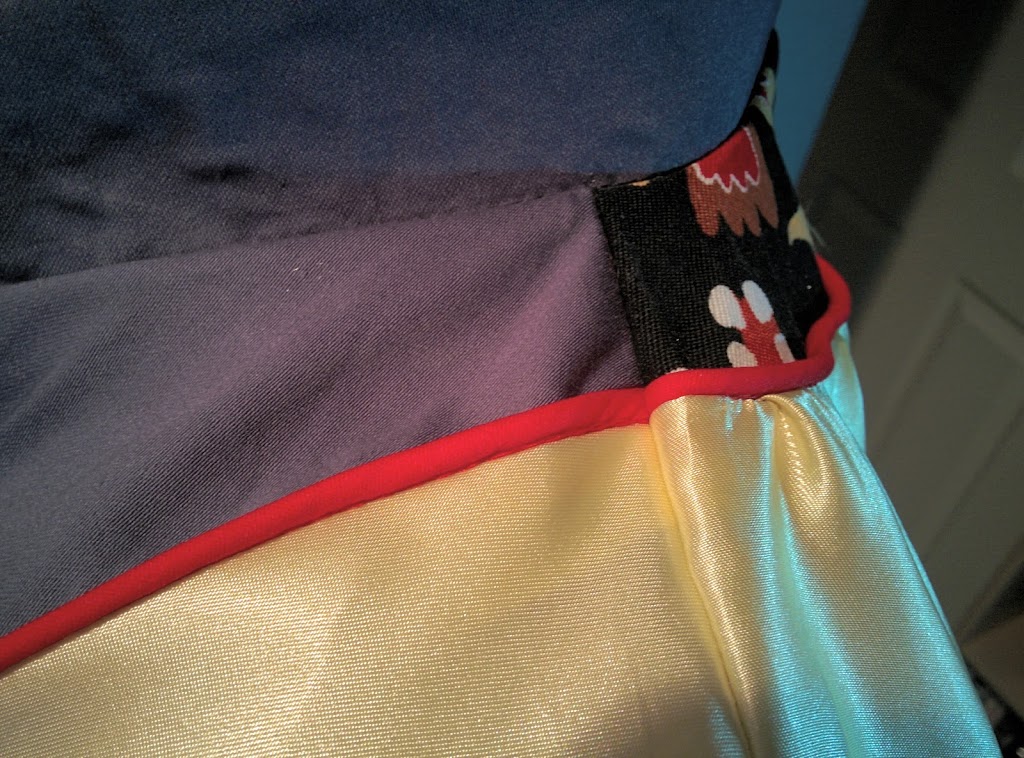
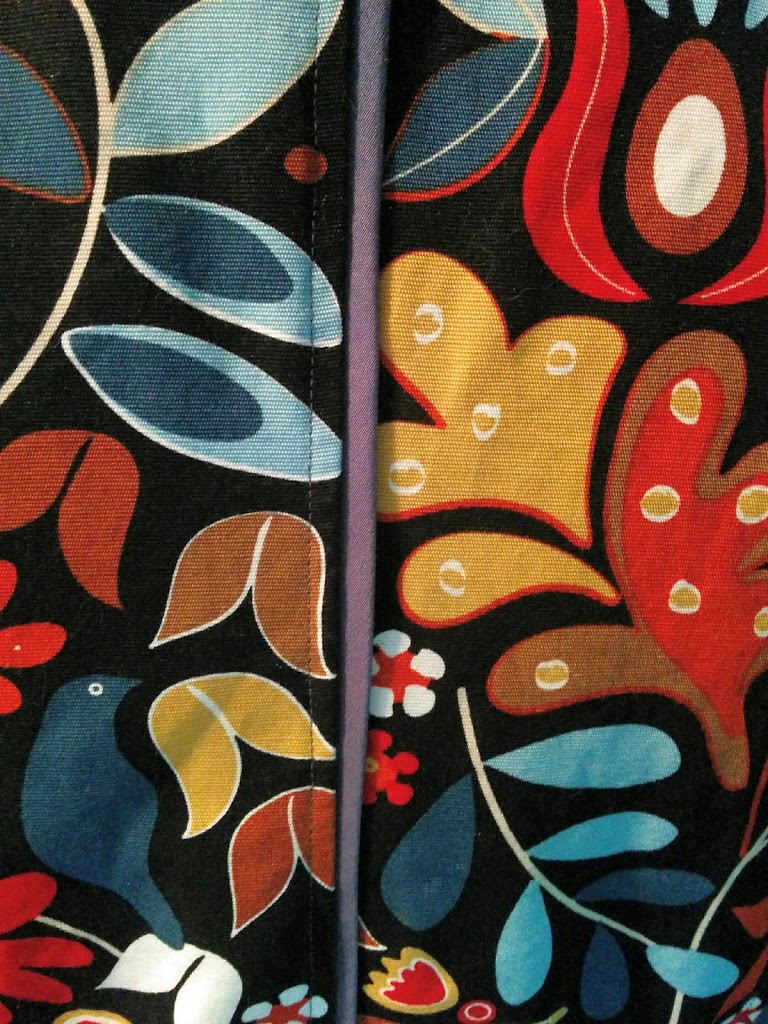
I had in my stash a lovely blue sateen fabric that I thought looked great with this print and helped tame the busy-ness of the print a bit and keeps in it check, so I used that for some contrast flat piping in the seams and as the collar and belt.
I also had a yellow satin in my stash that I used as the lining and a package of red piping that I picked up from an awesome store near my house called Seattle ReCreative, which is one of the best places to find really cool notions and fabrics.
I really like how the pockets turned out. I didn’t get a photo, but the pocket piece is lined with the same yellow satin that makes up the coat lining and I love how it feels on my hand when I put it in my pocket.
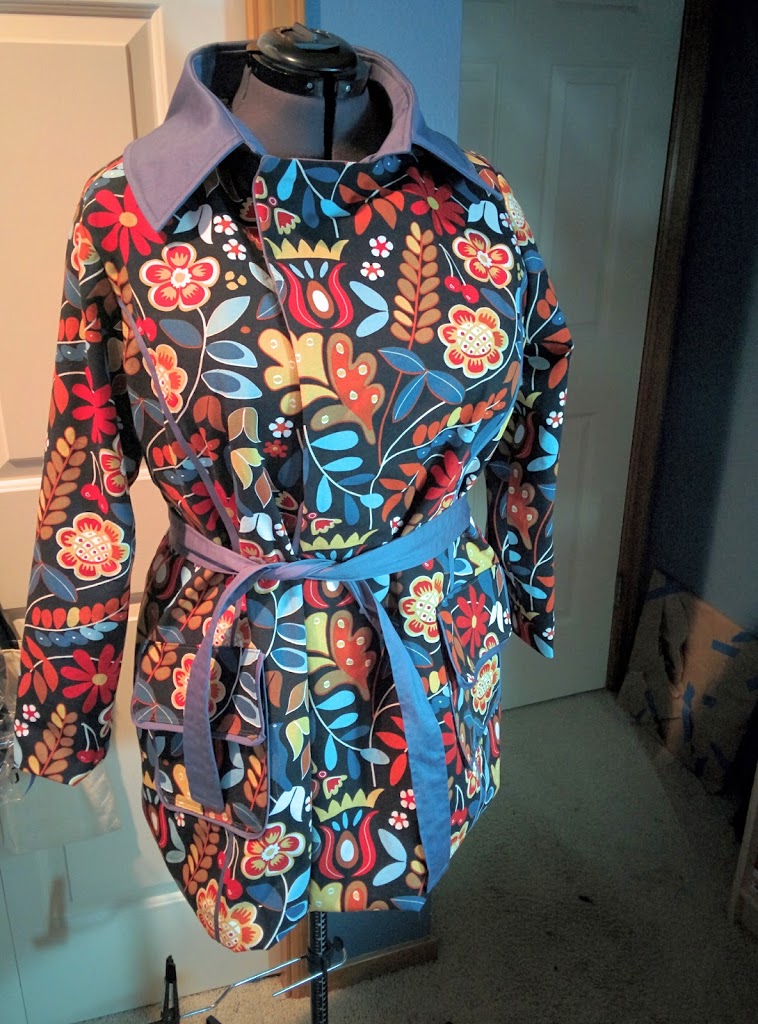
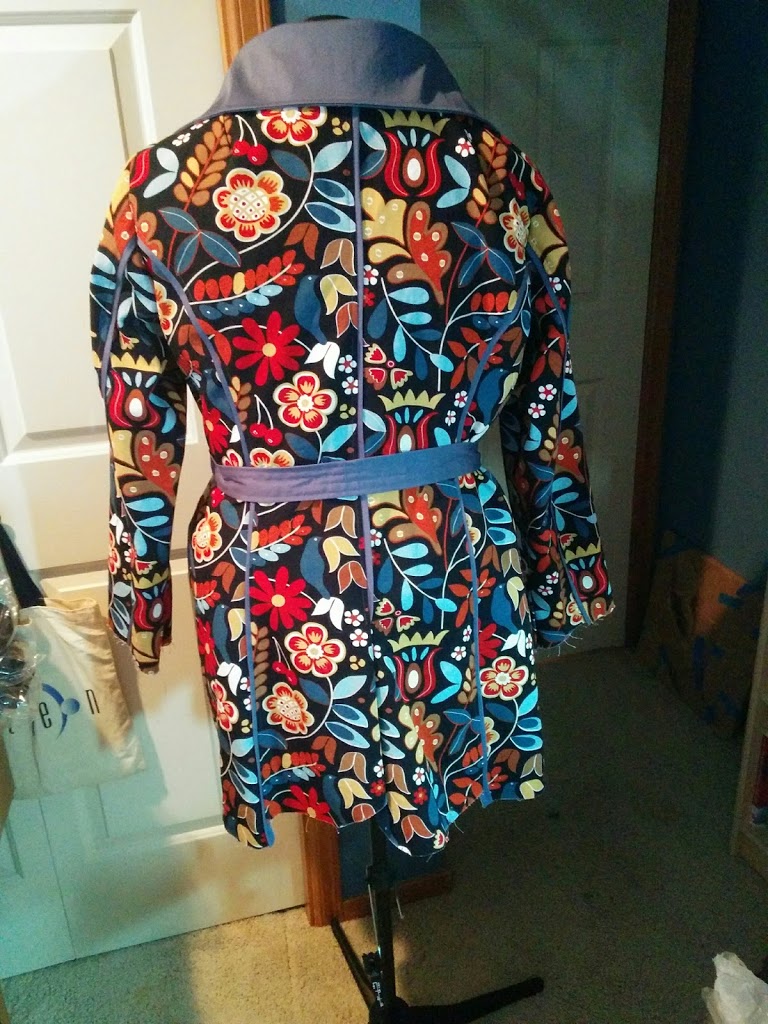
Here are a couple photos on my dress form, the photo of the back was taken before I finished the hem — I apparently didn’t take any after of the back..
I used a red piping between the facings and the lining. I really like that little hidden detail.
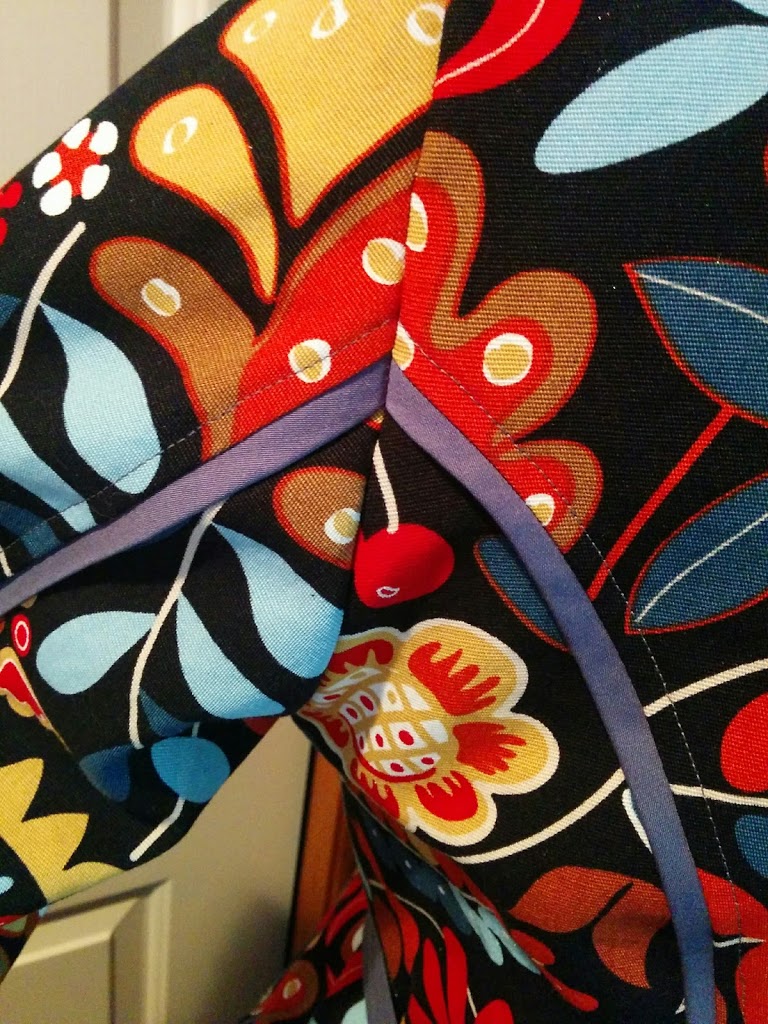
Some detailed shots of the flat piping on the outside.
Getting the sleeve seams to match up perfectly took a few tries and it’s a bit lost in the shuffle, but it makes me very happy.
I’m a walking zombie from the lack of sleep I’ve had the last several days trying to get this sewn up. But this coat was a lot of firsts for me (including my very first collar!), and Ottobre magazine isn’t exactly known for their detailed instructions, so my seam ripper was my best friend on this project and I had to try some things several times before I got them right.
The finished projects are all up on the Fabric Mart blog, so go check them out and vote for your favorite. All of the other ladies made absolutely gorgeous coats with great details and workmanship. I’m very, very impressed with all of them because I ended up having to leave out a lot of the details I had hoped to add, like the epaulettes and the cuff straps, although I have those pieces cut and I hope to get them on when I get some time to revisit my coat. I also didn’t add buttons because I had planned to make frog closures out of the blue fabric, and I probably still will. But I was pleasantly surprised at how well it worked just using the belt as a closure.
I would like to say thank you to everyone who voted for me and for all the really sweet comments you all made about my dress. It’s definitely one of the things I’m most proud of having made.
There were also three winners of the reader participation prize, which was a 3 yard cut of that same lovely sweater knit we used for our first projects. Contratulations to SewMeAdorable, Lilmrs_winslay and Virginiasdaughter on Instagram! I’m following you all on Instagram now and I’m looking forward to seeing what you make with it!
The second week’s challenge is to make a trench coat. I was completely freaking out and I had several all nighters, but I got it done enough to call it complete and I submitted my writeup and photos just a little bit ago. I love my new trench coat, but I do have a few more details I plan on getting into it before I start actually wearing it.
The projects will be posted on the Fabric Mart blog tomorrow, but until then, I’ll leave you with a little sneak peek.
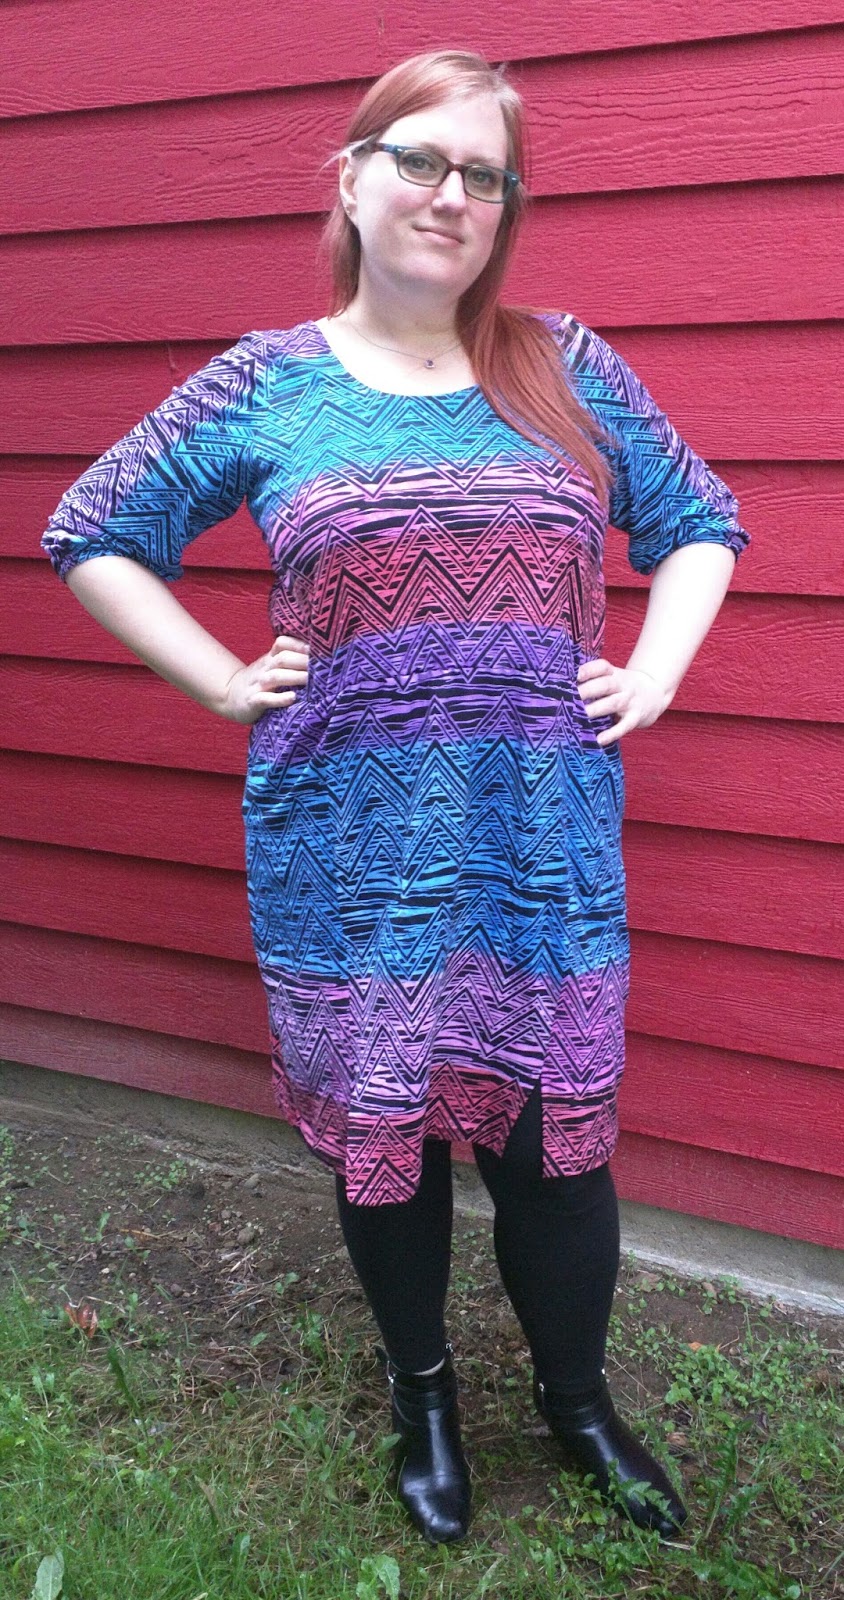
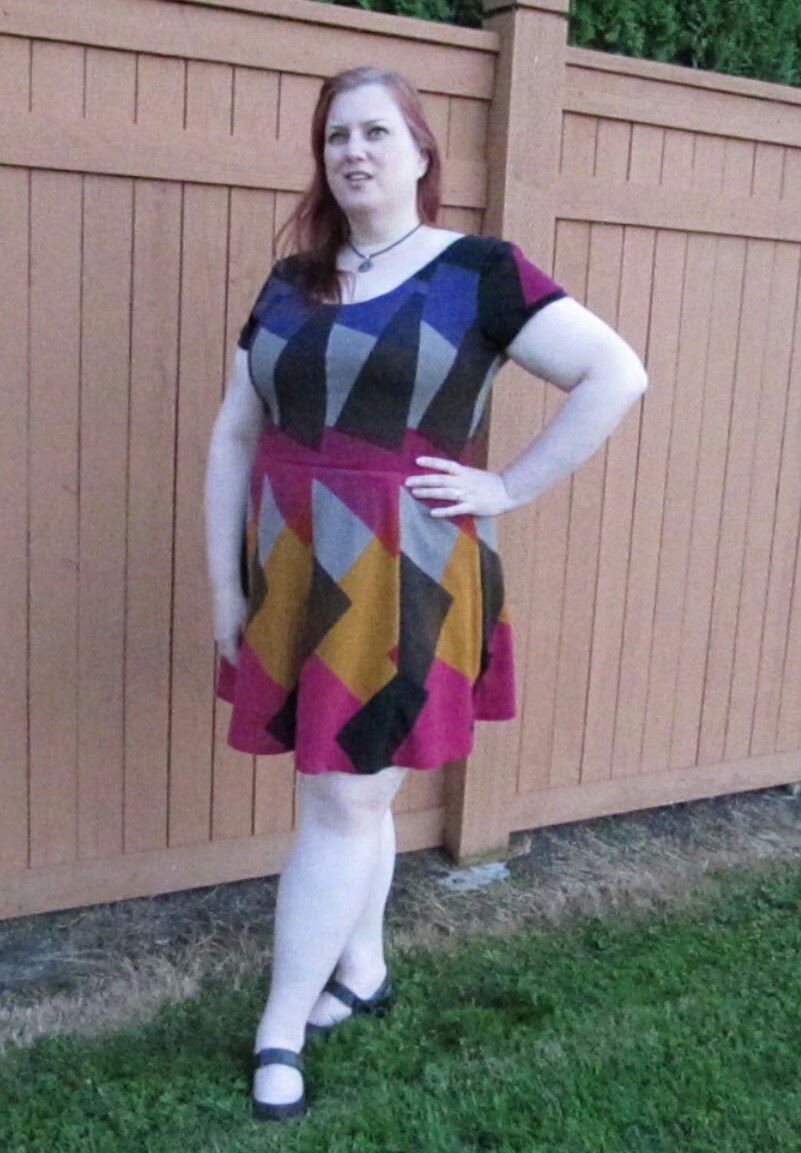
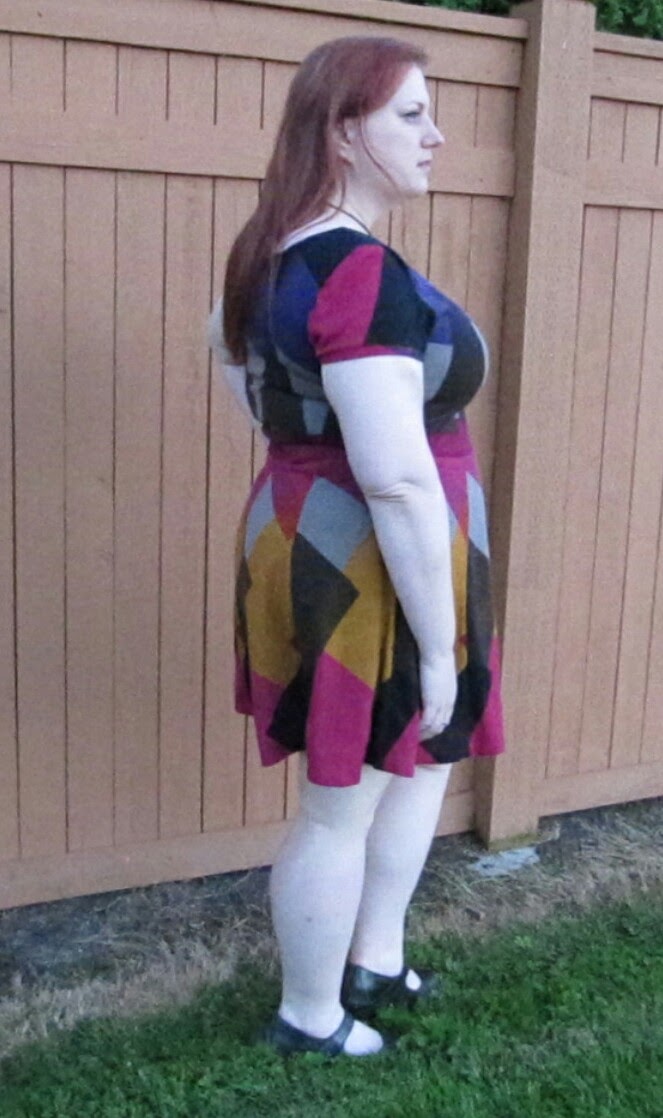
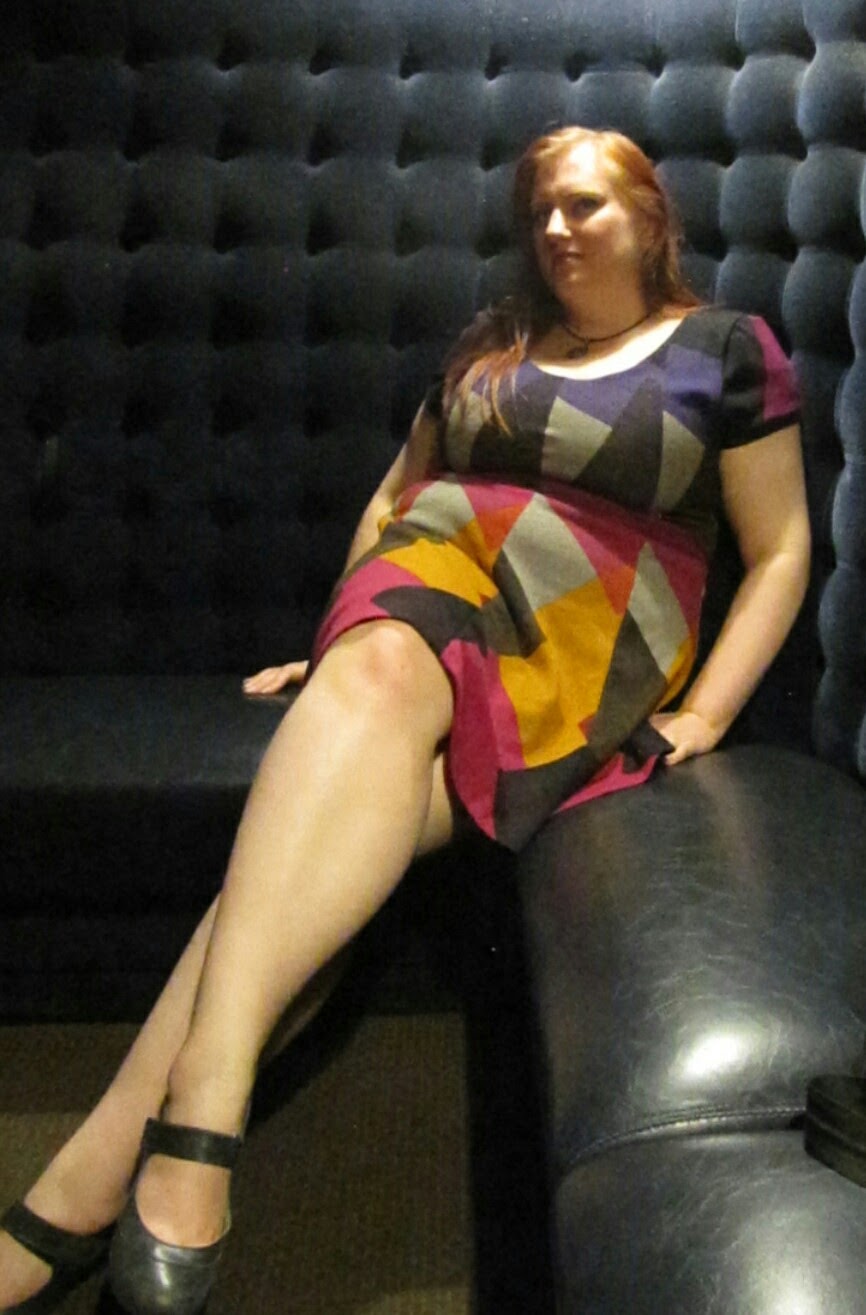
I made a dress!! Is anyone really surprised? But this isn’t just any dress, it’s a gorgeous carefully pieced work of art (if I do say so myself.) It is absolutely my favorite thing I’ve ever made so far.
When the fabric arrived, I was very pleased with the quality and the colors are just so pretty and perfect for fall. But the more I contemplated and sketched ideas, I kept finding my sketches pulling in the colors, but since I was usually away from the fabric when I was sketching, I just kept forgetting that the scale of the pattern was very large, as you can see in this photo of it draped over my dress form.
Although I liked what I sketched (badly,) they didn’t accurately reflect what the garment would look like in the actual fabric. I just couldn’t wrap my head around how to use it in a way that I’d be able to either pattern match across seams or make it very apparent that I didn’t intend to pattern match (by rotating the fabric, for example.) I also didn’t like the idea of the mustard or the hot pink colors being close to my face. I don’t find those colors very flattering on me, so I was hoping to be able to place them far from where they can clash with my skin tone.
So, I sat and looked at the fabric laying out on my cutting table, sketchbook in hand and I remembered a technique I had seen not too long ago in a sewing magazine that I had been wanting to try. Unfortunately, I can’t remember which magazine and even leafed through a few to see if I could find the article I was thinking about, with no luck. But the technique was to take a fabric with a large pattern repeat and cut out a particular portion of the repeat several times and sew them back together to make a new design.
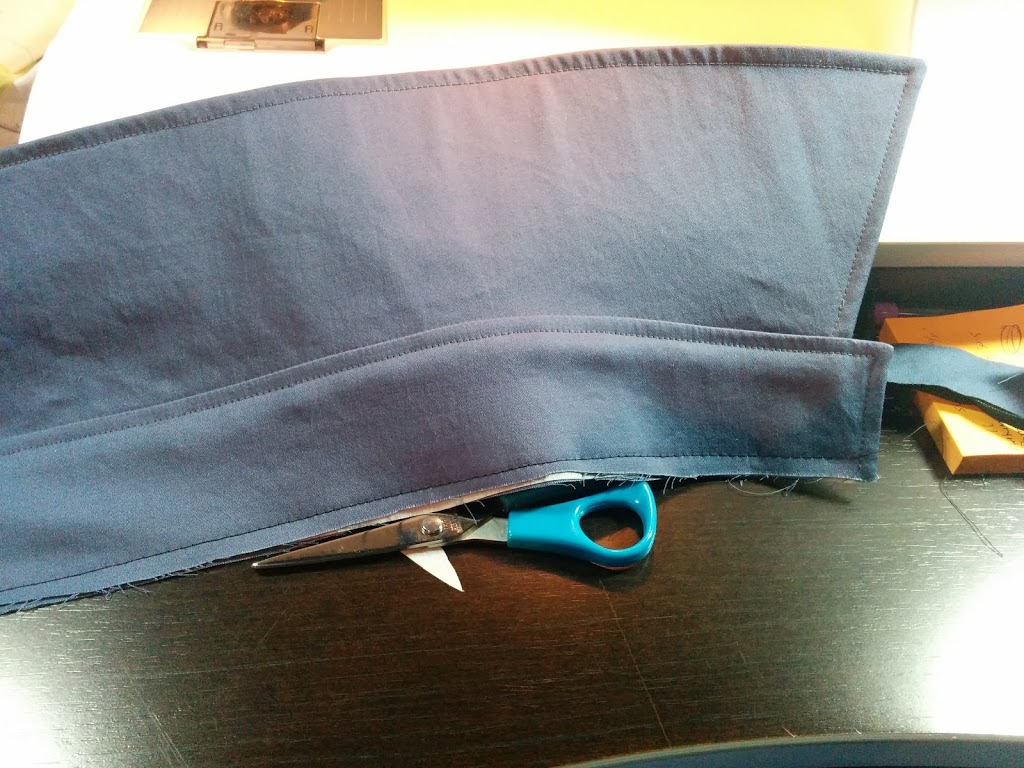
So, I decided to use my TNT Kitschy Coo Lady Skater pattern and divide each bodice and skirt piece vertically into 2 pieces, adding seam allowances between them, thus making 4 panels across the width of the dress. I identified where on the fabric I would lay out each piece and sketched out the design, trying to keep the scale as accurate as possible, to see how I’d like it. I loved it, so I settled on that as a plan, even before I finished coloring it in. My colored pencils just don’t do the colors in this fabric justice!
As shown in the photo above of my previously altered Lady Skater front bodice piece, I drew a vertical line from the bottom, halfway between the side seam stitching line and center front fold line (since seam allowances hadn’t been added yet) up to where I thought it would look aesthetically pleasing and did the same for the bodice back. For the skirt I did the same, but I marked exactly halfway between the stitching lines at both the top and the bottom of the pattern. I then copied each of the pattern halves onto tissue paper and added seam allowances at the fold lines and to both halves where the original patterns were split in the middle.
I started with the bodice and cut out one of the center front panels first. Then used it as a guide to determine where to lay the side bodice piece that was going to be next to it, matching the seam line on one side. Since the top of the bodice pieces were very different shapes, I focused on making the fabric pattern at the waist seam consistent to get the effect I was after.
My original sketch planned to use another sweater knit I have in my stash that is solid black for the sleeves, but after I pulled it out and looked at it, it didn’t have the same sheen as the provided fabric and it just looked dull and lifeless next to this gorgeous knit. I considered leaving the dress sleeveless, but ultimately I want to have a dress that I will actually wear, so I decided to use the leftover fabric, which I barely had two pieces just big enough to cut the pattern’s cap sleeves. I just positioned the sleeve piece such that the front of both sleeves had as much of the black as possible, to try to keep as close to my original vision as possible.
I also had planned on using that other sweater knit for the neck band, but that was out now. I didn’t want to just turn and stitch the neckline, so I made the decision to fully line the dress with a black cotton thermal knit with cameos printed on it that I picked a long time ago for very cheap and have thought I might never use. It had almost the exact stretch amount and was just a tad lighter than the sweater knit, so it seemed the perfect pairing. I used the unmodified pattern for the lining pieces and attached them to the shell at the neck, armscyes and the waist, letting the skirt lining basically hang free and just using french tacks to keep it in place.
My tips for working with sweater knits.
First of all, there are many different types of sweater knits. This one was what I’d consider a pretty stable sweater knit. The weave is tight and the fabric is opaque, but I’ve worked with very loose weave sweater knits before. I think Seamwork’s guide to sewing with sweater knits is a good starting point. In addition to the tips Seamwork provide, these are the things I have found helpful when I work with sweater knits.
1.Keep a lint brush handy! Or what I refer to as a “rolly sticky.” When you cut into these fabrics, a million little loops get opened up, so there is lint EVERYWHERE. Not just on the cutting table, but they’ll be all over your machine and workspace and the garment and my dress form was covered in tiny pieces of sweater knit.
2.When cutting, mark your notches with pins or thread or do like I was taught growing up and cut them outward, not inward to avoid losing them in the weave of the sweater knit.
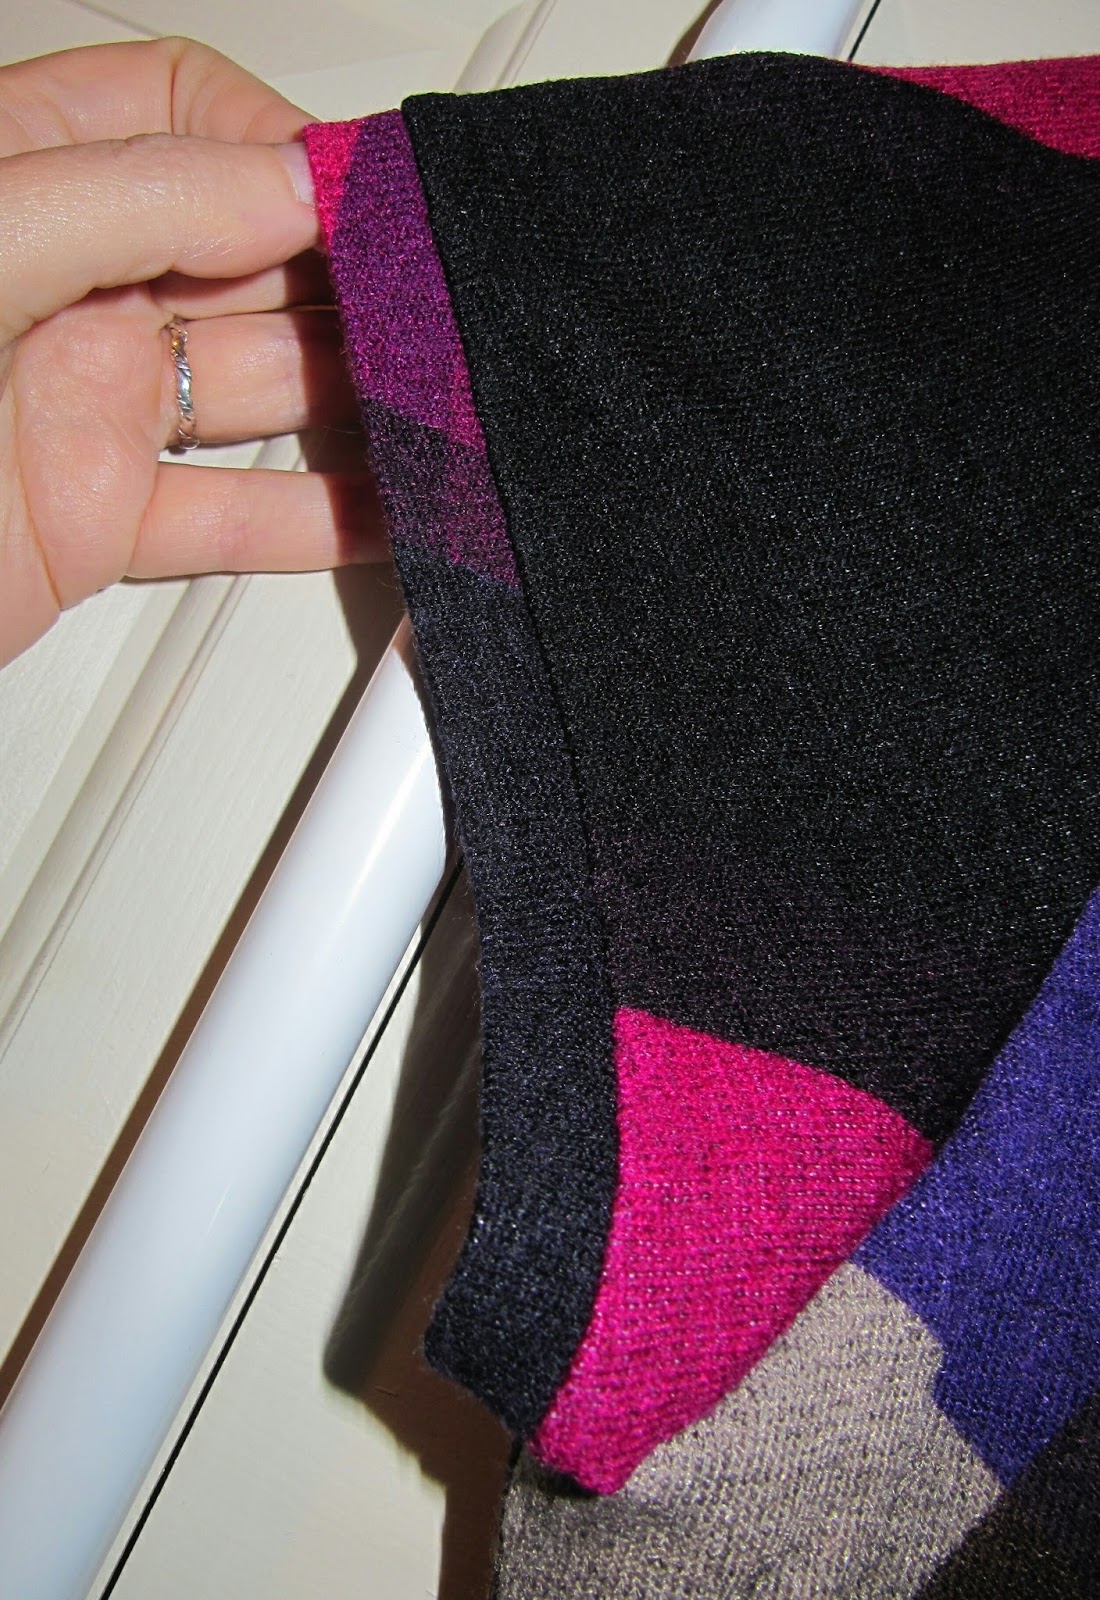
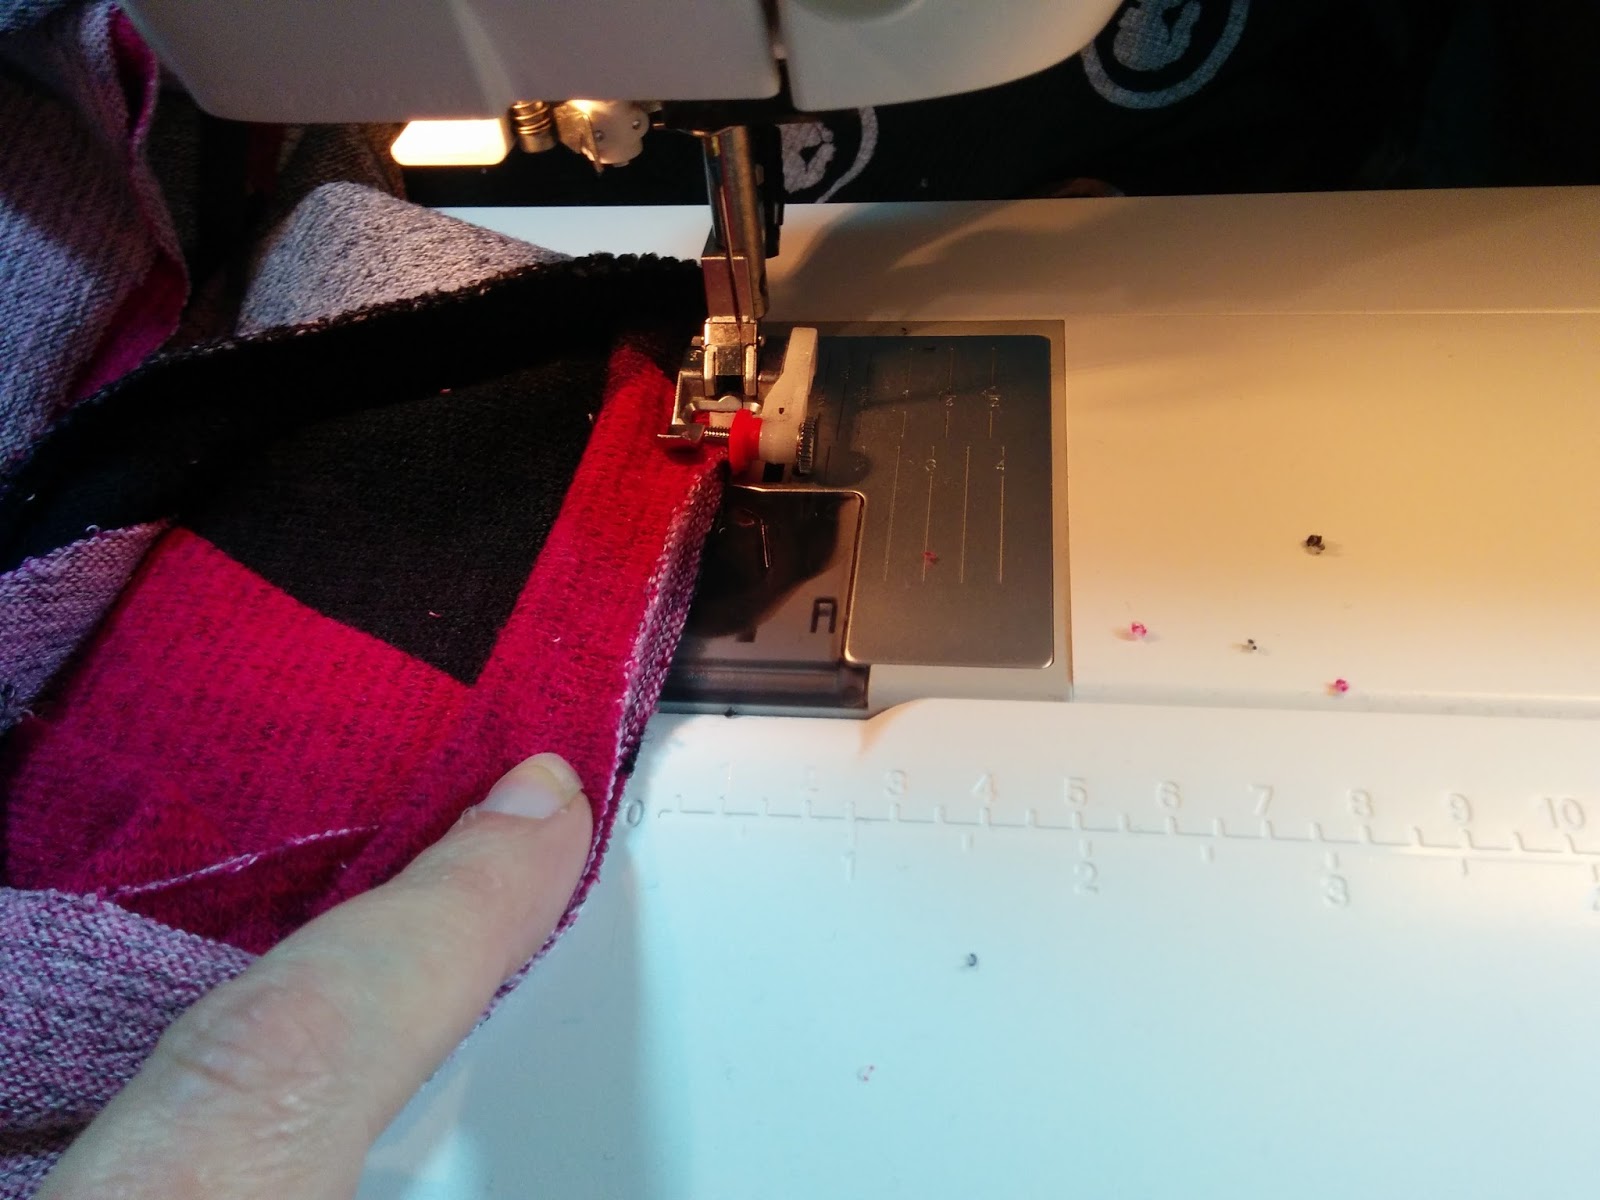
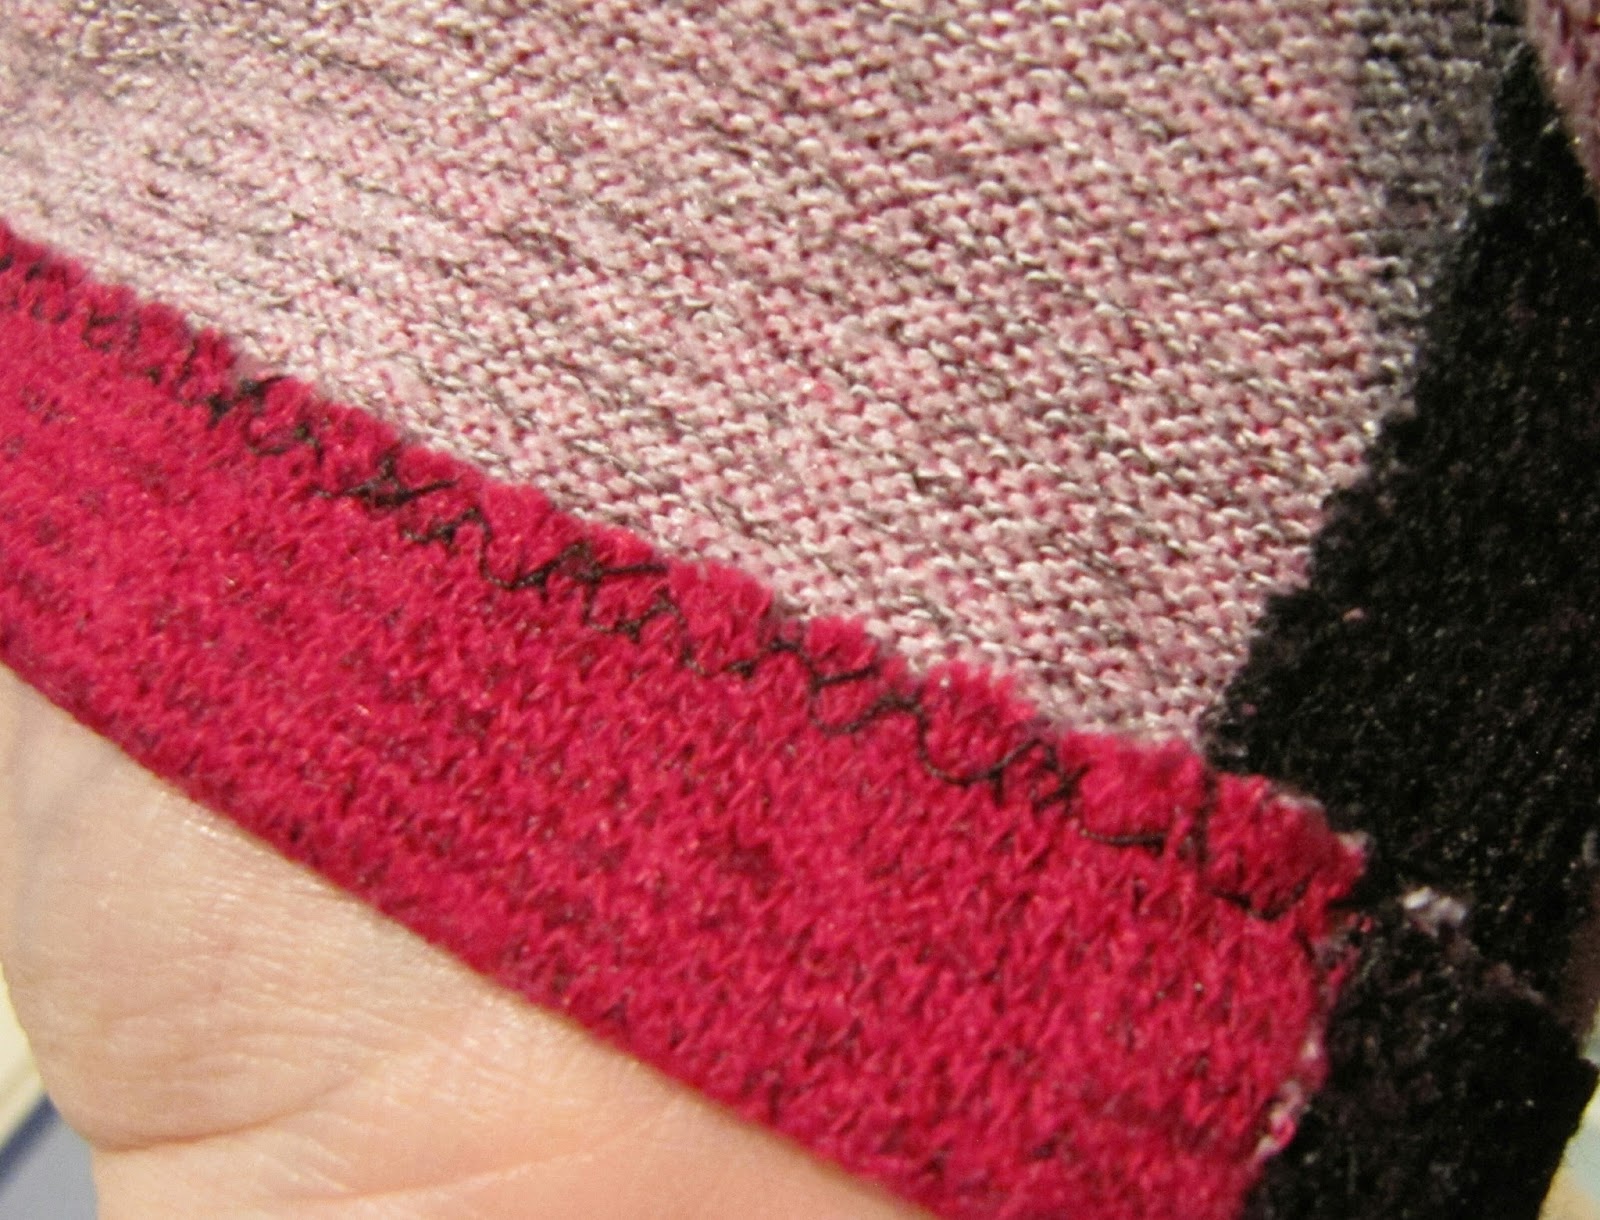
3.BASTE, BASTE, BASTE! This is always a good idea anyway, but even with TNT patterns, it’s just smart to baste your seams first with sweater knits. Because sweater knits tend to be lofty, the stitches have this great way of just sinking in and disappearing, which is fantastic, but it also makes it so that the stitches are nearly impossible to see to rip out. Luckily I didn’t have any mistakes this time around and I only know how hard the stitches are to rip out because after the dress was assembled, I thought maybe I would add a pocket. After about half an hour and only having about an inch ripped out, I decided it was way too much work and just resewed that bit shut again. But I definitely basted almost all of my seams first, especially that waist seam, since I wanted the vertical seams to match up perfectly. Below is a photo of how the seams just disappear. That is actually a seam right down the middle of the photo.
I tend to be a fairly lazy sewist most of the time since I’m just making clothes for myself, but seeing how great this dress turned out actually made me take the extra time to hand sew an invisible hem. I overlocked the raw edge, pressed it up 5/8” and catch stitched it. The fabric is nice and lofty, so I was able to catch a few threads of the body without anything even showing on the right side.
Overall, this fabric was a dream to work with. It pressed really well, the seams absolutely disappear into it and it’s just gorgeous. I got to use a technique I’ve been wanting to use for a while and it made an amazing dress that I’m incredibly proud of and have been showing off to everyone who’ll pay attention to me.
All of the projects are up on the Fabric Mart blog and I definitely have some stiff competition. So go check out all the entries and vote for the project you liked the best.


Recent Comments